
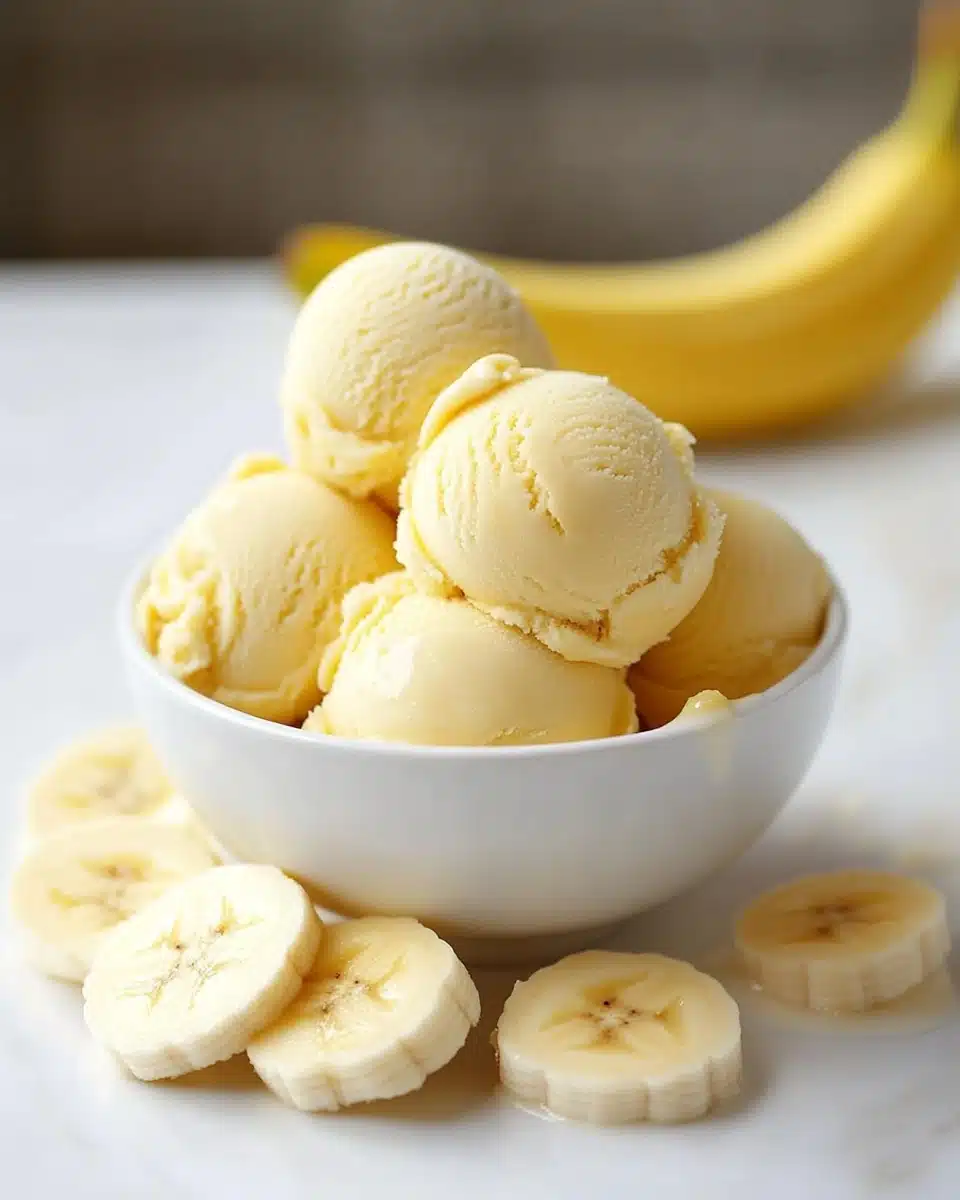
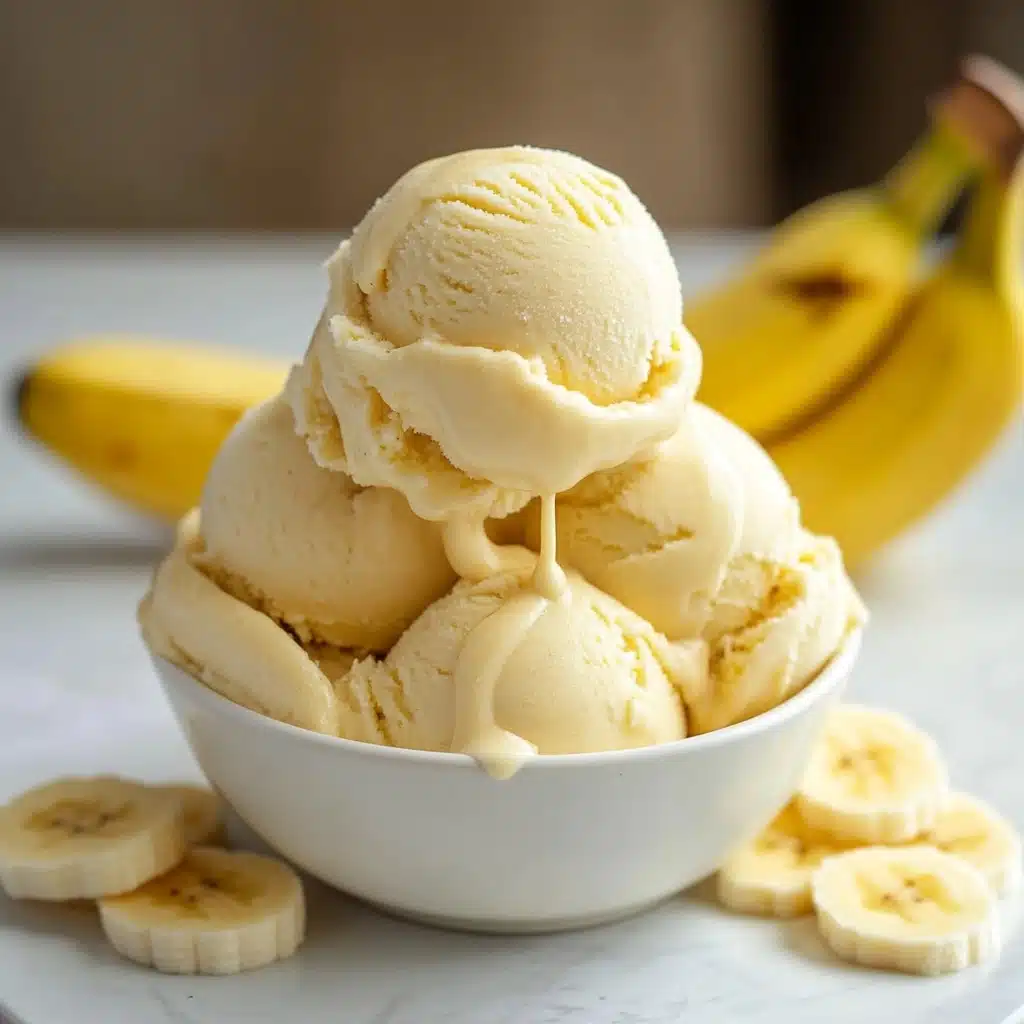
This Healthy Ninja Creami Banana Ice Cream Recipe is truly a game-changer for anyone seeking a guilt-free frozen treat! With just a handful of wholesome ingredients and your trusty Ninja Creami, you’ll have ultra-creamy, irresistibly sweet ice cream in no time—without the added sugar or carbs you’ll find in traditional recipes. I can’t wait to show you how easy (and fun!) it is to make this homemade wonder.
Why You’ll Love This Recipe
- Naturally Sweet, No Added Sugar: The bananas do all the heavy lifting for flavor and creaminess, so you get sweetness without the sugar crash.
- Creamy & Dreamy Texture: The Ninja Creami will have you swooning with every scoop—it’s silky-smooth every time!
- Super Simple Ingredients: You probably already have everything you need in your kitchen, and each ingredient has a purpose (that you can pronounce!).
- Perfect for Special Diets: This ice cream is low-carb, dairy-free, and vegan-friendly, so everyone can dig in.

Ingredients You’ll Need
You only need five simple ingredients to create a Healthy Ninja Creami Banana Ice Cream Recipe that rivals any scoop shop—no mystery fillers or artificial additives! Each ingredient plays a starring role in giving you lush, banana-forward flavor and that authentic ice cream creaminess despite being low-carb and totally fuss-free.
- 2 ripe bananas: The natural sweetness and velvety texture of ripe bananas are crucial—spotty is perfect!
- 1 cup unsweetened almond milk: This keeps things creamy without weighing your ice cream down and maintains the recipe’s dairy-free benefits.
- 1 tablespoon sugar-free maple syrup: Adds an extra hint of sweetness while keeping the carbs in check—try to find a brand with a clean ingredient list.
- 1 teaspoon vanilla extract: Boosts all the banana flavors and gives you that classic ice cream aroma.
- 1/4 teaspoon ground cinnamon (optional): Just a pinch adds warmth and subtle spice that balances the sweetness beautifully.
Variations
Part of the magic of this Healthy Ninja Creami Banana Ice Cream Recipe is just how customizable it is—think of it as your blank (banana!) canvas. Whether you’re avoiding certain ingredients or simply want to mix up textures and flavors, there’s a variation here for everyone to try.
- Chocolate Banana Swirl: Stir in a tablespoon of unsweetened cocoa powder before freezing for a chocolatey twist—so divine!
- Chunky Monkey Style: Add a handful of chopped walnuts and a sprinkle of sugar-free chocolate chips right after the final spin for extra crunch and decadence.
- Berry Banana Bliss: Swap half a banana for 1/2 cup frozen berries, like raspberries or blueberries, to add a burst of color and tartness.
- Protein Power-Up: Mix in a scoop of your favorite vanilla protein powder with the almond milk before blending—perfect for a post-workout treat!
How to Make Healthy Ninja Creami Banana Ice Cream Recipe
Step 1: Prep Your Ingredients
Start by peeling your ripe bananas and slicing them into even rounds. Place the banana pieces directly into your Ninja Creami pint container along with the almond milk, sugar-free maple syrup, vanilla extract, and ground cinnamon (if using). The key is using bananas that are spotty for the best flavor and natural sweetness!
Step 2: Blend Everything Smooth
Use an immersion blender right in the pint container to blend all the ingredients until the mixture is silky smooth. If you don’t have an immersion blender, a handheld masher and whisk will work—just make sure everything is well combined and the bananas are fully broken down for optimal creaminess.
Step 3: Freeze for 24 Hours
Cover the pint container with its lid and pop it straight into the freezer. Let it freeze for a full 24 hours—this patience step is essential for the iconic Ninja Creami texture, so don’t cut corners!
Step 4: Let the Ninja Creami Work Its Magic
Once the mixture is frozen solid, remove the lid and place the pint in your Ninja Creami. Select the Ice Cream function and let the machine run its cycle (this is where the magic happens!).
Step 5: Adjust for Creaminess
If the texture looks a little crumbly after the first spin, just hit the re-spin button once or even twice. With each additional spin, you’ll get closer to that perfect, scoopable, dreamy banana ice cream.
Step 6: Serve and Enjoy Instantly
Now the best part—scoop your Healthy Ninja Creami Banana Ice Cream Recipe into bowls, add your favorite toppings, and dig in! It’s meant to be enjoyed straight away for the creamiest possible treat.
Pro Tips for Making Healthy Ninja Creami Banana Ice Cream Recipe
- Banana Ripeness Matters: Use bananas that are deeply speckled and soft for maximum sweetness and a naturally lush texture.
- Blending is Key: For the creamiest results, thoroughly blend the mixture—you want it as smooth as possible before freezing so no icy bits sneak in.
- Don’t Rush the Freeze: The full 24-hour freeze ensures the Ninja Creami can churn out that classic, scoopable ice cream consistency every time.
- Master the Re-spin: Don’t hesitate to press that re-spin button (even twice!)—it’s your secret weapon for achieving that dreamy, thick texture.
How to Serve Healthy Ninja Creami Banana Ice Cream Recipe
Garnishes
Toppings can elevate your homemade banana ice cream from good to “I need seconds!” Try adding a dusting of cinnamon, a drizzle of sugar-free chocolate sauce, fresh berries, or toasted chopped nuts for a pop of flavor and crunch. Even a simple sprinkle of unsweetened coconut flakes is delicious!
Side Dishes
Keep it light and summery with a side of fresh fruit salad, or go decadent by pairing your ice cream with low-sugar brownies or almond flour cookies. If you’re feeling bold, a scoop alongside coffee is pure magic—you’ll feel like you’re a kid again.
Creative Ways to Present
Scoop your Healthy Ninja Creami Banana Ice Cream Recipe into pretty parfait glasses layered with berries and crunchy nuts, create “banana split” bowls with all your favorite toppings, or serve mini scoops in edible chocolate cups for a special occasion. Don’t be afraid to get artsy with your presentation—the more fun, the better!
Make Ahead and Storage
Storing Leftovers
If you happen to have extra ice cream, simply smooth the top, press a layer of parchment or wax paper onto the surface to prevent ice crystals, and re-cover with the container lid. Store in your freezer for up to two weeks—it will firm up a bit, but you can bring it back to creamy with another spin in the Ninja Creami.
Freezing
This recipe is designed for the Ninja Creami, which handles long, solid freezer times like a champ. Always freeze for at least 24 hours before spinning, and if you need to store it longer, be sure to blend again when you’re ready to indulge so the ice cream regains its silky texture.
Reheating
No need to reheat, but if your ice cream is extra firm after storing, just let it sit at room temperature for 5–10 minutes, then use the Ninja Creami’s re-spin function to bring back that original creaminess. Avoid microwaving, to keep the texture just right!
FAQs
-
Can I use frozen bananas instead of fresh?
While frozen bananas can be used, for the Ninja Creami process, it’s best to start with fresh, ripe bananas so the mixture blends smoothly before freezing. Frozen bananas may cause the ice cream to turn out icy rather than creamy.
-
Is there a way to make this ice cream even lower in carbs?
Absolutely! Simply use green-tipped bananas (which are less sweet but lower in sugar) and ensure your almond milk and syrup are both unsweetened and sugar-free. You can also add in a pinch of monk fruit or stevia for extra sweetness without the carbs.
-
What should I do if my ice cream is too crumbly after spinning?
Don’t worry—just press the re-spin button! The Ninja Creami is designed to fix this, and after an additional spin (or two), you’ll have a perfectly smooth ice cream consistency. If you like, you can add a tablespoon of almond milk to help soften it up before the final spin.
-
Can I double or triple the recipe for a crowd?
You can absolutely make multiple pints by preparing extra batches in separate containers—just make sure not to overfill the Creami pint, as proper freezing and spinning rely on the correct volume per container for that signature texture.
Final Thoughts
If you’re looking for a delicious treat that’s both healthy and deeply satisfying, you’ll fall in love with this Healthy Ninja Creami Banana Ice Cream Recipe just as much as I have. It’s a celebration of pure banana bliss and creamy texture, all ready at home—so grab your Ninja Creami and give it a try. Your next favorite dessert is just a spin away!
Print
Healthy Ninja Creami Banana Ice Cream Recipe (Low-Carb) Recipe
- Prep Time: 10 minutes
- Cook Time: 0 minutes
- Total Time: 24 hours 30 minutes
- Yield: 4 servings
- Category: Dessert
- Method: Blending, Freezing
- Cuisine: American
- Diet: Low Calorie
Description
Indulge in this guilt-free Healthy Ninja Creami Banana Ice Cream Recipe, a low-carb treat that’s easy to make and even easier to enjoy. Creamy, sweet, and satisfying, this ice cream is sure to become your new favorite dessert!
Ingredients
Ingredients:
- 2 ripe bananas
- 1 cup unsweetened almond milk
- 1 tablespoon sugar-free maple syrup
- 1 teaspoon vanilla extract
- 1/4 teaspoon ground cinnamon (optional)
Instructions
- Step 1 – Combine Ingredients: Peel and slice the bananas, then place them in the Ninja Creami pint container along with the almond milk, sugar-free maple syrup, vanilla extract, and ground cinnamon.
- Step 2 – Blend the Mixture: Use an immersion blender to blend everything until smooth. If you don’t have an immersion blender, mash the bananas thoroughly with a whisk or handheld masher, then mix well.
- Step 3 – Freeze the Mixture: Cover the container with the lid and freeze for 24 hours.
- Step 4 – Initial Spin: Remove the container from the freezer and place it into the Ninja Creami machine. Select the Ice Cream function and start the cycle.
- Step 5 – Adjust the Texture: Press the re-spin button once. If the ice cream is still crumbly, press the re-spin button one more time until it is creamy.
- Step 6 – Serve and Enjoy: Add your favorite toppings and serve immediately!
Nutrition
- Serving Size: 1 serving
- Calories: 120
- Sugar: 10g
- Sodium: 80mg
- Fat: 3g
- Saturated Fat: 0g
- Unsaturated Fat: 2g
- Trans Fat: 0g
- Carbohydrates: 25g
- Fiber: 3g
- Protein: 1g
- Cholesterol: 0mg
