
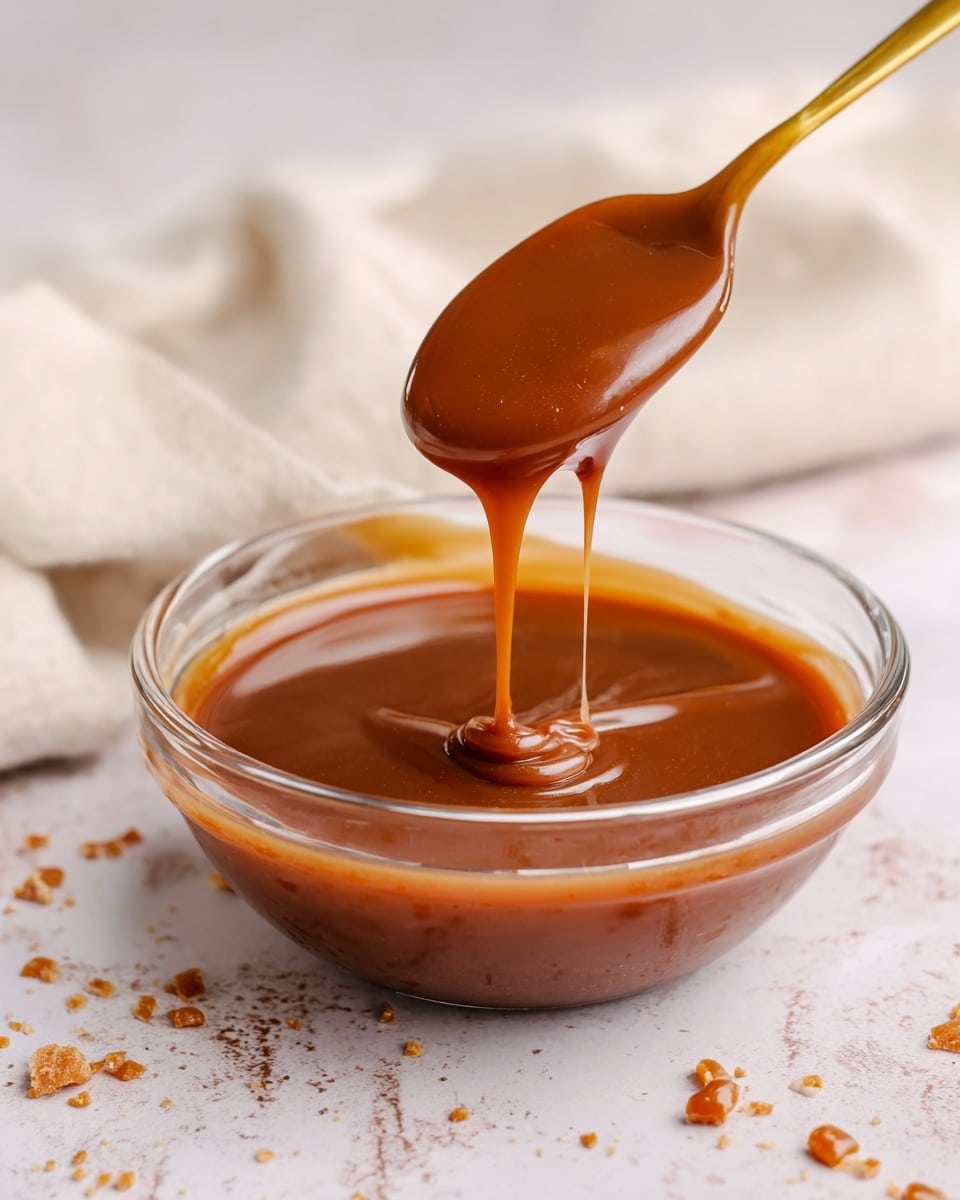
Oh, I can’t wait to share this Foolproof Homemade Salted Caramel Sauce Recipe with you! This sauce is that perfect combination of sweet, buttery, and salty that makes everything from ice cream to coffee taste like a celebration. I absolutely love how this turns out every single time — silky smooth, deeply flavored, and with that lovely golden hue that just screams indulgence.
When I first tried mastering caramel sauce, I struggled with burnt sugar and grainy textures. But this recipe? It’s foolproof because it carefully walks you through each step, so you get that perfect sauce that’s rich and luscious without the stress. You’ll find that once you make this, it becomes your go-to to jazz up desserts, drizzle over fruit, or even just sneak spoonfuls straight from the jar!
Why You’ll Love This Recipe
- Simple Ingredients: Uses pantry staples you likely have on hand, making it easy to whip up anytime.
- Reliable Results: Follow my easy steps and avoid common caramel pitfalls like burning and crystallizing.
- Versatile Use: Perfect on ice cream, pancakes, coffee, or even as a dip for apples—so many ways to enjoy!
- Long-Lasting: Stores beautifully in the fridge so you can enjoy that rich caramel flavor for weeks.

Ingredients You’ll Need
Each ingredient plays its part to create that perfect balance of creamy, sweet, and salty caramel. Don’t skip warming the cream—that little trick helps everything blend smoothly.
- Granulated sugar: The base for caramel, make sure it’s just plain white sugar for the best melting and browning.
- Unsalted butter: Softened to room temperature so it blends in easily and adds that luscious richness.
- Heavy cream: Warmed slightly to avoid shocking the caramel and to keep your sauce silky.
- Vanilla extract: Adds a lovely depth that brightens the flavor without overpowering the caramel.
- Salt: Start with less and adjust to your taste — I prefer a good balance, just enough to enhance, not mask, the sweetness.
Variations
One of the things I enjoy most about this salted caramel sauce is how versatile it is—you can tweak it to suit your mood or meal. Don’t hesitate to play around with the salt level or add a little extra vanilla for a different twist.
- Brown Butter Caramel: I love to brown the butter first before adding it in—this adds a nutty depth that my family goes crazy for on vanilla ice cream.
- Spiced Caramel: Adding a pinch of cinnamon or cayenne can turn this sauce into a warm, cozy treat, especially in cold months.
- Dairy-Free Version: Swap the heavy cream with full-fat coconut milk and use a vegan butter substitute—you’ll still get that creamy, rich texture.
- Salt-Free: If you prefer pure sweet caramel, just avoid adding salt, but I recommend at least a tiny pinch for balance.
How to Make Foolproof Homemade Salted Caramel Sauce Recipe
Step 1: Watch the Sugar Melt Slowly
Start by adding granulated sugar to a wide, light-colored pan on the lowest flame you have. Trust me, patience here is key: don’t rush with high heat or you risk burning. The sugar will begin to melt at the bottom and look grainy or lumpy. Use a dry utensil to gently stir as it melts, encouraging even heat distribution. This can take 15 minutes or more, so give yourself some time and watch for that deep golden caramel color—it’s worth the wait!
Step 2: Add Butter Off Heat, Whisk Thoroughly
Once your sugar is melted and amber, turn off the heat and quickly add your softened butter. Whisk steadily until fully melted; don’t worry if it looks separated at first—that’s totally normal. This step creates a rich, buttery base for the caramel flavor to shine through.
Step 3: Slowly Incorporate Warmed Cream
Add your warmed cream gradually while whisking. The mixture will bubble and froth—that’s the caramel reacting, and it’s absolutely what you want to see. If the sauce thickens too fast or looks like it’s seizing, turn your heat back on low and gently stir until smooth again. This step ensures your sauce is velvety with the perfect consistency.
Step 4: Finish with Vanilla and Salt
Once smooth, stir in the vanilla extract and salt, starting with one teaspoon and tasting. This step adds that signature depth and balances the sweetness with a subtle salty kick. Adjust the salt to your liking—you’ll quickly find your perfect spot!
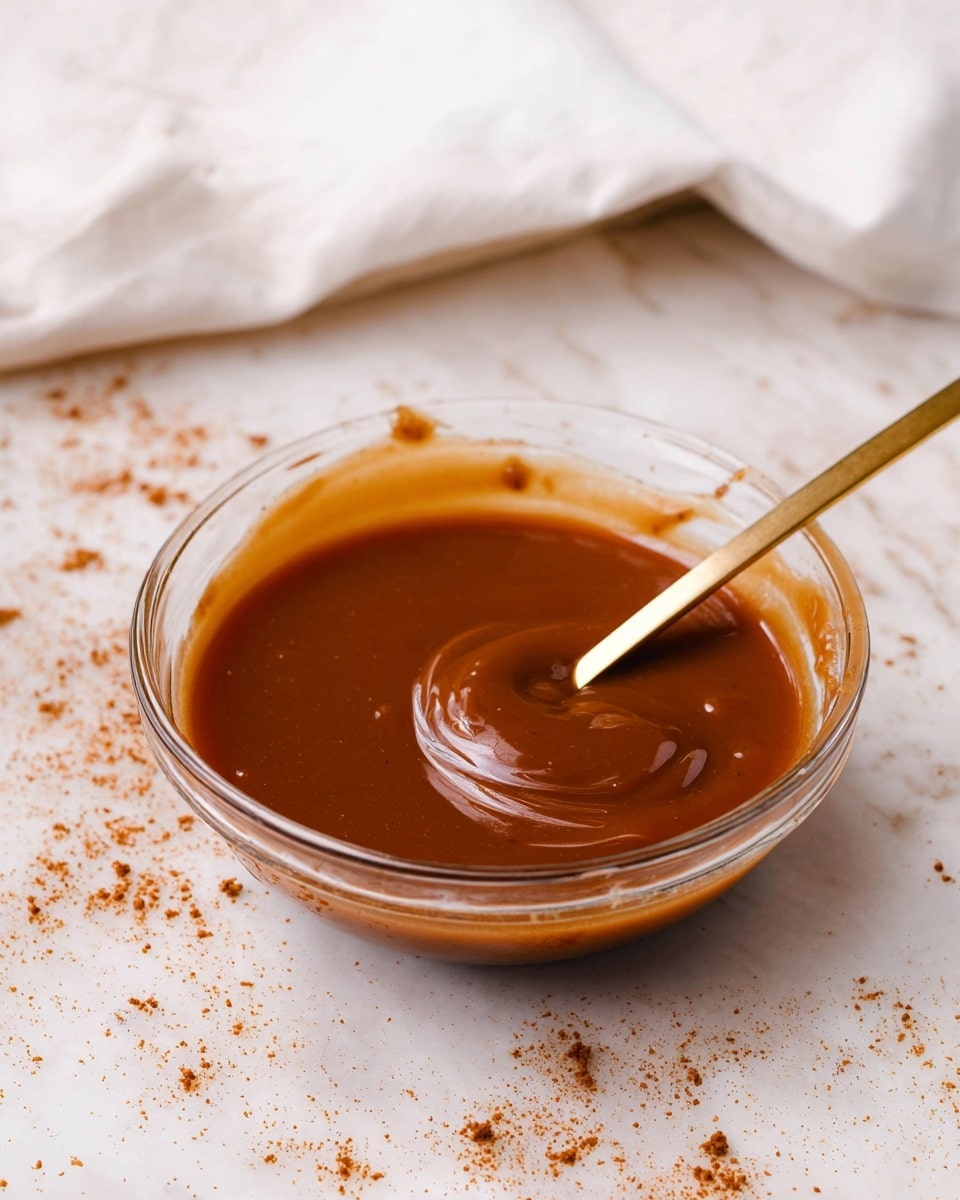
Step 5: Cool and Store
Pour your beautiful caramel into a heat-safe jar and let it cool at room temperature for about an hour. It will thicken to that silky, luscious texture you want. Store in an airtight container in the fridge when you’re done, and reheat gently whenever you want your caramel fix.
Pro Tips for Making Foolproof Homemade Salted Caramel Sauce Recipe
- Low and Slow Sugar Heating: I learned that using the lowest heat prevents bitter burnt sugar and gives you time to control the melt.
- Warm Your Cream First: Adding cold cream causes the caramel to seize, but warm cream keeps it smooth and helps it combine effortlessly.
- Use a Light-Colored Pan: This allows you to monitor the color change better—dark pans can hide the transition leading to burned caramel.
- Don’t Stir Too Early: Wait for the sugar to start melting before stirring—premature stirring causes crystallization.
How to Serve Foolproof Homemade Salted Caramel Sauce Recipe
Garnishes
I often sprinkle a little flaky sea salt on top of desserts drizzled with this caramel—it adds that satisfying crunch and boosts the flavor. Chopped toasted nuts, like pecans or almonds, are another favorite garnish that adds texture and nutty notes that pair beautifully.
Side Dishes
This sauce pairs amazingly with vanilla ice cream, bread pudding, warm apple crisp, or even drizzled over pancakes and waffles for an ultra-decadent breakfast. My kids love it on sliced bananas and crepes too—so many options!
Creative Ways to Present
For special occasions, I like to serve this caramel sauce in little mini jars with a tiny spoon tied around the lid—makes a charming gift or party favor. Another fun idea is to swirl it into hot chocolate or coffee, giving an unexpected twist that’s always a crowd-pleaser.
Make Ahead and Storage
Storing Leftovers
I store my leftover salted caramel sauce in a clean glass jar, tightly sealed, in the fridge. It keeps perfectly for up to 3 weeks. Just give it a good stir before each use, as a little separation can happen but it’s easy to fix.
Freezing
I’ve tried freezing this caramel sauce in small containers, and it thaws beautifully with no loss of texture. Just thaw it overnight in the fridge and warm gently before using. Great if you want to make a big batch and save some for later!
Reheating
To reheat, I pop the caramel in the microwave for 10-20 second bursts, stirring in between, until warm and pourable again. You can also warm it gently on the stove over low heat, stirring continually. Avoid overheating to keep it silky smooth.
FAQs
-
Can I make salted caramel sauce without heavy cream?
Yes! You can substitute heavy cream with full-fat coconut milk or evaporated milk, but keep in mind the flavor and texture will be slightly different. Coconut milk adds a subtle coconut flavor, while evaporated milk keeps it closer to the original richness. Just warm your substitute before adding it to prevent seizing.
-
How do I prevent my caramel sauce from crystallizing?
Crystallization happens when sugar recrystallizes during cooking or cooling. To avoid this, don’t stir sugar until it starts melting, use a clean pan, and you can even wipe down your pan’s sides with a wet pastry brush during cooking. Adding the butter and cream at the right time and temperature also helps keep it smooth.
-
Why is my caramel sauce grainy?
Grainy texture usually means the sugar didn’t fully dissolve or crystallized after stirring too early or uneven heating. Using a light-colored, wide pan and stirring only after the sugar has started melting helps prevent this. Also, keep the heat low and be patient.
-
Can I make this sauce in advance?
Absolutely! This caramel sauce stores well in the fridge for up to 3 weeks. Just reheat gently before serving. Making it ahead means you always have a delicious caramel boost ready for desserts or drinks.
Final Thoughts
Honestly, this Foolproof Homemade Salted Caramel Sauce Recipe has changed the way I approach dessert toppings. That rich, buttery, perfectly salted caramel elevates just about anything, and knowing it’s simple and reliable makes it even better. I truly recommend giving it a try—you’ll enjoy watching it come together and taste so much fresher and more vibrant than store-bought versions. Once you make this, I bet it’ll become a staple in your kitchen, just like it is in mine!
Print
Foolproof Homemade Salted Caramel Sauce Recipe
- Prep Time: 5 minutes
- Cook Time: 20 minutes
- Total Time: 1 hour 25 minutes (including cooling)
- Yield: 2 cups
- Category: Sauce
- Method: Stovetop
- Cuisine: American
Description
This foolproof homemade salted caramel sauce is rich, creamy, and perfectly balanced with a hint of sea salt. Made with simple ingredients like sugar, butter, heavy cream, vanilla, and salt, this sauce is ideal for drizzling over desserts, ice cream, or adding a decadent touch to any sweet treat. The slow melting of sugar over low heat ensures a deep golden caramel flavor without burning.
Ingredients
Ingredients
- 1 1/2 cups granulated sugar (300g)
- 1/2 cup unsalted butter, softened at room temperature (113g)
- 3/4 cup heavy cream, warmed (180g)
- 2 teaspoons vanilla extract
- 1 to 1 1/2 teaspoons salt
Instructions
- Heat the sugar: Add the granulated sugar to a wide-bottomed, light-colored pan and place it over the lowest flame on the stove. Avoid high heat as sugar can burn easily. Allow the sugar to gradually start melting on the bottom of the pan.
- Stir the melting sugar: Using a dry utensil, slowly stir the sugar to encourage even melting. The sugar will appear grainy and lumpy initially, but continue stirring gently on low heat until all the lumps dissolve and the sugar fully melts.
- Develop caramel color: Let the melted sugar cook further until it reaches a deep golden caramel color, which usually takes more than 15 minutes depending on your stove and pan.
- Add the butter: Turn off the heat and add the softened butter. Whisk continuously until the butter fully melts into the caramel mixture. The mixture may look separated at this stage, which is normal.
- Incorporate warm cream: Slowly add the warm heavy cream while whisking. Initially, the mixture will become bubbly and frothy, then settle into a smooth, creamy caramel sauce. If the sauce thickens too much or seizes, return the pan to the lowest heat and stir gently until the consistency is smooth again, then remove from heat.
- Season the caramel: Add vanilla extract and start by mixing in 1 teaspoon of salt. Taste and add up to 1 ½ teaspoons more salt as desired for the perfect salted caramel balance.
- Cool the sauce: Pour the caramel into a heat-safe glass bowl or jar. Let it cool fully at room temperature for about 1 hour. The sauce will thicken and become silky smooth as it cools.
- Store and serve: Store the cooled caramel sauce in an airtight container in the refrigerator. Reheat gently in the microwave in 10-20 second increments before serving as needed.
Notes
- Use a wide and light-colored pan to monitor sugar melting and caramel color accurately.
- Keep the heat low throughout the caramelization process to prevent burning and ensure even melting.
- Warm the cream slightly before adding to prevent shocking the caramel and seizing.
- The salt amount can be adjusted based on taste preference for a more or less intense salted flavor.
- This caramel sauce keeps well refrigerated for up to 2 weeks.
Nutrition
- Serving Size: 2 tablespoons (about 35g)
- Calories: 150
- Sugar: 26g
- Sodium: 120mg
- Fat: 7g
- Saturated Fat: 4.5g
- Unsaturated Fat: 2g
- Trans Fat: 0g
- Carbohydrates: 26g
- Fiber: 0g
- Protein: 0.3g
- Cholesterol: 25mg

