
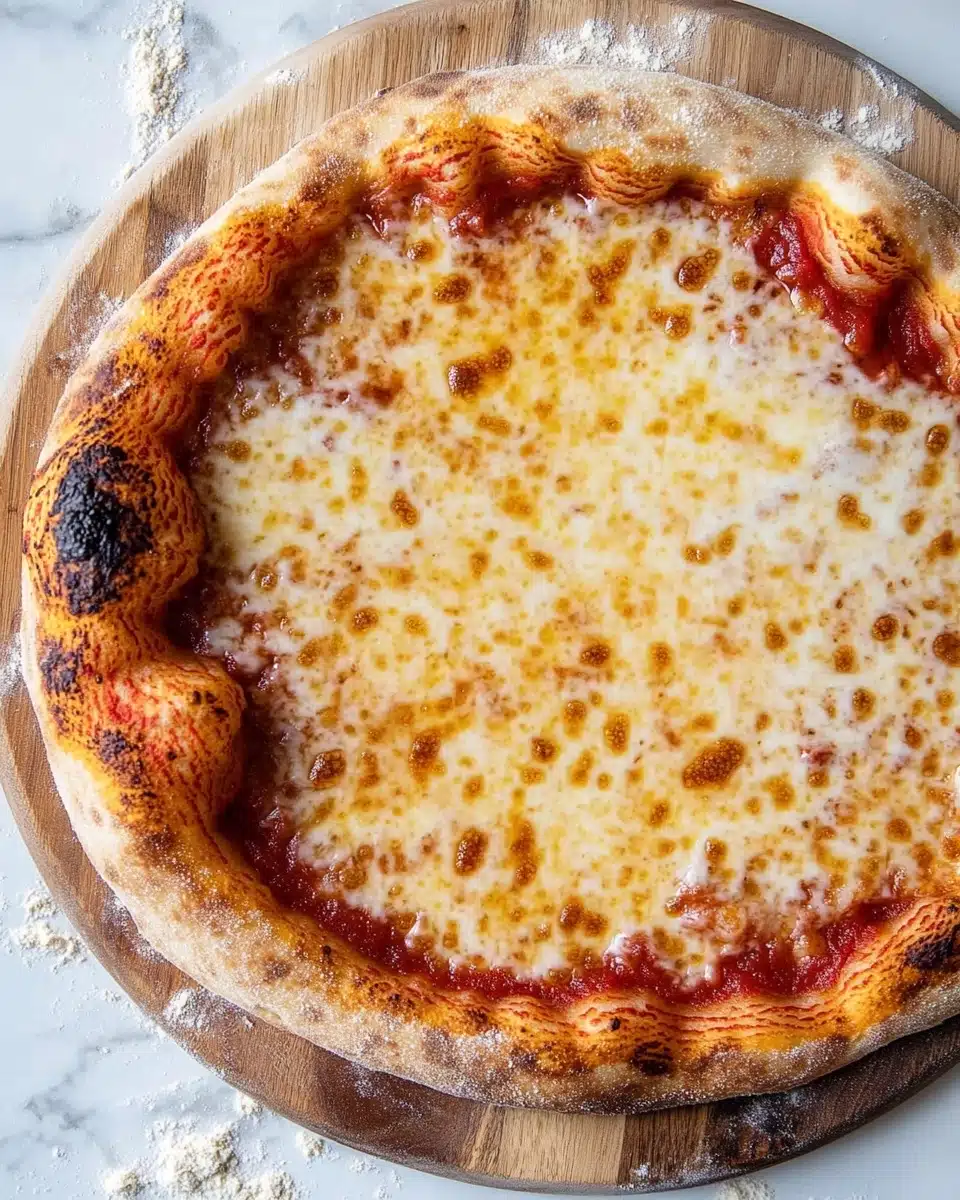
If you dream of a pizza crust that’s shatteringly crisp at the edges, tender and chewy in the middle, and bursting with beautiful, airy bubbles, this Artisan Pizza Dough is about to become your next obsession! With a patient but simple process and a few basic ingredients, you can create a pizzeria-worthy base right at home.
Why You’ll Love This Recipe
- Incredible Texture: This Artisan Pizza Dough bakes up with a perfectly crisp exterior and a chewy, airy interior – ideal for those crust bubbles we all crave.
- Minimal Ingredients, Maximum Flavor: Just flour, water, yeast, and salt transform into a dough with depth and real character.
- Hands-Off Prep: Most of the work is simply waiting as the dough develops flavor—no fancy equipment needed!
- Versatile Foundation: This recipe adapts to your favorite toppings, whether you opt for classic Margherita or load it up with veggies and cheese.

Ingredients You’ll Need
It’s astonishing how just four staple ingredients can create a dough that’s so complex in flavor and texture. Each one has a key role to play in building the perfect Artisan Pizza Dough—no fancy additives required, just simple kitchen magic.
- All-purpose flour: The backbone of your dough, providing structure and that classic crust chewiness. Opt for unbleached if possible for an even better texture.
- Water: Hydrates the flour and creates steam for a bubbly, open crumb. Using warm water helps give the yeast a gentle nudge.
- Active dry yeast: A tiny amount kicks off fermentation, resulting in lightness and beautiful air pockets—no instant yeast shortcuts here!
- Fine salt: Essential for flavor—it brings out subtle wheat notes and controls fermentation to keep your dough in balance.
Variations
One of the best parts of Artisan Pizza Dough is how easily you can make it your own. A few tweaks or swaps and you’ll have a dough that fits your favorite pizza style, dietary needs, or creative cravings.
- Whole Wheat Version: Swap up to half the all-purpose flour for whole wheat to add nutty flavor and wholesome depth—just add a splash more water to keep the dough soft.
- Herb-Infused Dough: Knead a teaspoon of dried Italian herbs, oregano, or basil directly into the dough for a subtle, aromatic backdrop to your toppings.
- Sourdough Boost: Replace 50g of flour and 50g of water with fed sourdough starter for a tangy, complex twist (reduce yeast slightly).
- Gluten-Free Adaptation: Use a high-quality 1:1 gluten-free flour blend to make a pizza crust everyone can enjoy (be aware the texture will change, but it’s still scrumptious!).
How to Make Artisan Pizza Dough
Step 1: Mix and Rest the Dough
In a large bowl, stir your flour with all but one tablespoon of the warm water until just combined. There’s no need to knead—just mix until you see no dry bits. Cover and let the dough rest for 20 minutes; this simple pause lets the flour fully hydrate and starts gluten development without extra effort.
Step 2: Activate Yeast and Add Salt
Sprinkle that tiny pinch of yeast over your reserved tablespoon of warm water, and let it dissolve while the dough rests. Next, scatter the salt across the dough, stir the yeast mixture, and pour it over. Now, using a lightly wet hand to prevent sticking, fold and pincer-squeeze the dough as directed—this integrates the yeast and salt thoroughly for even fermentation.
Step 3: First Rest and Fold
Cover the dough and let it sit for about an hour. After this, perform a series of stretch-and-folds: reach under, gently stretch, and fold sections over the top, rotating the bowl. This step strengthens gluten and helps the dough tighten into a soft ball, ready for its big rise.
Step 4: First Rise (Bulk Fermentation)
Invert the dough into a lightly greased, clean bowl (seam down, smooth side up), cover, and let it rise for 5–6 hours at room temperature. You’ll see it double in volume, developing gorgeous bubbles—signs of a truly artisan dough!
Step 5: Portion and Shape Dough Balls
Onto a floured surface, gently ease the dough out and cut it in half. For each piece, stretch one side and fold it over the center, repeating around until a loose ball forms. Place the seam-side down on an un-floured section, then gently drag it toward you to create surface tension and a round, taut shape—it’s deeply satisfying!
Step 6: Second Rest or Refrigerate
Transfer the shaped balls to a greased plate, lightly oil the tops, cover, and let rest at room temp about 1 hour. If you aren’t making pizza right away, just cover the dough tightly and refrigerate for up to 2 days; the flavors get even better.
Step 7: Shape and Bake the Pizza
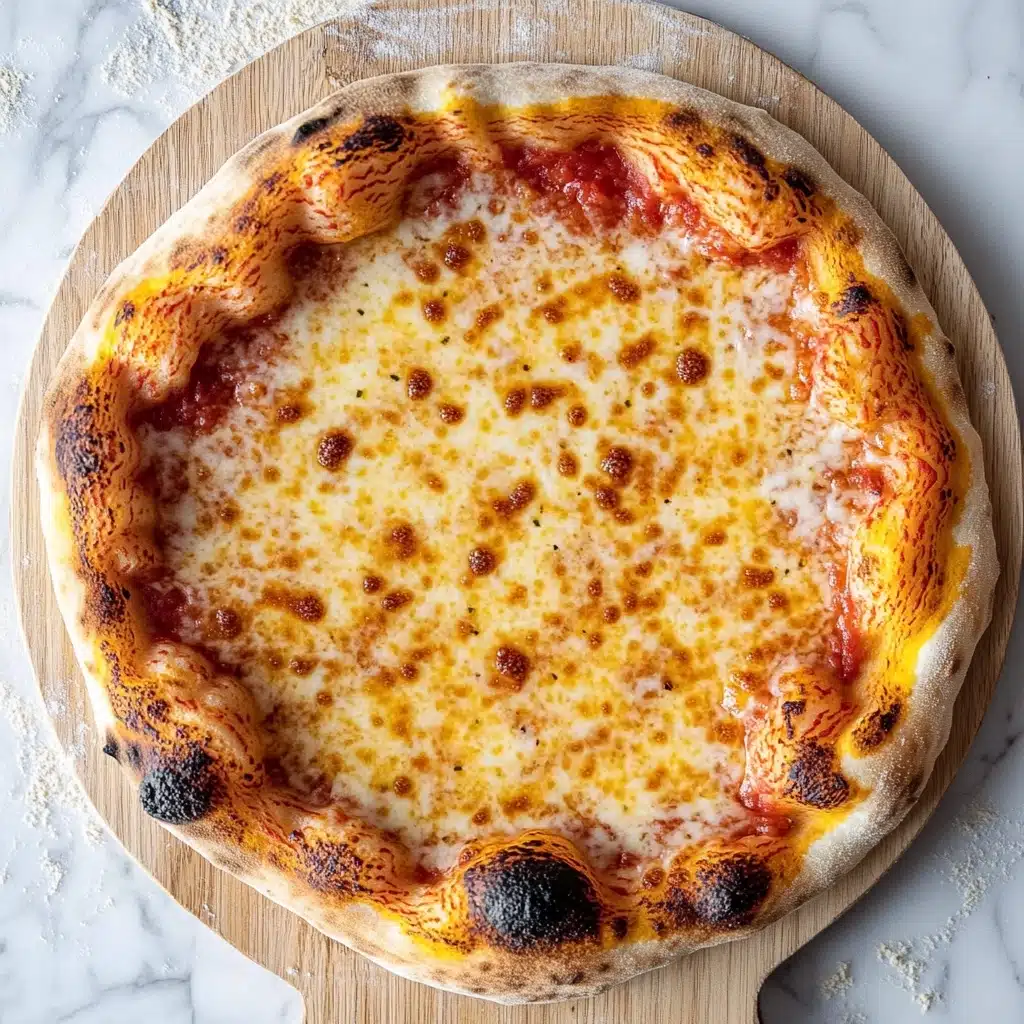
Preheat your oven (with pizza steel, stone, or inverted baking sheet inside) to 500°F or as hot as it will go—give it a solid 45 minutes to heat. Gently stretch the dough into a 12-inch circle, keeping the edge thick for that classic, airy crust. Add toppings and bake directly on the hot surface until golden, crisp, and gloriously blistered!
Pro Tips for Making Artisan Pizza Dough
- Hydration Matters: This dough is higher hydration than standard recipes—don’t panic if it feels sticky! Wet your hands before mixing or shaping to keep things smooth.
- Stretch, Don’t Roll: Always use your hands to stretch the dough instead of a rolling pin—this protects those precious air pockets and gives your crust that signature chew and bubble.
- Let It Rest: If your dough resists stretching or snaps back, let it sit for 10 minutes; resting lets the gluten relax and makes shaping easy.
- Super-Hot Oven: Give your pizza stone, steel, or baking sheet at least 45 minutes to preheat—blistered, pizzeria-style crust needs that serious heat!
How to Serve Artisan Pizza Dough
Garnishes
The perfect finishing touch? Scatter fresh basil leaves, a glug of grassy olive oil, or a pinch of flaky sea salt right after baking. A handful of arugula or shaved parmesan adds a peppery, elegant bite—don’t be afraid to make it your signature!
Side Dishes
To turn your Artisan Pizza Dough into a stellar meal, serve hot slices alongside a crisp Caesar salad, garlicky roasted vegetables, or a bowl of briny olives. And honestly—there’s nothing better than good company and a chilled drink.
Creative Ways to Present
Let your pizzas steal the spotlight by slicing them into rustic wedges and serving on a wooden board. For a fun spin, bake mini pies or shape the dough into garlic knots, focaccia, or even calzones for a pizza night surprise!
Make Ahead and Storage
Storing Leftovers
Baked pizza keeps beautifully for a couple of days. Wrap cooled slices in foil or an airtight container and refrigerate—your next-day lunch or midnight snack is sorted!
Freezing
You can freeze extra raw dough balls wrapped snugly in plastic, then foil. When the pizza craving strikes, thaw overnight in the fridge and let rise at room temperature for 1–2 hours before shaping—homemade pizza anytime!
Reheating
For the best crispiness, reheat pizza slices in a hot oven or a dry skillet over medium heat. The crust becomes wonderfully revived and almost as good as new—much better than soggy microwave leftovers!
FAQs
-
Can I make Artisan Pizza Dough ahead and refrigerate it?
Absolutely! In fact, letting the dough rest in the fridge (for up to 48 hours) deepens its flavor and makes it even easier to handle. Just bring it to room temperature before shaping for the best results.
-
What’s the best flour to use for crispy, chewy crust?
All-purpose flour works really well for this recipe, but if you love an even chewier bite and extra structure, try substituting bread flour for part or all of the all-purpose.
-
How do I prevent the pizza dough from sticking to my peel or hands?
Generously dust your peel with flour (or fine semolina) and keep your hands lightly wet or floured when shaping. If the dough starts to stick, just add a sprinkle more flour as needed.
-
Can I use this Artisan Pizza Dough for other bakes, like focaccia or breadsticks?
Yes! This dough is incredibly versatile—shape it into focaccia, garlic knots, breadsticks, or even small flatbreads. Adjust the baking time as needed and have fun experimenting.
Final Thoughts
If you haven’t tried making your own Artisan Pizza Dough yet, this recipe is your invitation to dive in and discover how amazing homemade pizza can be. Pour a drink, invite some friends, and savor every bubbly, golden bite—here’s to pizza night, made extra special!
Print
Artisan Pizza Dough Recipe
- Prep Time: 20 minutes
- Cook Time: 8 minutes
- Total Time: 8 hours
- Yield: 2 12-inch pizzas
- Category: Main Dish
- Method: Baking
- Cuisine: Italian
- Diet: Vegetarian
Description
Learn how to make the perfect artisan pizza dough with a crispy, chewy, and bubbly crust. This recipe yields delicious homemade pizza crusts that will elevate your pizza night to a whole new level.
Ingredients
Dough:
- 500g (3 3/4 cups plus 2 tbsp) all-purpose flour
- 375g (1 1/2 cups water plus 2 tbsp) warm water, divided
- 1g (1/4 tsp) active dry yeast
- 10g (1 1/2 tsp) fine salt
Instructions
- Mix flour and water: In a large bowl, combine flour and most of the water. Let it rest for 20 minutes. Dissolve yeast in the remaining water.
- Add salt and yeast: Sprinkle salt over the dough. Pour the yeast mixture over the dough. Fold and mix until a shaggy dough forms. Let it rest for an hour.
- Develop gluten: Fold the dough to tighten it into a ball. Let it rise until doubled in volume, about 5-6 hours.
- Shape the dough: Cut the dough in half, shape into balls, and let rest. Preheat the oven.
- Make pizza: Preheat oven to 500°F. Shape the dough, add toppings, and bake for 5 minutes. Broil for a few minutes until done.
Notes
- Cover tightly with plastic wrap if storing in the refrigerator.
- For a crispier crust, preheat a pizza stone or steel before baking.
Nutrition
- Serving Size: 1 slice of pizza (1/8 of a 12-inch pizza)
- Calories: Approximately 250 kcal
- Sugar: 1g
- Sodium: 300mg
- Fat: 2g
- Saturated Fat: 0.5g
- Unsaturated Fat: 1.5g
- Trans Fat: 0g
- Carbohydrates: 50g
- Fiber: 2g
- Protein: 7g
- Cholesterol: 0mg


