
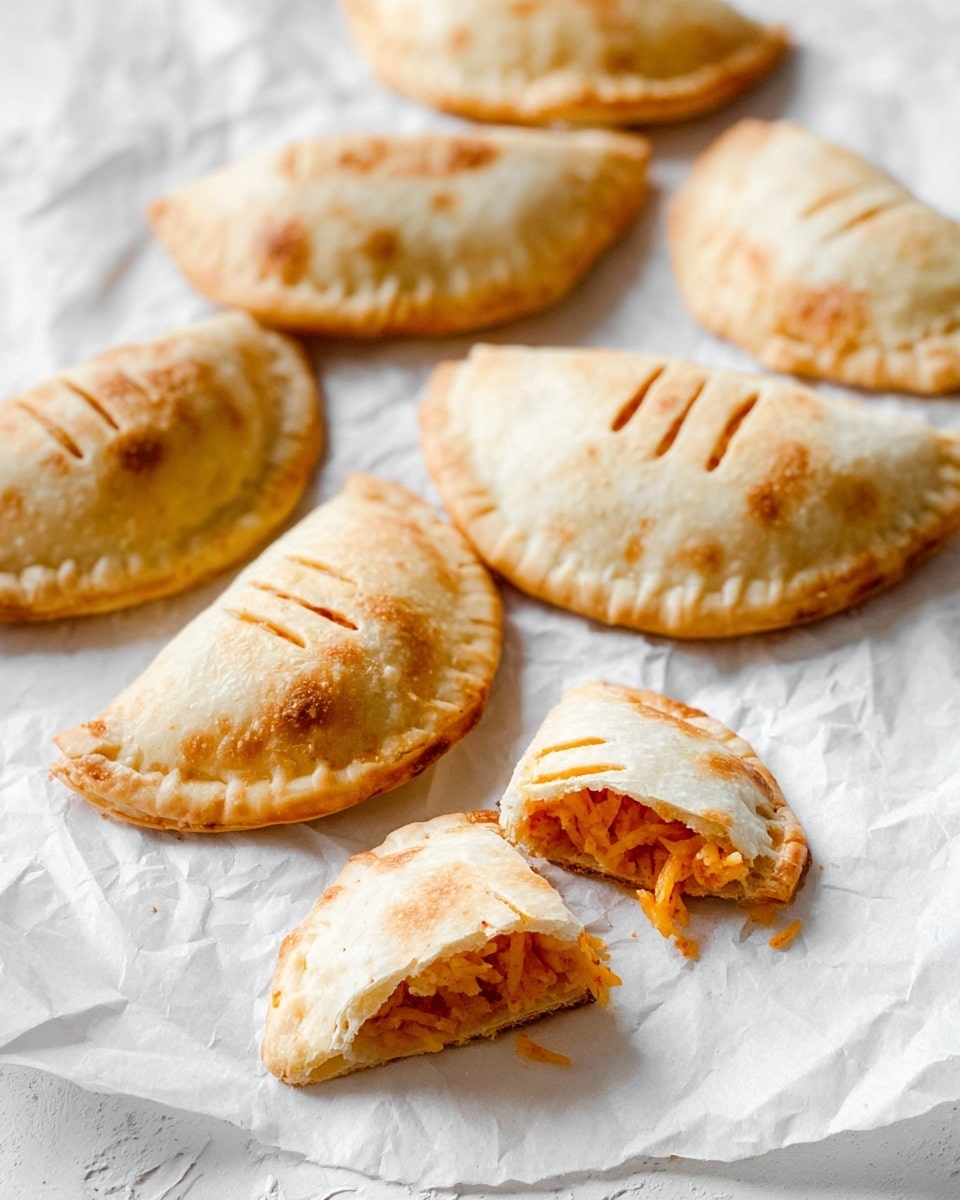
If you’re on the hunt for a hearty, spicy snack that’s both cheesy and ridiculously satisfying, you’re gonna love this Cheesy Buffalo Chicken Hand Pies Recipe. Seriously, these little pockets are packed with tender shredded chicken, melty cheddar, and that classic Buffalo kick, all wrapped up in a flaky crust that bakes golden and crisp. When I first tried making these, I couldn’t believe how quickly they vanished around my kitchen table — and I’m betting you’ll have the same problem!
Why You’ll Love This Recipe
- Perfect Balance of Flavors: The creamy cheese, spicy Buffalo sauce, and tender chicken come together beautifully.
- Super Convenient: Uses store-bought pie crusts to save time without sacrificing taste.
- Great for Parties and Snacks: Hand-sized and portable, they’re ideal for game days or quick bites.
- Customizable Heat Level: Easily adjust the Buffalo sauce amount to suit your spice preference.

Ingredients You’ll Need
Each ingredient in this Cheesy Buffalo Chicken Hand Pies Recipe plays a key role in bringing together that comforting, spicy, and cheesy experience. I like to use fresh, quality components when possible—it really makes a difference, especially with the chicken and the Buffalo sauce.
- Boneless, skinless chicken breasts: Cooked and shredded chicken forms the hearty filling—grilled or poached works great depending on your mood.
- Cream cheese: Makes the filling super creamy and tangy, balancing out the heat from the Buffalo sauce perfectly.
- Buffalo sauce: This adds the signature tangy, spicy flavor—feel free to pick your favorite brand or homemade version.
- Cheddar cheese: Sharp cheddar melts beautifully and amps up the cheesiness of the filling.
- Pie crusts: Store-bought pie crusts keep things quick and easy but deliver that buttery, flaky texture we all love.
- Egg (optional): Brushed on for a pretty, golden finish—but you can skip this if you prefer.
Variations
I love making this Cheesy Buffalo Chicken Hand Pies Recipe my own by switching up cheeses or adding veggies—this recipe is like a delicious blank canvas, and you should totally feel free to experiment!
- Dairy-Free Version: I’ve swapped cream cheese for a dairy-free spread and used a vegan cheddar alternative, and it still tastes amazing.
- Extra Crunch: Add some finely chopped celery to the filling for a nice crunch and a fresh bite.
- Heat Levels: Use a milder wing sauce or add hot sauce drops to amp up the spice—easy to adjust for family preferences!
- Bigger Pies: Make fewer, larger hand pies by cutting bigger circles from your pie crust—great for a heartier snack or meal.
How to Make Cheesy Buffalo Chicken Hand Pies Recipe
Step 1: Make the Buffalo Chicken Filling
Start by heating a skillet over medium heat, tossing in the cream cheese and shredded chicken. Stir it gently until the cream cheese melts and blends smoothly with the chicken—this creaminess is the heart of your filling! Then pour in the Buffalo sauce and sprinkle the shredded cheddar cheese. Cook for a minute or two until everything is melted and well combined. I like to keep the heat moderate here so the cheese melts nicely without sticking or burning.
Step 2: Cut Out the Pie Crust Circles
Using a large circular cookie cutter, cut out 15 circles from the pie crusts. You’ll want to re-roll the dough after the first batch to get all 15. For bigger hand pies, I skip the cutter and just cut squares or larger circles with a knife—both ways work, but the circles look super cute. Pro tip: Keep your dough chilled and just a bit floured to avoid sticking while rolling.
Step 3: Fill and Seal the Hand Pies
Divide the chicken filling among the pie crust pieces, keeping it centered with about a ¼-inch border around. Wet the edges lightly with water (this helps those edges stick together), then fold over to form a half-moon shape. Press the edges shut by pinching with your fingers or pressing with a fork for a pretty edge seal. Don’t forget to cut a few little slits on top to let steam escape while baking—this keeps the crust crisp.
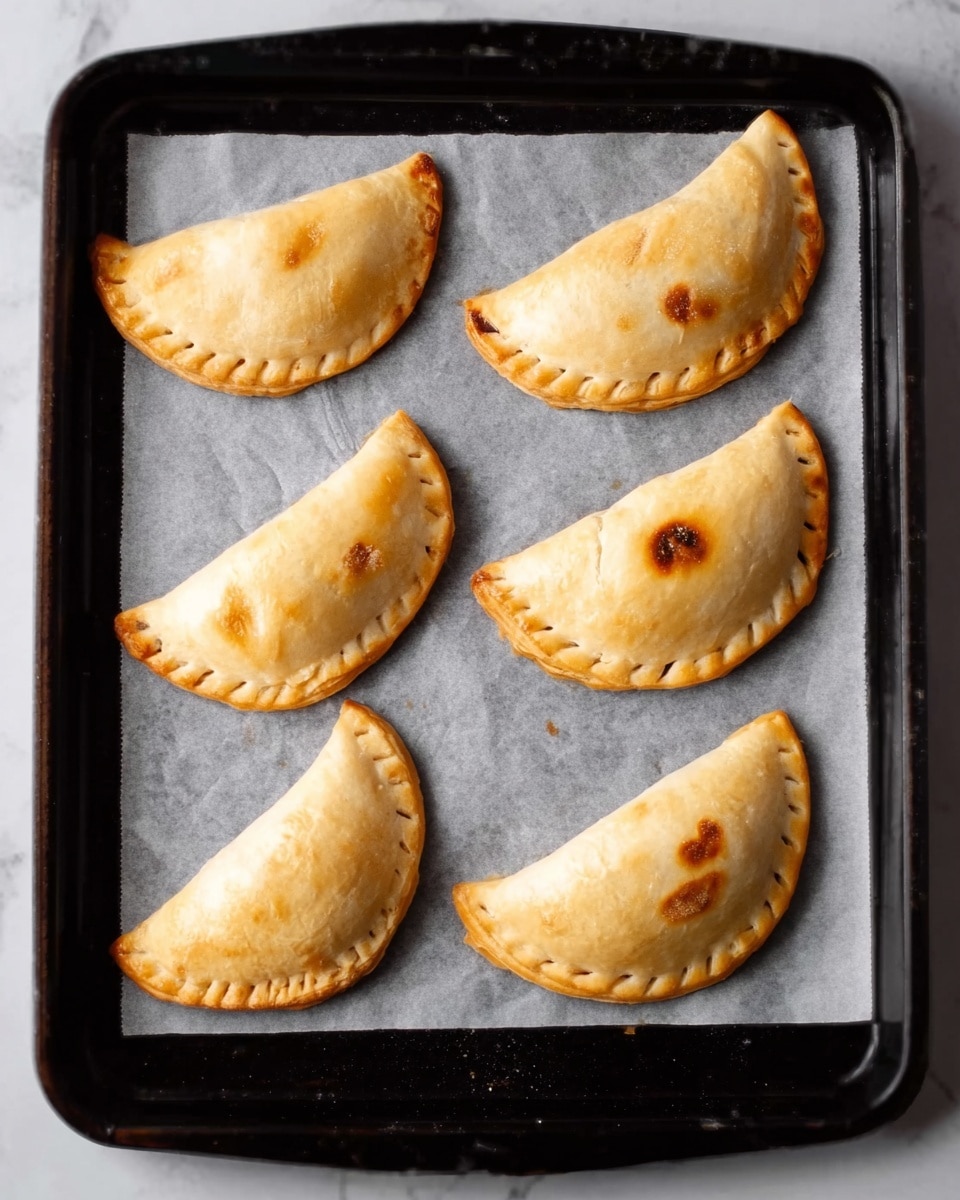
Step 4: Bake Until Golden Brown
Arrange your pies on a baking sheet, brush them with egg wash if you want that golden, glossy finish, and bake at 400°F for 17-20 minutes. You’ll know they’re ready when the crust is beautifully golden and flaky. Let them cool for a few minutes before digging in—trust me, the filling is hot and melty and will love a little rest.
Pro Tips for Making Cheesy Buffalo Chicken Hand Pies Recipe
- Warm Cream Cheese First: Letting the cream cheese come to room temp makes melting with chicken a breeze and keeps the filling silky smooth.
- Don’t Overfill: Too much filling can make sealing tricky and cause leaking during baking—trust me, it’s frustrating but avoidable.
- Vent the Pies: Those small slits on top aren’t just pretty—they help steam escape and keep the crust from getting soggy.
- Use an Egg Wash: This little extra step ups the golden color and keeps your pies looking professional, but it’s optional if you want a rustic look.
How to Serve Cheesy Buffalo Chicken Hand Pies Recipe
Garnishes
My go-to garnish is a sprinkle of chopped green onions or fresh parsley—it adds a nice color contrast and a mild fresh bite that complements the spicy filling perfectly. Sometimes I serve them with a small dollop of ranch or blue cheese dressing on the side for dipping, which my whole family goes crazy over.
Side Dishes
I love pairing these hand pies with simple sides like celery sticks and carrot sticks for crunch and freshness. A crisp cucumber salad or coleslaw also adds a cool, refreshing balance to the heat and richness.
Creative Ways to Present
For game days or casual get-togethers, I arrange these pies on a large platter lined with parchment paper, surrounded by small bowls of blue cheese dressing, ranch, and extra Buffalo sauce. One time, I even served them in individual mini baskets with some colorful paper liners — total crowd-pleaser and super festive!
Make Ahead and Storage
Storing Leftovers
Leftover hand pies store really well! I pop mine in an airtight container and keep them in the fridge for up to 3 days. When you’re ready to eat, just reheat them gently in the oven to bring back that flaky crust and melty filling.
Freezing
I’ve frozen these pies twice with great results. After assembling them but before baking, I flash freeze them on a baking sheet, then transfer into a freezer-safe bag. When you want some, just bake them straight from frozen, adding a few extra minutes to the cook time. Perfect for meal prep!
Reheating
To reheat, I usually zap a hand pie in the microwave for about 30 seconds just to warm the filling, then pop it in a preheated 350°F oven for 5-7 minutes to crisp the crust back up. This double-step method keeps the texture and flavor perfectly balanced.
FAQs
-
Can I use rotisserie chicken for this recipe?
Absolutely! Using rotisserie chicken is a great shortcut and adds great flavor. Just shred it up and follow the recipe as usual. It’s a huge time-saver and your pies will still be delicious.
-
What can I substitute if I don’t have pie crusts?
If you can’t find pie crusts, puff pastry works as a tasty alternative—just roll it out and cut circles the same way. Or you can use biscuit dough for a softer texture, although it won’t be as flaky.
-
How spicy is this recipe, and can I adjust it?
The spice level depends on your Buffalo sauce choice. If you prefer milder, choose a mild wing sauce or reduce the amount added. For extra heat, mix in some cayenne or hot sauce to taste.
-
Can I make these ahead of time and bake later?
Yes! Assemble them, keep them covered in the fridge, and bake fresh when you’re ready. Just be sure to let them come back to room temperature for about 15 minutes to ensure even baking.
Final Thoughts
Honestly, this Cheesy Buffalo Chicken Hand Pies Recipe has become one of my absolute favorites for a reason—it’s easy, quick, and just downright addictive. Every time I make them, whether for a casual lunch or a spirited game day, they bring smiles all around. If you like bold flavors wrapped in flaky, hand-held goodness, you owe it to yourself to try these. I can’t wait to hear how yours turn out!
Print
Cheesy Buffalo Chicken Hand Pies Recipe
- Prep Time: 15 minutes
- Cook Time: 20 minutes
- Total Time: 35 minutes
- Yield: 15 hand pies
- Category: Appetizer
- Method: Baking
- Cuisine: American
Description
These Cheesy Buffalo Chicken Hand Pies are a delicious and portable appetizer or snack featuring tender shredded chicken mixed with creamy cheese and spicy Buffalo sauce, all wrapped in flaky pie crust and baked to golden perfection.
Ingredients
Filling
- 1 pound boneless, skinless chicken breasts (cooked and shredded)
- 4 ounces cream cheese (at room temperature)
- 1/2 cup Buffalo sauce
- 1 cup cheddar cheese (shredded)
Crust & Finishing
- 2 pie crusts
- 1 egg (lightly beaten, optional egg wash)
Instructions
- Preheat Oven: Preheat your oven to 400°F to ensure it is hot and ready for baking the hand pies.
- Prepare Filling: In a large skillet over medium heat, combine the cream cheese and cooked shredded chicken. Stir continuously until the cream cheese melts and fully coats the chicken.
- Add Sauce and Cheese: Pour in the Buffalo sauce and stir in the shredded cheddar cheese. Cook for an additional 1-2 minutes, stirring until all the ingredients are melted and blended evenly.
- Cut Pie Crust: Use a large circular cookie cutter to cut out 15 circles from the pie crusts. You will need to re-roll the dough to get all 15 circles. For larger hand pies, follow recipe notes on crust cutting.
- Fill and Shape Pies: Divide the chicken mixture evenly among the pie crust circles, placing the filling in the center for small pies or to one side for larger pies, leaving a 1/4-inch border around edges.
- Seal Edges: Moisten the edges of each pie crust with a little water, fold over the dough, and seal edges by pinching them together or pressing with a fork to ensure they do not open during baking.
- Vent and Egg Wash: Cut a few small slits on top of each pie to allow steam to escape. Brush the tops with the beaten egg wash if using, to achieve a golden glossy finish.
- Bake: Place the hand pies on a baking sheet and bake in the preheated oven for 17-20 minutes or until the crusts are golden brown and cooked through.
- Cool and Serve: Let the pies cool for a few minutes before eating to allow the filling to settle and avoid burns.
Notes
- To make larger hand pies, cut pie crust into bigger circles and adjust filling accordingly.
- Egg wash is optional but provides a shiny, golden crust.
- If desired, you can use store-bought cooked shredded chicken to save time.
- Buffalo sauce can be substituted with your favorite hot sauce for different heat levels.
- Let pies cool slightly before eating as the filling will be very hot.
Nutrition
- Serving Size: 1 hand pie
- Calories: 210
- Sugar: 2g
- Sodium: 480mg
- Fat: 13g
- Saturated Fat: 6g
- Unsaturated Fat: 5g
- Trans Fat: 0g
- Carbohydrates: 14g
- Fiber: 1g
- Protein: 12g
- Cholesterol: 55mg


