
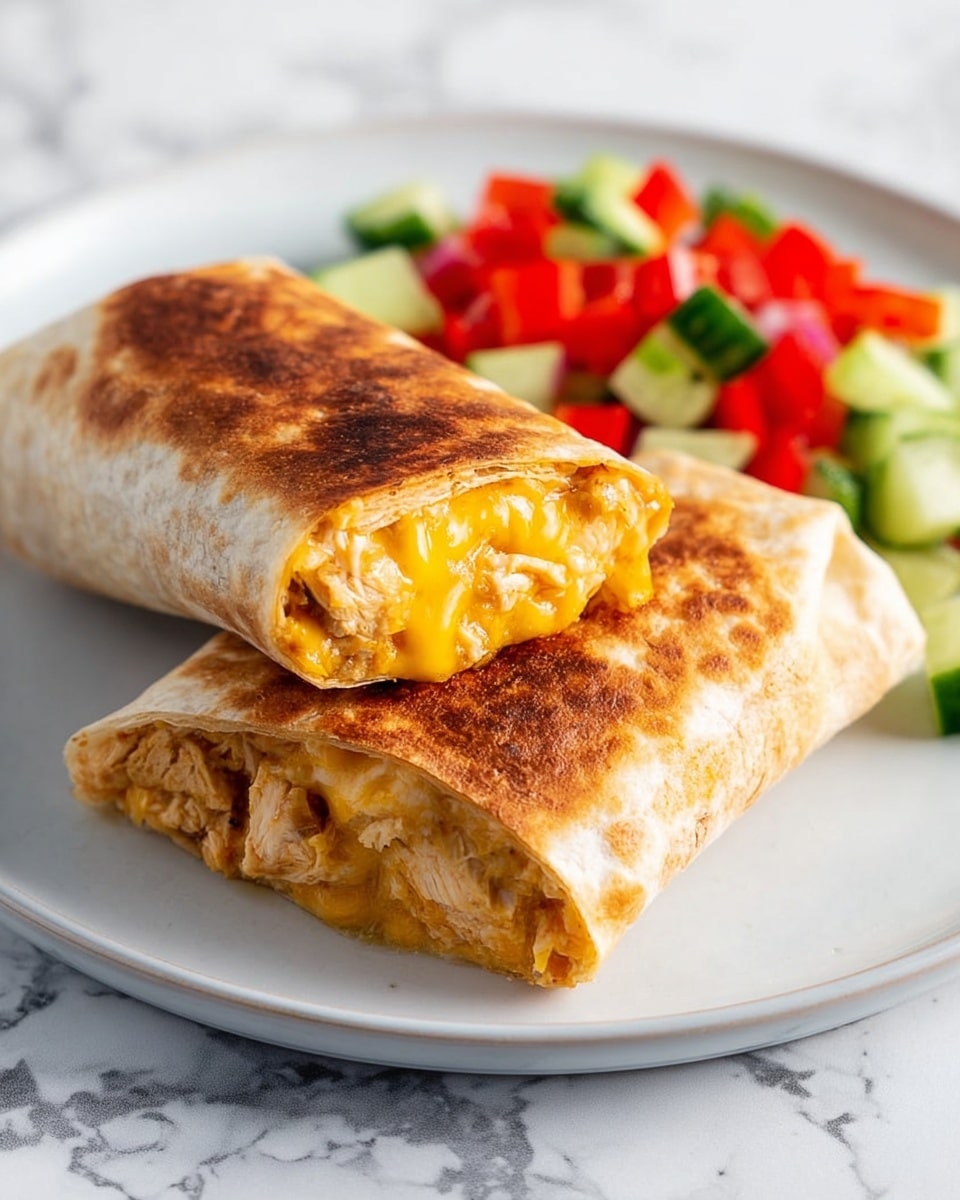
I absolutely love sharing this Cheesy Garlic Chicken Wraps Recipe because it’s one of those meals that feels like a cozy hug wrapped in a tortilla. The combination of melty cheese, savory garlic, and juicy chicken makes it a fast favorite in my house—perfect for busy weeknights or whenever you crave something comforting but quick. You’ll find that it satisfies a hunger for something both hearty and fresh, without the fuss of a complicated recipe.
What makes this Cheesy Garlic Chicken Wraps Recipe stand out is how adaptable and forgiving it is. Whether you’re using up leftover rotisserie chicken or whipping it up from scratch, it comes together in no time, and the flavors just sing. I remember the first time I made these, the smell alone had everyone crowding into the kitchen, eager to grab one. Trust me, once you try it, this wrap will become your go-to, too!
Why You’ll Love This Recipe
- Quick and Easy: Ready in just about 20 minutes with simple, pantry-friendly ingredients.
- Flavor-Packed: Garlic and cheese bring delicious depth without overwhelming the chicken.
- Versatile & Adaptable: Perfect to customize with your favorite cheeses, sauces, or veggies.
- Family Friendly: A surefire hit for picky eaters and hungry appetites alike.

Ingredients You’ll Need
All the ingredients in this Cheesy Garlic Chicken Wraps Recipe harmonize to create that perfect balance of creamy, spicy, and savory. Keep an eye out for good-quality chicken and sharp cheese for the best flavor.
- Large tortillas: Choose regular or opt for low-carb/high-protein depending on your preference.
- Cooked chicken: Rotisserie chicken works wonders here—it’s juicy and already seasoned.
- Garlic cloves: Freshly minced or grated gives the best bold flavor; adjust to taste.
- Light mayonnaise: Adds creaminess without heaviness—great for binding the filling.
- Light Greek yogurt or plain yogurt: Brings a little tang and extra creaminess to the mixture.
- Hot sauce: Frank’s or your favorite hot sauce adds just the right kick.
- Salt: Enhances all the flavors—don’t skip it!
- Grated cheese: I often use a cheddar blend for rich, melty goodness, but feel free to experiment.
- Green onion: Adds a fresh, mild bite and a pop of color.
- Olive oil spray: Keeps the wraps crispy when cooking without extra mess.
Variations
I love making this Cheesy Garlic Chicken Wraps Recipe my own by tweaking the fillings or sauces to suit different cravings or seasons. Don’t hesitate to switch things up depending on what you have on hand or want to try!
- Spicy Kick: I once added extra jalapeños and a splash of smoked paprika, and it added a fantastic smoky heat.
- Vegetarian Version: Swap chicken for grilled mushrooms or roasted veggies for a meatless twist that’s equally tasty.
- Dairy-Free Option: Use dairy-free cheese and swap mayo for avocado to keep it creamy without the dairy.
- Herb Twist: Fresh basil or cilantro stirred into the filling brightens the whole wrap beautifully.
How to Make Cheesy Garlic Chicken Wraps Recipe
Step 1: Mix Up the Flavorful Chicken Filling
In a bowl, combine chopped chicken, garlic, light mayonnaise, Greek yogurt, hot sauce, and salt. Make sure to mix it well so every bite is bursting with flavor. If you like garlic punchier, add a little more—it really makes the difference! You can prepare this filling ahead of time, which saves so much effort when dinner time rolls around.
Step 2: Build Your Wrap Like a Pro
Lay your tortilla flat and sprinkle about 2 tablespoons of grated cheese on the lower third. Then, spoon on about two-thirds of a cup of your chicken filling. Top that with another spoonful of cheese and a sprinkle of chopped green onion to add freshness and texture. This layering helps the cheese melt perfectly and keeps everything inside when you roll it up tight.
Step 3: Fold and Roll for Perfect Crispy Wraps
Here’s what I’ve learned: folding the sides of your tortilla in before rolling up from the bottom ensures your filling won’t escape during cooking. You want a tight roll that’s sealed well to hold all that cheesy, garlicky goodness inside.
Step 4: Pan-Fry to Crispy Perfection
Heat a non-stick pan over medium-high and spray it lightly with olive oil. Place the wraps seam-side down, so they don’t unravel. Cook each side for about 3–4 minutes until the tortilla is golden and crispy. I cover the pan with a lid to help the cheese inside melt faster—this little trick really makes a difference and speeds things up.
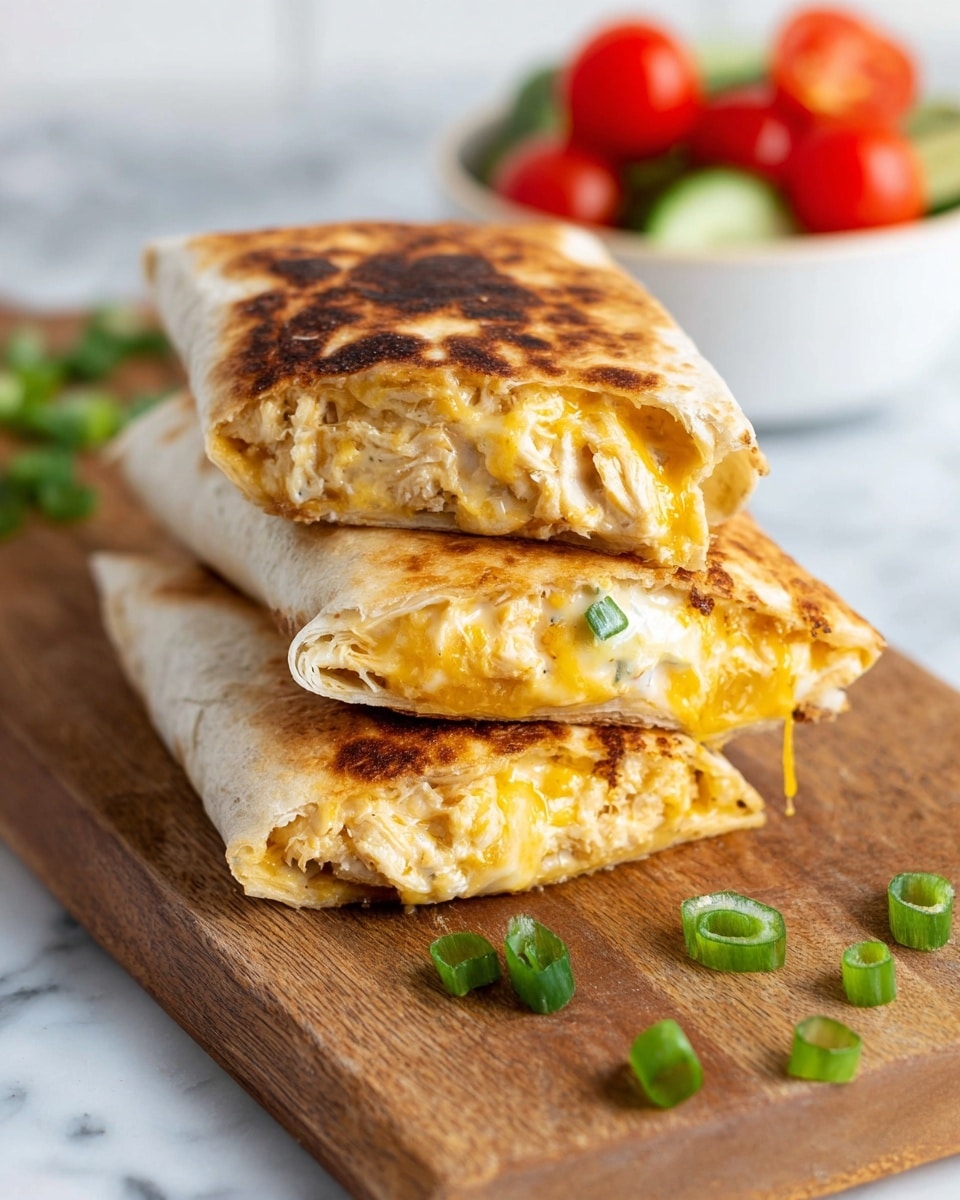
Step 5: Slice and Serve
Once cooked, slice your wraps in half and serve while warm. The cheese should be gooey, and the chicken richly garlicky. You’re ready for the best quick meal that looks impressive but requires minimal effort!
Pro Tips for Making Cheesy Garlic Chicken Wraps Recipe
- Don’t Overload the Filling: Too much filling makes rolling tricky and leads to spills while cooking, so keep it balanced.
- Use a Good Pan: A non-stick skillet with even heat distribution helps achieve that perfect golden crust without burning.
- Cover While Cooking: As I mentioned, placing a lid traps heat and melts the cheese quickly, saving you time.
- Let the Wrap Rest: After cooking, allow the wrap to rest for a minute before slicing to prevent hot cheese from oozing out too fast.
How to Serve Cheesy Garlic Chicken Wraps Recipe
Garnishes
I like to sprinkle some extra chopped green onions or fresh parsley on top for a fresh, vibrant finish. Sometimes a dollop of sour cream or a dash of hot sauce on the side adds that final yum factor that keeps everyone coming back for more.
Side Dishes
For a complete meal, I usually serve these wraps with a crisp green salad or crunchy roasted veggies to add some freshness and balance out the richness. If we’re feeling indulgent, my family loves chips or even a side of tangy pickles with them!
Creative Ways to Present
For casual get-togethers, I serve the wraps sliced into smaller pinwheel bites—perfect finger food! Another time, I stacked a couple of wraps to look like a sandwich tower on the plate, which was a real hit with kids and adults alike. It’s always fun to get a little creative!
Make Ahead and Storage
Storing Leftovers
I usually wrap leftovers tightly in foil or place them in an airtight container and keep them in the fridge for up to two days. Refrigerated this way, the wraps hold up well and still taste delicious.
Freezing
I’ve found freezing the assembled and cooked wraps isn’t ideal because the tortilla gets soggy upon thawing. However, the chicken filling freezes beautifully for up to one month—just thaw it in the fridge before rolling your wraps fresh.
Reheating
When reheating, my favorite method is to use a skillet or air fryer to bring back that crispy outside while warming the inside perfectly. Avoid microwaving if you want to keep the wrap crispy and the cheese melty—it just doesn’t compare!
FAQs
-
Can I make the chicken filling ahead of time?
Absolutely! The chicken filling can be made 2-3 days in advance and kept chilled in the fridge, making weeknight cooking super easy and stress-free.
-
What’s the best cheese to use in this recipe?
I recommend a cheddar blend because it melts well and adds rich flavor, but you can also try mozzarella, Monterey Jack, or even pepper jack if you like a little spice.
-
Can I bake these wraps instead of pan-frying?
Yes, you can bake them at 400°F (200°C) for 10-12 minutes, flipping once to crisp both sides. Although, pan-frying or air frying gives a better crispy texture.
-
Is this recipe suitable for meal prep?
Definitely! You can prepare the chicken filling in advance and store it, then assemble and cook wraps when you’re ready, making lunch or dinner prep super simple.
Final Thoughts
Honestly, this Cheesy Garlic Chicken Wraps Recipe feels like a warm, satisfying secret I’m always excited to share with friends. It hits all the right notes for flavor, speed, and comfort food vibes. I hope you enjoy making and eating these as much as my family and I do—once you try this, I promise it’ll become a staple in your kitchen, too!
Print
Cheesy Garlic Chicken Wraps Recipe
- Prep Time: 15 minutes
- Cook Time: 7 minutes
- Total Time: 22 minutes
- Yield: 2 servings
- Category: Lunch, Dinner, Wraps
- Method: Frying
- Cuisine: American
Description
These Cheesy Garlic Chicken Wraps are a quick and delicious meal option featuring tender cooked chicken mixed with garlic, light mayonnaise, yogurt, and hot sauce, all wrapped in a tortilla with melted cheddar blend cheese. Crispy on the outside and gooey on the inside, they make a satisfying lunch or dinner with simple ingredients and minimal prep time.
Ingredients
Wraps and Filling
- 2 large tortillas (regular or low-carb/high-protein)
- 7 oz cooked chicken (about 200 grams), chopped (rotisserie chicken is great)
- 2 garlic cloves, minced or grated (adjust to taste)
- 2 tablespoons light mayonnaise
- 1 tablespoon light Greek yogurt or plain yogurt
- 2 teaspoons hot sauce (such as Frank’s)
- 1/4 teaspoon salt
- 3 oz grated cheese (about 90 grams, cheddar blend recommended)
- 1 green onion, chopped
- Olive oil spray
Instructions
- Prepare Chicken Mixture: In a bowl, combine the chopped cooked chicken, minced garlic, light mayonnaise, Greek yogurt, hot sauce, and salt. Mix thoroughly to create a flavorful filling.
- Assemble Wraps: Lay out each tortilla flat. On the lower third of the tortilla, sprinkle about 2 tablespoons of grated cheese, then add approximately ⅔ cup of the chicken mixture on top. Add another tablespoon of cheese and a sprinkle of chopped green onion over the filling.
- Roll the Wraps: Fold in the sides of the tortilla to encase the filling, then roll tightly from the bottom to form a secure wrap.
- Cook the Wraps: Heat a non-stick pan over medium-high heat and spray with olive oil. Place the wraps seam-side down in the pan. Cook for 3 to 4 minutes on each side until the wraps are crispy and golden brown. Cover the pan with a lid during cooking to help melt the cheese and heat the filling evenly.
- Serve: Remove the wraps from the pan, slice them in half, and serve immediately with your choice of sides or dips.
Notes
- Covering the pan while cooking helps melt the cheese faster and warms the filling thoroughly.
- The chicken filling can be made ahead and stored in the refrigerator for up to 3 days.
- For a lighter version, reduce the amount of cheese, but note the melty cheese center adds great flavor and texture.
- The wraps can also be cooked using an air fryer at 375°F (190°C) for about 6–8 minutes, or baked at 400°F (200°C) for 10–12 minutes, flipping once for even crispiness.
- Leftover chicken filling works well in toasties, quesadillas, or stuffed baked potatoes.
- Store cooked wraps in the fridge for up to 2 days and reheat in a skillet or air fryer to restore crispness; avoid freezing the assembled wraps but you can freeze the filling for up to 1 month.
- Make the chicken filling 2–3 days ahead and keep chilled until ready to assemble and cook.
- Serve with a crunchy salad, roasted veggies, pickles, salsa, or chips for a complete meal.
Nutrition
- Serving Size: 1 wrap
- Calories: 420
- Sugar: 2g
- Sodium: 650mg
- Fat: 20g
- Saturated Fat: 8g
- Unsaturated Fat: 10g
- Trans Fat: 0g
- Carbohydrates: 30g
- Fiber: 3g
- Protein: 32g
- Cholesterol: 75mg


