

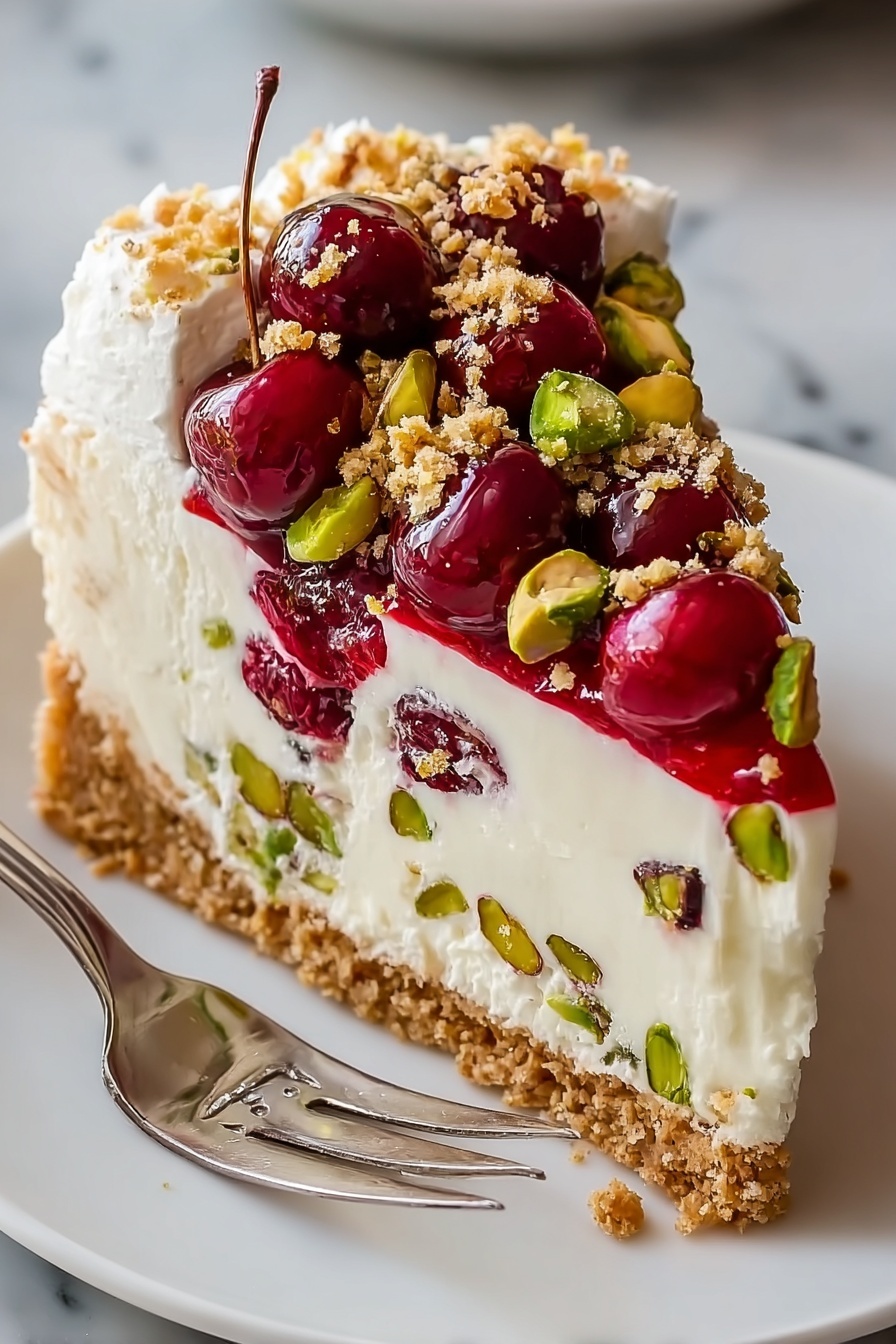
If you’re on the lookout for a dessert that’s both elegant and bursting with flavor, this Cherry Pistachio Cheesecake Recipe is an absolute showstopper. I love this because it balances the rich creaminess of cheesecake with the crunchy, nutty goodness of pistachios and the bright, sweet pop of cherry topping. Once you try it, you’ll see why it quickly becomes a favorite for special occasions or whenever you want to treat yourself.
Why You’ll Love This Recipe
- Perfect Flavor Combo: The earthy pistachios and bright cherry topping create a stunning balance that’ll wow your taste buds.
- Easy to Follow: This recipe uses simple steps and accessible ingredients, so you won’t get overwhelmed.
- Make-Ahead Friendly: You can prep this in advance — it’s perfect for parties and gatherings.
- My Family’s Favorite: Everyone’s crazy for it at home; trust me, you’ll get rave reviews.

Ingredients You’ll Need
The magic of this Cherry Pistachio Cheesecake Recipe comes from simple ingredients that each bring their own punch of flavor. Whether it’s the creamy cheesecake filling or the crunchy nut crust, you’ll find these ingredients work so well together. Also, grabbing roasted, unsalted pistachios elevates the flavor big time.
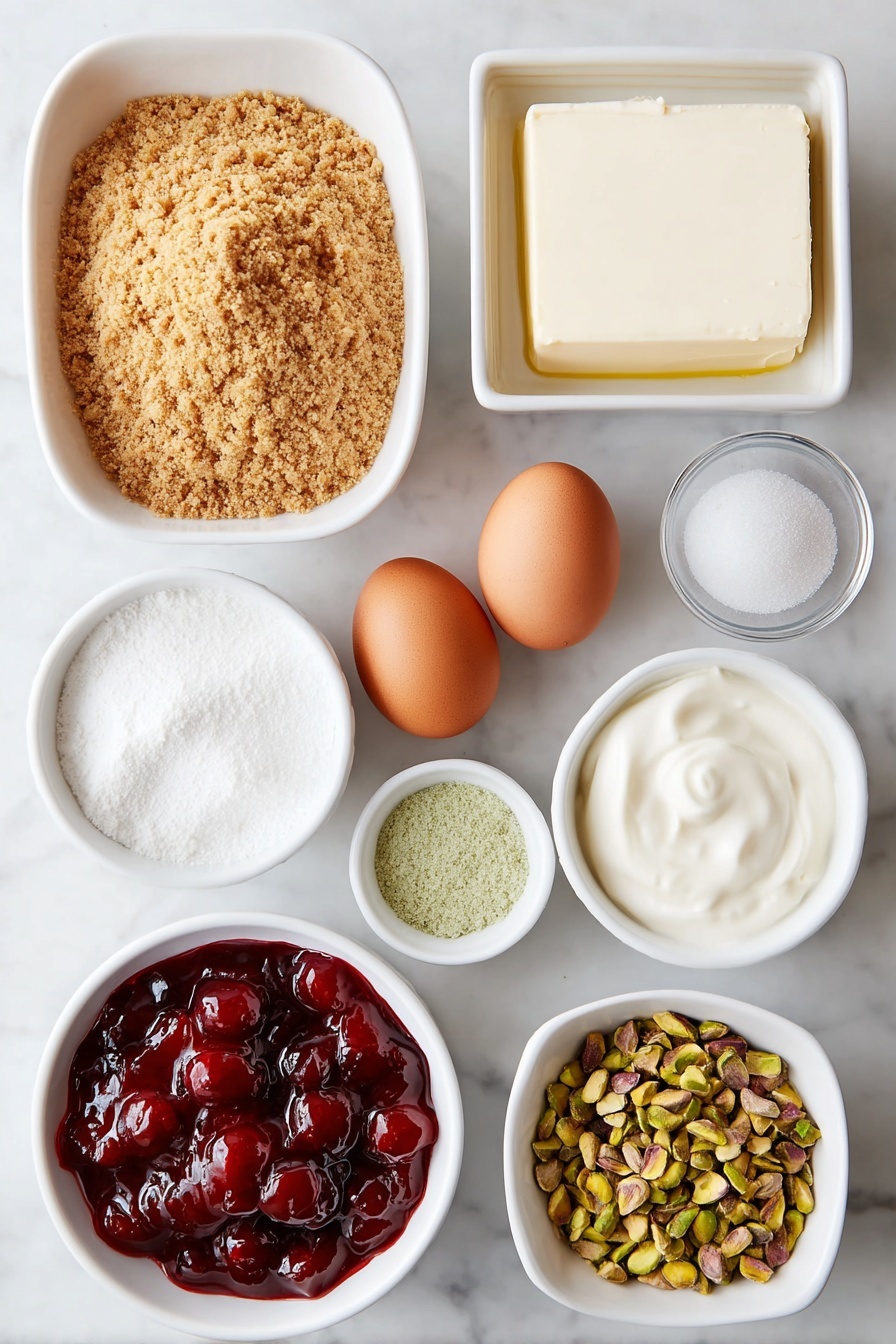
- Graham cracker crumbs: These make the classic crunchy base that holds the cheesecake together. I always opt for finely crushed crumbs for the best texture.
- Ground pistachios: Adds nuttiness and a subtle buttery flavor that gives the crust a unique twist.
- Sugar: Simple sweetness that balances the tang of cream cheese and sour cream.
- Melted butter: Helps bind the crust and adds richness—you want this fully melted to spread easily.
- Cream cheese: The star of the show—make sure it’s softened to room temperature to avoid lumps.
- Eggs: They give the filling structure and creaminess; add them one at a time for perfect blending.
- Sour cream: Brings tang and keeps the texture velvety and moist.
- Pistachio pudding mix (dry): This adds both pistachio flavor and a lovely lift to the filling without extra effort.
- Vanilla extract: For warmth and depth—it brightens all the other flavors.
- Cherry pie filling: Sweet and tart topping that contrasts beautifully with the creamy cheesecake beneath.
- Chopped pistachios (optional): A crunchy, pretty garnish that’s perfect for presentation and texture.
Variations
One of the things that makes this Cherry Pistachio Cheesecake Recipe so fun is how customizable it is! Over the years, I’ve played with a few tweaks that give it a new twist depending on the occasion or what I have on hand.
- Almond Extract Boost: I discovered this trick to make the pistachio flavor pop even more by adding a quarter teaspoon of almond extract — it’s subtle but makes a lovely difference.
- Gluten-Free Crust: Swap the graham crackers for gluten-free cookies or nut meal to keep it friendly for everyone.
- Fresh Cherries: When in season, I love using fresh cherry compote instead of canned pie filling—it’s a bit lighter and fresher tasting.
- Vegan Version: I haven’t made a full vegan version yet, but using vegan cream cheese and coconut cream could be a fun experiment!
How to Make Cherry Pistachio Cheesecake Recipe
Step 1: Prep Your Oven and Pan
Start by preheating your oven to 325°F (160°C). I always grease my 9-inch springform pan and then line the bottom with parchment paper to make sure the cheesecake slides out easily later. Tricky removal is something I’ve learned to avoid the hard way!
Step 2: Make the Pistachio-Graham Crust
Combine the graham cracker crumbs, ground pistachios, sugar, and melted butter. Press this mixture firmly and evenly into the bottom of your prepared pan. Baking the crust for about 8 minutes helps it set and gives you that perfect crunch. Let it cool while you prepare the filling—it’s a little trick I found that really helps keep the crust crisp under the creamy filling.
Step 3: Whip Up the Filling
Beat the softened cream cheese and sugar until ultra smooth—no lumps! Add the eggs one at a time so everything blends nicely without over-mixing, which can cause cracks during baking. Then, mix in the sour cream, pistachio pudding powder, and vanilla extract just until smooth. This filling is luscious and beautifully flavored thanks to the pudding mix.
Step 4: Bake and Cool
Pour that silky filling over your cooled crust and smooth out the top with a spatula. Bake for 45–50 minutes, but keep an eye on it—the center should be just set and slightly jiggly. Here’s what I do: when time is up, I turn off the oven, crack open the door, and let the cheesecake cool slowly inside. This gentle cooling helps prevent cracks and keeps the texture wonderfully creamy.
Step 5: Chill and Add Topping
Once it’s at room temperature, pop the cheesecake in the fridge for at least 4 hours, preferably overnight. I promise, this patience pays off — the flavors meld and the texture firms up beautifully. Before serving, spread the cherry pie filling over the top and sprinkle with extra chopped pistachios for a stunning finish.
Pro Tips for Making Cherry Pistachio Cheesecake Recipe
- Softened Cream Cheese Is Key: I learned the hard way to let cream cheese come to room temp before mixing, which avoids lumps and gives a silky filling.
- Don’t Overmix: Mix just enough to combine ingredients smoothly to keep the cheesecake dense and crack-free.
- Use a Water Bath (Optional): Wrapping the pan in foil and baking in a water bath can help prevent cracks, but I’ve had success without it by cooling slowly in the oven.
- Add Topping After Chilling: Always add the cherry topping after the cheesecake chills so it doesn’t soak into the filling and stays vibrant.
How to Serve Cherry Pistachio Cheesecake Recipe
Garnishes
I love garnishing with extra chopped pistachios because they add a nutty crunch and look gorgeous against the deep red cherries. If you want to get fancy, a light dusting of powdered sugar or a few fresh mint leaves can also brighten things up beautifully.
Side Dishes
This cheesecake is so rich and flavorful that I usually serve it on its own or with a simple cup of coffee or tea. But if you’re thinking of a full dessert spread, a scoop of vanilla bean ice cream or a fresh berry salad pairs wonderfully.
Creative Ways to Present
For special occasions, I’ve sliced this cheesecake into petite squares and served them on dessert platters with tiny spoons—easy for guests to grab. You can also pipe whipped cream rosettes around the edges or drizzle a little pistachio syrup to amp up the wow factor.
Make Ahead and Storage
Storing Leftovers
I usually cover leftover cheesecake tightly with plastic wrap and keep it in the fridge, where it stays fresh for up to 4 days. The flavors actually deepen overnight, so it tastes even better the next day—if you can resist!
Freezing
Freezing cheesecake can be tricky, but this recipe freezes beautifully if you don’t add the cherry topping first. Freeze the plain cheesecake wrapped well in plastic and foil for up to 2 months. When ready to serve, thaw in the fridge overnight and add cherry pie filling fresh before slicing.
Reheating
I usually skip reheating cheesecake to keep its texture intact. If you want it less chilled, leave slices at room temperature for 15–20 minutes before serving for the best creamy experience.
FAQs
-
Can I use fresh cherries instead of canned pie filling?
Absolutely! Fresh cherry compote or homemade cherry sauce works beautifully. Just be sure to cook down fresh cherries with a bit of sugar and cornstarch until thickened to mimic the gelled texture of canned pie filling.
-
Why does my cheesecake crack on top?
Cracks usually happen from overmixing or baking at too high a temperature. To avoid this, mix just until combined, bake at 325°F (160°C), and cool the cheesecake slowly by leaving the oven door cracked after baking.
-
Can I make this cheesecake gluten-free?
Yes! Swap the graham cracker crumbs for gluten-free cookies or finely ground almonds/pistachios for the crust. Everything else in the recipe is naturally gluten-free.
-
How do I get the pistachio flavor to really stand out?
Using roasted, unsalted pistachios is essential. You can also add a little almond extract to the filling for an extra boost of that nutty flavor.
Final Thoughts
This Cherry Pistachio Cheesecake Recipe holds a special place in my heart because it’s one of those desserts that’s both impressive and approachable. Whether you’re making it for a crowd or a cozy night in, you’ll appreciate the way the flavors come together so beautifully. I hope you enjoy baking it as much as my family and I enjoy devouring it—seriously, once you try it, you’ll keep coming back for that perfect nutty crunch and cherry sweetness combo.
Print
Cherry Pistachio Cheesecake Recipe
- Prep Time: 20 min
- Cook Time: 50 min
- Total Time: 5 hr 10 min
- Yield: 12 servings
- Category: Dessert
- Method: Baking
- Cuisine: American
Description
This Cherry Pistachio Cheesecake is a luscious dessert that combines a crunchy pistachio and graham cracker crust with a creamy pistachio-flavored cheesecake filling, topped with sweet cherry pie filling and optional chopped pistachios. Perfect for special occasions or a delightful treat, this recipe balances rich textures with vibrant flavors.
Ingredients
For the crust:
- 1½ cups graham cracker crumbs
- ¼ cup ground pistachios
- 3 tbsp sugar
- 5 tbsp melted butter
For the filling:
- 16 oz cream cheese, softened
- ½ cup sugar
- 2 large eggs
- ½ cup sour cream
- ¼ cup pistachio pudding mix (dry powder)
- 1 tsp vanilla extract
For the topping:
- 1 can (21 oz) cherry pie filling
- Optional: extra chopped pistachios for garnish
Instructions
- Preheat oven: Preheat your oven to 325°F (160°C). Grease a 9-inch springform pan or line the bottom with parchment paper to prevent sticking.
- Make the crust: In a mixing bowl, combine graham cracker crumbs, ground pistachios, sugar, and melted butter. Press this mixture firmly and evenly into the bottom of the prepared pan. Bake the crust for 8 minutes to set, then remove and let it cool completely.
- Prepare the filling: In a large bowl, beat the softened cream cheese and sugar together until smooth and creamy. Add the eggs one at a time, mixing well after each. Then incorporate the sour cream, pistachio pudding mix, and vanilla extract, mixing just until the filling is smooth and evenly combined.
- Bake: Pour the cheesecake filling evenly over the cooled crust and smooth the top with a spatula. Bake in the preheated oven for 45 to 50 minutes, or until the center is just set but still slightly jiggly. Once done, turn off the oven and leave the cheesecake inside with the door cracked open to cool gradually and prevent cracking.
- Chill: After cooling to room temperature, refrigerate the cheesecake for at least 4 hours or preferably overnight to allow it to fully set and develop flavor.
- Top and serve: Once chilled, spread the cherry pie filling evenly over the top of the cheesecake. Garnish with extra chopped pistachios if desired for added texture and visual appeal. Slice and serve chilled.
Notes
- Use roasted, unsalted pistachios for the best flavor balance.
- For a more intense pistachio flavor, add ¼ teaspoon of almond extract to the filling.
- This cheesecake freezes well; add the cherry topping after thawing to preserve texture and flavor.
Nutrition
- Serving Size: 1 slice (1/12 of cheesecake)
- Calories: 380
- Sugar: 28g
- Sodium: 220mg
- Fat: 26g
- Saturated Fat: 13g
- Unsaturated Fat: 10g
- Trans Fat: 0.5g
- Carbohydrates: 29g
- Fiber: 1.5g
- Protein: 6g
- Cholesterol: 110mg


