
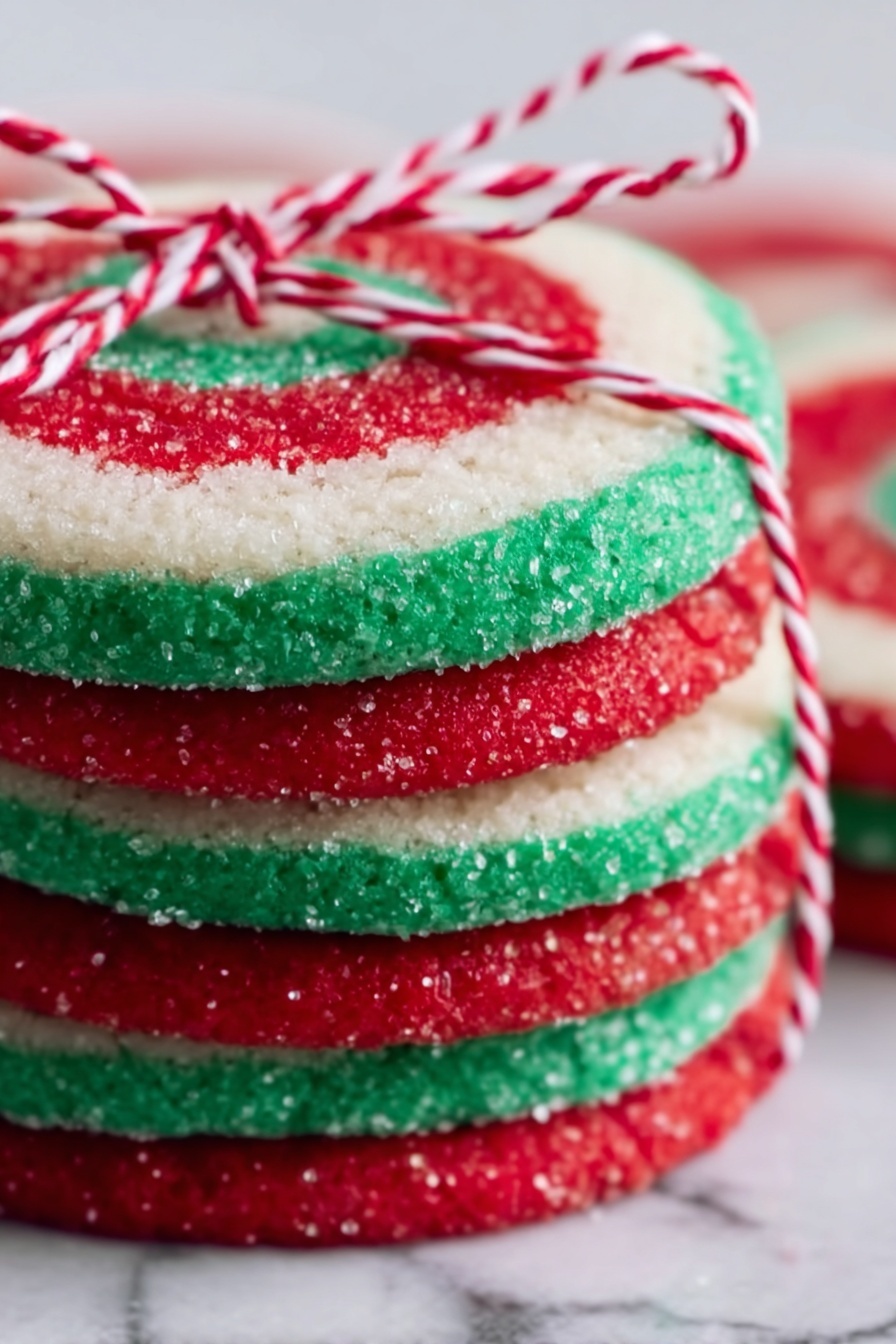
If you’re looking to add a festive, fun twist to your holiday baking, this Christmas Pinwheel Cookies Recipe is absolutely the way to go. I love these cookies because they’re as charming to look at as they are delicious, with vibrant red and green spirals that scream holiday cheer. Plus, they bring back nostalgic memories every time I bake them, making the season feel even cozier. Stick with me, and I’ll share all my best tips so you can create these beautiful, buttery cookies with ease—your friends and family will be asking for the recipe!
Why You’ll Love This Recipe
- Eye-Catching Holidays Vibes: The vibrant red and green spirals really make these cookies pop on any dessert table.
- Simple Ingredients: You probably already have everything in your pantry, making this a no-stress festive treat.
- Perfect Texture: These cookies are tender but hold their shape beautifully, so the pinwheel design stays sharp.
- Make-Ahead Friendly: You can prepare the dough in advance and bake fresh whenever you’re ready.

Ingredients You’ll Need
All these ingredients come together perfectly in this Christmas Pinwheel Cookies Recipe to give you a buttery, sweet dough with those festive swirls you can’t resist. When shopping, try to use good-quality butter and pure vanilla extract—it really makes a difference!
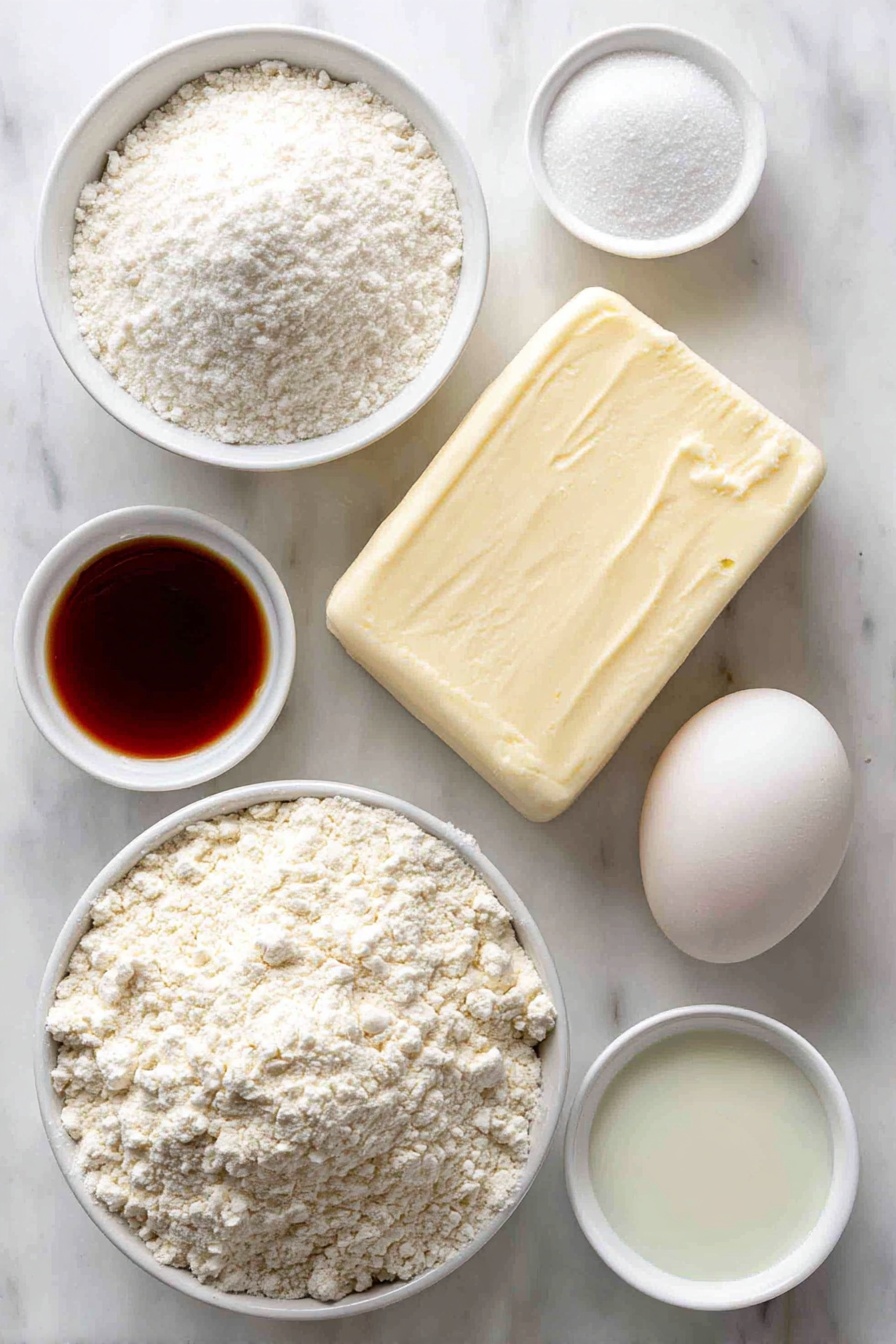
- All-purpose flour: Provides the right structure; be sure to measure it properly by spooning and leveling for the best texture.
- Baking powder: Just a touch to give the cookies a slight lift without losing their neat shape.
- Salt: Balances the sweetness perfectly—don’t skip it!
- Unsalted butter: Softened for easy creaming, and using unsalted lets you control the saltiness better.
- Granulated sugar: For classic sweetness and crunch.
- Large egg: Binds everything and adds richness.
- Vanilla extract: Adds warm, sweet flavor for holiday comfort.
- Red and green food coloring: Gel colors work best for vibrant hues without making the dough too soft.
- Milk (optional): Helps soften the dough slightly if it feels too firm to roll.
Variations
I love experimenting with this Christmas Pinwheel Cookies Recipe by swapping colors or adding flavors, so feel free to make it your own. It’s such a versatile base that lends itself well to festive creativity.
- Flavor Swaps: I once tried swapping vanilla for peppermint extract in one color layer and it gave a perfect holiday mint kick without overpowering the cookie.
- Color Variations: Beyond classic red and green, try blue and white for a winter wonderland theme or pastel shades for other celebrations.
- Dietary Mods: I’ve made these with gluten-free flour blends and they still turn out surprisingly great—just watch the dough texture as you go.
- Chocolate Swirls: Adding cocoa powder to one portion of dough creates a chocolate contrast that’s seriously addictive.
How to Make Christmas Pinwheel Cookies Recipe
Step 1: Whip Up the Dough Base
Start by mixing your dry ingredients—flour, baking powder, and salt—in a medium bowl and set it aside. In a larger bowl, I like to cream the softened butter and sugar together first; it usually takes me about 3 to 4 minutes with my stand mixer to get that light, fluffy texture. Then add the egg and vanilla extract, blending till everything is smooth and combined. Slowly add your dry ingredients on low speed until you get a soft, uniform dough. If it feels a bit dry or crumbly, you can add a teaspoon of milk—just don’t overdo it!
Step 2: Divide and Color Your Dough
Divide the dough into three equal parts. Leave one plain for the white layer, then add red food coloring to one and green to the other. I recommend gel food coloring because it gives that intense color without watering down the dough. Use your hands or a spatula to mix until the color is evenly distributed. If any batch feels too stiff to work with, add a tablespoon of milk to soften it.
Step 3: Roll and Chill the Dough Sheets
Roll each dough portion between two parchment sheets into a rectangle about ¼ inch thick and roughly the same size—for neat stacking, size consistency is key. I’ve found chilling the rolled sheets on baking sheets for 30 minutes before assembly makes a world of difference; the dough firms up and layers stick together so much better when you roll it up.
Step 4: Layer and Roll Into a Log
Once chilled, stack the green dough over the white, and then the red dough on top of the green, aligning edges carefully. Give them a gentle press with your rolling pin to remove air pockets and help the layers bond. Now, starting from one edge, roll the layered dough tightly into a log—this is where the signature spiral forms! Wrap the log in plastic wrap and chill it for at least 2 hours or overnight to let it firm up, making slicing easier.
Step 5: Slice and Bake Your Cookies
When it’s time to bake, preheat your oven to 350°F (175°C) and line baking sheets with parchment paper. Using a sharp knife, slice the chilled log into rounds about ¼ inch thick. Make sure your cuts are even so the cookies bake uniformly. Space them 2 inches apart on the sheets and bake for 10 to 12 minutes. You want the edges to be set but not browned—this keeps them tender. Let them cool for a few minutes on the sheet before transferring them to a wire rack.
Pro Tips for Making Christmas Pinwheel Cookies Recipe
- Chill, Chill, Chill: Don’t rush the refrigeration steps; firm dough layers make rolling and slicing so much easier and neater.
- Use a Serrated Knife: When slicing the log, a serrated knife helps prevent squishing the dough and keeps rounds perfectly shaped.
- Trim for Sharper Spirals: Before stacking, trimming the edges of the dough rectangles gives cleaner spirals and helps layers stick better.
- Avoid Overbaking: The cookies continue to set as they cool; pulling them out too late leads to dryness, so watch closely near the end.
How to Serve Christmas Pinwheel Cookies Recipe
Garnishes
I usually keep it simple with these cookies because the pinwheel pattern is already so eye-catching, but sometimes I sprinkle a light dusting of powdered sugar on top for a frosted look. Around the holidays, I love adding tiny edible glitter stars—I found they add a little extra magic when serving at parties.
Side Dishes
These Christmas Pinwheel Cookies go beautifully with a cup of hot cocoa or your favorite holiday tea. If you’re hosting a dessert spread, pairing them with some peppermint bark or gingerbread cookies gives your guests delightful variety and keeps the festive theme strong.
Creative Ways to Present
One of my favorite tricks is arranging the cookies in a circular pattern on a festive plate to mimic a wreath—add a red ribbon around the plate for that extra holiday punch. For gifting, stacking them between parchment sheets in a pretty tin or wrapping in colorful cellophane tied with twine always impresses the cookie recipients.
Make Ahead and Storage
Storing Leftovers
I store leftovers in an airtight container at room temperature, layered between parchment paper to keep them from sticking. They usually stay fresh and soft for up to a week—if they last that long, that is!
Freezing
If I’m prepping early, I freeze the cookie dough log wrapped tightly in plastic wrap. When ready, I slice and bake directly from the freezer—just add a couple more minutes to the baking time. This way, fresh Christmas Pinwheel Cookies are always at my fingertips.
Reheating
To enjoy leftovers warm, I pop a cookie or two in the microwave for about 10 seconds or briefly heat in a low oven for 3–4 minutes. This revives their tender texture and buttery flavor beautifully.
FAQs
-
Can I make the Christmas Pinwheel Cookies Recipe without food coloring?
Absolutely! While the colorful spirals are part of the fun, you can skip the food coloring and enjoy classic vanilla pinwheel cookies. Alternatively, try natural colorings like beet juice or spinach powder for a subtle tint.
-
How do I prevent the layers from separating when rolling the log?
Chilling each dough sheet before stacking and pressing layers with a rolling pin helps them stick together. Also, wrapping the log tightly and refrigerating it before slicing gives the dough time to bond and firm up, reducing separation during baking.
-
Can I use this dough to make other cookie shapes?
You sure can! This buttery dough is versatile and works well for rolled or cut-out cookies. Just remember that without rolling into a log, you won’t get the signature pinwheel spiral.
-
What’s the best way to slice the dough log without squishing the cookies?
Use a very sharp, preferably serrated knife and cut straight down with a gentle sawing motion. It helps if the dough is well-chilled or even slightly frozen, which keeps the slices clean and intact.
-
How many cookies does this recipe make?
This recipe yields about 35 cookies, depending on how thinly you slice the log. It’s perfect for gift giving and holiday gatherings!
Final Thoughts
When I first tried this Christmas Pinwheel Cookies Recipe, I was amazed at how such simple ingredients could transform into something so festive and beautiful. Each bite bursts with buttery goodness and a nostalgic holiday vibe that makes baking feel like a warm tradition. If you want to bring a little magic to your cookie platter this year, trust me—you’ll love making these pinwheel beauties. Grab your rolling pin, and let’s get baking!
Print
Christmas Pinwheel Cookies Recipe
- Prep Time: 45 minutes
- Cook Time: 12 minutes
- Total Time: 57 minutes
- Yield: 35 cookies
- Category: Dessert Cookies
- Method: Baking
- Cuisine: American
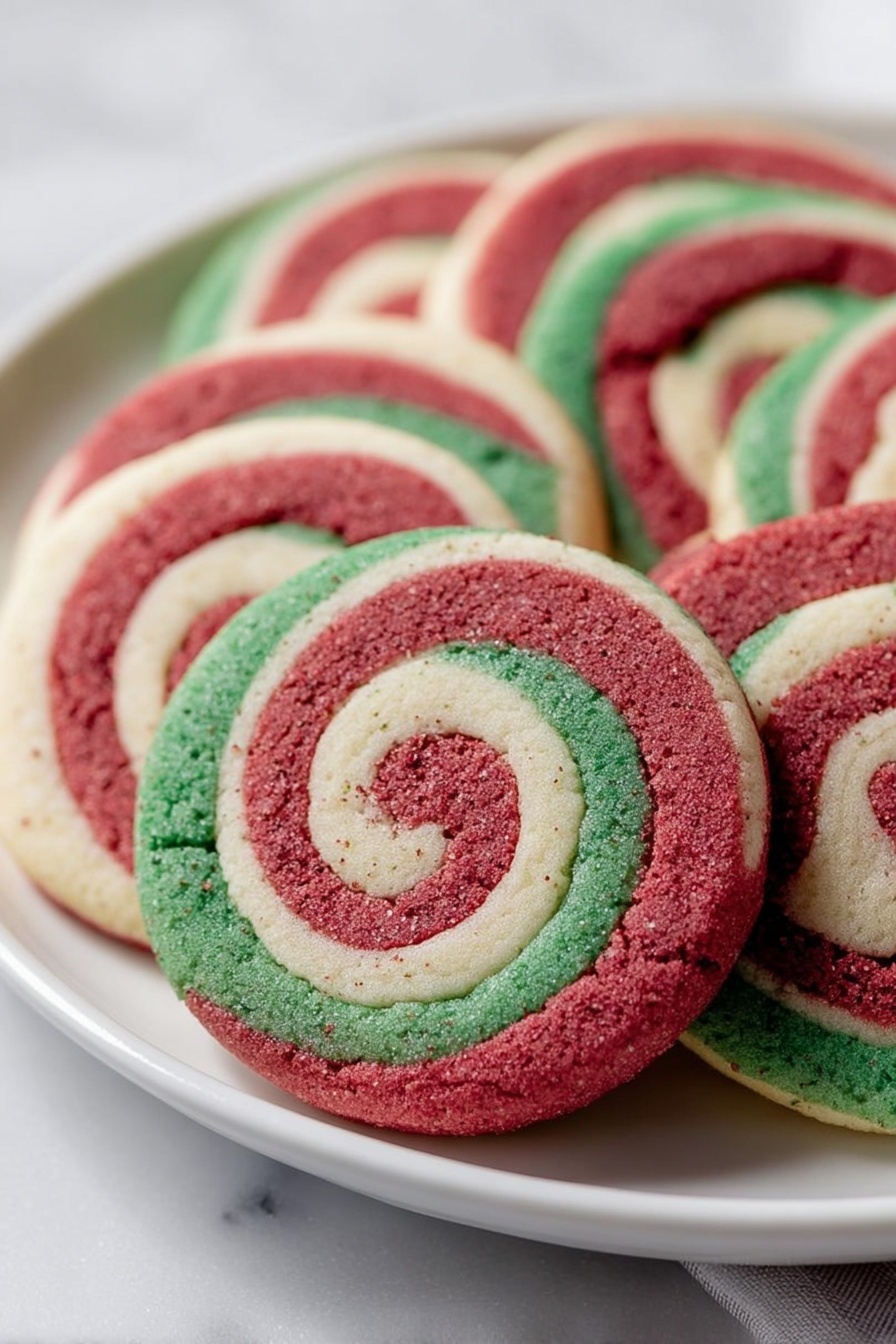
Description
These festive Christmas Pinwheel Cookies feature vibrant red, green, and white spirals, perfect for holiday celebrations. Soft, buttery, and subtly sweet, these cookies are as delightful to look at as they are to eat. The dough is divided, colored, layered, rolled into a log, sliced, and baked to create charming pinwheel patterns that will brighten any cookie platter.
Ingredients
Dry Ingredients
- 2 ½ cups all-purpose flour
- ½ teaspoon baking powder
- ¼ teaspoon salt
Wet Ingredients
- ¾ cup unsalted butter, softened
- 1 cup granulated sugar
- 1 large egg
- 1 teaspoon vanilla extract
Additional Ingredients
- Red food coloring
- Green food coloring
- 1 tablespoon milk (optional, for easier dough handling)
Instructions
- Prepare the dough base: In a medium bowl, whisk together the flour, baking powder, and salt; set aside. In a large mixing bowl, cream the softened butter and sugar together until light and fluffy, about 3 to 4 minutes. Add the egg and vanilla extract and mix until fully incorporated. Gradually add the dry ingredients to the wet mixture on low speed, mixing until a soft, uniform dough forms.
- Divide and color the dough: Divide the dough evenly into three portions. Leave one portion plain for the white layer. To the second portion, add red food coloring and mix thoroughly to evenly color the dough. To the third portion, add green food coloring and mix well. If any dough portion feels too firm, add 1 tablespoon of milk to soften it slightly.
- Roll out the dough: Roll each dough portion between two sheets of parchment paper into rectangles about ¼ inch thick and approximately the same size. Transfer these dough sheets onto baking sheets and chill them in the refrigerator for 30 minutes to firm up the dough for easy assembly.
- Layer and roll the dough: Once the dough sheets are firm, stack the green dough layer on top of the white dough, then stack the red dough layer on top of the green. Align edges as closely as possible and gently press the layers together using a rolling pin. Starting from one edge, carefully roll the layered dough into a tight log to create a spiral pattern. Wrap the dough log tightly in plastic wrap and refrigerate for at least 2 hours or overnight until firm.
- Slice and bake: Preheat your oven to 350°F (175°C) and line baking sheets with parchment paper. Using a sharp knife, slice the chilled dough log into ¼ inch thick rounds. Place the cookie slices on the prepared baking sheets, spacing them about 2 inches apart. Bake for 10 to 12 minutes, until the edges are set but not browned. Allow the cookies to cool on the baking sheet for several minutes before transferring them to a wire rack to cool completely.
Notes
- For sharper and cleaner spirals, consider trimming the edges of each dough rectangle before stacking the layers.
- Use gel food coloring to achieve more vibrant colors without adding extra liquid, which can affect dough consistency.
Nutrition
- Serving Size: 1 cookie
- Calories: 110
- Sugar: 7g
- Sodium: 50mg
- Fat: 6g
- Saturated Fat: 3.7g
- Unsaturated Fat: 2g
- Trans Fat: 0g
- Carbohydrates: 12g
- Fiber: 0.3g
- Protein: 1.2g
- Cholesterol: 20mg


