
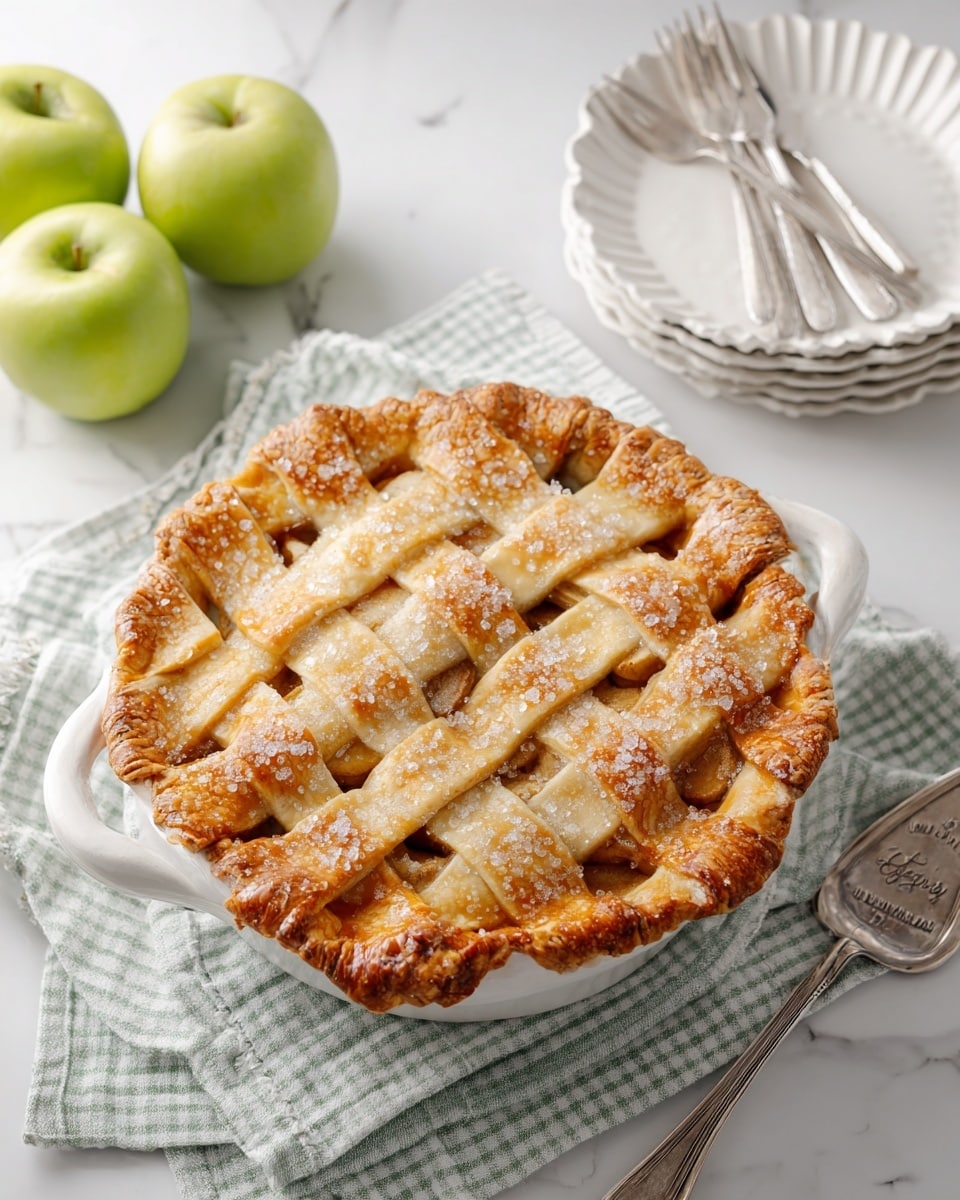
I absolutely love how this Classic Homemade Apple Pie Recipe brings out the cozy flavors of fall in every bite. It’s one of those recipes that instantly makes you feel at home—the warm cinnamon-spiced apples wrapped in a flaky, buttery crust just hit all the right notes. Whether you’re baking for a family gathering, holiday feast, or just because you want to treat yourself, this pie really delivers that nostalgic comfort we all crave.
When I first tried this recipe, I was amazed at how simple it was to get such a perfect balance of sweet and tart apples, all tender and juicy without turning into mush. You’ll find that the homemade crust adds this delicate flakiness that store-bought ones just can’t match. I’m excited to share all my tips so you can achieve apple pie perfection anytime you want!
Why You’ll Love This Recipe
- Perfect Balance of Flavors: Tender apples with just the right amount of cinnamon and brown sugar create a comforting, classic filling.
- Flaky Homemade Crust: The buttery, flaky crust is easy to make and seals in all that delicious goodness.
- Simple Steps for Big Results: You’ll appreciate how straightforward this recipe is—even if you’re not an experienced baker.
- Great for Any Occasion: Whether it’s a holiday celebration or a cozy night in, this pie hits the spot every time.

Ingredients You’ll Need
These ingredients come together beautifully—the mix of tart and sweet apples, warm spices, and a flaky crust makes magic. When shopping, pick the freshest apples you can find and be sure to have some good-quality butter handy for the crust.
- Perfect Pie Crust Recipe: Using a homemade crust really elevates this pie; if you don’t want to make it from scratch, pick a high-quality store-bought crust.
- Butter: Adds richness and a delicate flakiness to the filling and crust; don’t substitute margarine.
- Apples: Choose firm, tart apples like Granny Smith for a great texture and balanced flavor.
- Brown Sugar: Gives warmth and depth to the filling’s sweetness.
- All-Purpose Flour: Helps thicken the juice from the apples so your pie isn’t runny.
- Cinnamon: Adds that signature warming spice—don’t skimp!
- Lemon Juice: Brightens the apples and keeps them from browning.
- Salt: Enhances all the flavors around it.
- Egg: Used in the egg wash to give the crust a beautiful golden color.
- Water: Mixed with the egg for the egg wash.
- Coarse Sugar (optional): Sprinkled on top for a lovely sparkle and crunch.
Variations
I love experimenting with this Classic Homemade Apple Pie Recipe, and tweaking it to my mood or the season is part of the fun. Feel free to add your personal touch to make it truly your own!
- Variation: For a deeper spice flavor, try adding a pinch of nutmeg or cloves to the filling—I find it adds a lovely warmth that my family adores.
- Variation: Mixing apple varieties can take your pie to the next level—trying a combo of tart Granny Smith and sweeter Fuji apples adds complexity.
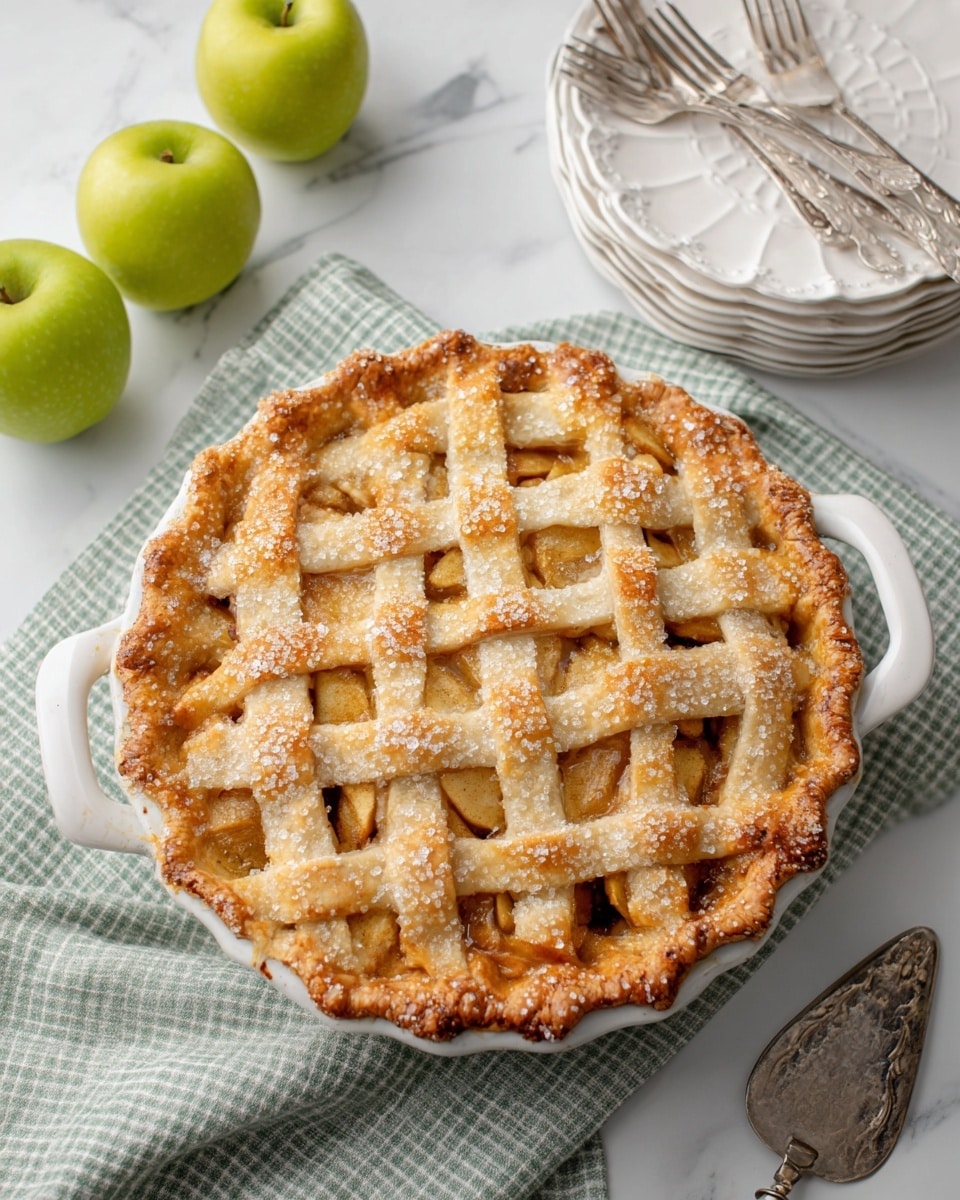
- Variation: If you prefer a lattice crust, cutting the top crust into strips and weaving them allows steam to escape while adding a decorative touch.
- Variation: For a dairy-free option, you can swap the butter for coconut oil—though I recommend a crust recipe designed for that substitution.
- Variation: To make it extra special, sprinkle some chopped toasted pecans or walnuts on top of the filling before adding the crust.
How to Make Classic Homemade Apple Pie Recipe
Step 1: Cook the Apple Filling to Perfection
Start by melting butter in a large pot over medium-low heat. Add your sliced apples, brown sugar, flour, cinnamon, lemon juice, and salt, then stir everything well. Cook gently, stirring every now and then, for about 8 to 10 minutes until the apples soften slightly but still hold their shape. This step is key because it pre-cooks the filling just enough to prevent a soggy crust later while blending those amazing flavors. Set it aside to cool while you prep your crust.
Step 2: Prepare and Roll Out Your Pie Crust
Divide your pie dough into two discs if not already done. Lightly flour your surface and roll one disc out to about 1/8-inch thick, making sure it’s wider than your 9-inch pie plate. Carefully lift and place it into the pie plate, gently pressing it to fit. Don’t worry about a few wrinkles—they add character! Trim the excess dough hanging off the edge for a clean finish later.
Step 3: Fill, Top, and Seal Your Pie
Pour the cooled apple filling into your crust-lined pie plate, spreading it out evenly. Next, roll out your second dough disc. You can either lay it whole on top, cut it into strips for a braided or lattice crust, or get creative with shapes. Remember to cut small vents if using a top crust so the steam escapes. Trim any excess dough and crimp the edges with your fingers or a fork to seal the pie well. This keeps all that lovely filling inside while it bakes.
Step 4: Add the Egg Wash and Bake
Whisk together the egg and water to make an egg wash, then lightly brush the entire top crust with it. If you want a little sparkle and crunch, sprinkle coarse sugar on top. Pop the pie into your preheated oven at 425°F and bake for 15 minutes, then reduce the oven temperature to 350°F and continue baking for around 40 minutes more. Keep an eye on the crust; if it’s browning too quickly, gently cover it with foil to avoid burning. The pie is done when the crust is golden and the filling bubbles through the vents.
Step 5: Cool Before Serving
This last step is often overlooked, but trust me—it makes all the difference. Let your apple pie cool for at least a couple of hours so the filling thickens up nicely. Cutting into it too soon can turn it runny, and nobody wants that. Then slice, serve, and enjoy the fruits (literally) of your labor!
Pro Tips for Making Classic Homemade Apple Pie Recipe
- Pick the Right Apples: Using firm, tart apples like Granny Smith helps the filling keep its shape without turning mushy.
- Cook Filling Before Baking: This trick ensures your apples soften perfectly and the juices thicken, preventing soggy crusts.
- Use Egg Wash for Beautiful Shine: Brushing the crust with egg wash gives a gorgeous golden finish every time.
- Cover with Foil if Needed: Shield your crust with foil if it browns too fast to avoid bitter, burnt edges.
How to Serve Classic Homemade Apple Pie Recipe
Garnishes
I like to top my slices with a scoop of vanilla ice cream or a dollop of freshly whipped cream—it’s that perfect creamy contrast to the warm, spiced apples. Sometimes I’ll sprinkle a little cinnamon or nutmeg on top for an extra spice kick that makes the pie feel even more special.
Side Dishes
This apple pie pairs wonderfully with a hot cup of coffee or tea for an afternoon treat. For dinners, it’s lovely alongside a simple cheese board or even served after a cozy meal of roasted chicken or pork.
Creative Ways to Present
For holidays or special occasions, I like to use cookie cutters to create little apple or leaf shapes from extra pie dough and decorate the top crust. It adds a festive, homemade touch that always impresses guests—and makes the pie look as good as it tastes!
Make Ahead and Storage
Storing Leftovers
I store leftover apple pie loosely covered at room temperature for up to two days. This keeps the crust crisp and the filling flavorful. If your kitchen’s on the warmer side, refrigeration is fine but can firm up the crust a bit.
Freezing
This Classic Homemade Apple Pie Recipe freezes beautifully. I usually wrap the whole pie tightly in plastic wrap and then foil before freezing. It can keep for up to 2 months—just thaw overnight in the fridge before baking or serving.
Reheating
To reheat leftovers, I pop individual slices in a 350°F oven for about 10 minutes. This revives the crust’s flakiness and heats the filling without turning it mushy or dry—way better than the microwave!
FAQs
-
Can I use frozen apples for this recipe?
Using frozen apples isn’t ideal because they release a lot of extra moisture that can make your pie soggy. If you must use them, be sure to thaw and drain them very well, then adjust the flour in the filling to compensate for the extra juice.
-
How do I prevent a soggy bottom crust?
Pre-cooking the apple filling helps, as in this recipe. Also, make sure your pie dough is well chilled before baking, and consider baking on a lower oven rack to get more direct heat to the bottom crust.
-
Can I make the pie crust in advance?
Absolutely! You can prepare the crust dough, wrap it tightly in plastic, and keep it refrigerated for up to 3 days or freeze it for up to a month before rolling it out for your pie.
-
What’s the best way to slice apples for the pie?
I like to slice the apples thinly and evenly—about 1/8-inch thickness. This helps them cook through evenly and quickly during the pre-cooking step, giving a tender but not mushy texture.
Final Thoughts
This Classic Homemade Apple Pie Recipe holds a special place in my kitchen because it’s simple enough to make anytime but elegant enough to impress. Each time I bake it, I think about those cozy moments spent sharing slices with family and friends, and I hope you’ll feel the same warmth when you try it. Take your time with the filling and crust—it’s worth every minute to enjoy that first perfect bite of homemade apple pie magic!
Print
Classic Homemade Apple Pie Recipe
- Prep Time: 25 minutes
- Cook Time: 55 minutes
- Total Time: 1 hour 20 minutes
- Yield: 8 servings
- Category: Dessert
- Method: Baking
- Cuisine: American
Description
Classic homemade apple pie featuring a tender, flaky pie crust filled with cinnamon-spiced, tender cooked apples. This comforting dessert is baked to golden perfection with an egg wash finish and optional coarse sugar topping.
Ingredients
Pie Crust
- 1 Perfect Pie Crust Recipe*
Filling
- 1/4 cup butter
- 8 cups thinly sliced apples, peeled and cored
- 2/3 cup lightly packed brown sugar
- 1 tablespoon all-purpose flour
- 2 teaspoons cinnamon
- 1 teaspoon lemon juice
- 1/4 teaspoon salt
Egg Wash
- 1 egg
- 1 teaspoon water
Topping
- Coarse sugar, optional
Instructions
- Preheat Oven: Set aside a 9-inch pie plate and preheat your oven to 425°F (220°C) to prepare for baking the pie.
- Cook Filling: Melt the butter in a large pot over medium-low heat. Add the sliced apples, brown sugar, flour, cinnamon, lemon juice, and salt. Stir to combine and cook, stirring occasionally, until the apples soften, which takes about 8 to 10 minutes. Remove from heat and let the filling cool.
- Prepare Crust Base: Divide the prepared pie dough into two discs if not already done. Lightly flour your work surface and roll out one disc to about 1/8-inch thickness, slightly larger than your pie plate. Transfer this rolled dough into the pie plate, gently pressing it to cover the bottom and sides.
- Make Egg Wash: Whisk together the egg and water in a small bowl to create an egg wash. Set aside for later use.
- Assemble Pie: Pour the cooled apple filling into the prepared crust base. Roll out the second disc of pie dough on a lightly floured surface and place it on top of the filling. Alternatively, cut the dough into strips and braid for a lattice top. Cut vents if not creating a braid. Trim excess dough hanging over the edges and crimp the edges of the pie to seal.
- Apply Egg Wash and Sugar: Lightly brush the top crust with the egg wash to help it brown nicely. Sprinkle with coarse sugar if desired for added texture and sweetness.
- Bake the Pie: Bake at 425°F (220°C) for 15 minutes. Then reduce the oven temperature to 350°F (175°C) and continue baking for about 40 minutes, or until the crust is golden brown and the filling is bubbling through the vents. If the crust browns too quickly, cover loosely with aluminum foil to prevent burning.
- Cool and Serve: Remove the pie from the oven and let it cool before serving to allow the filling to set properly.
Notes
- The Perfect Pie Crust Recipe should be pre-made or purchased to simplify preparation.
- Use tart apples such as Granny Smith for a balance of sweet and tart flavor.
- The flour in the filling helps thicken the juices released by the apples during baking.
- Applying the egg wash promotes a beautiful golden crust.
- Cover the pie with foil if the crust edges brown too quickly to prevent burning.
- Allow the pie to cool fully before slicing to ensure clean cuts and set filling.
Nutrition
- Serving Size: 1 slice (1/8 of pie)
- Calories: 350
- Sugar: 28g
- Sodium: 150mg
- Fat: 15g
- Saturated Fat: 8g
- Unsaturated Fat: 6g
- Trans Fat: 0g
- Carbohydrates: 50g
- Fiber: 4g
- Protein: 2g
- Cholesterol: 45mg


