
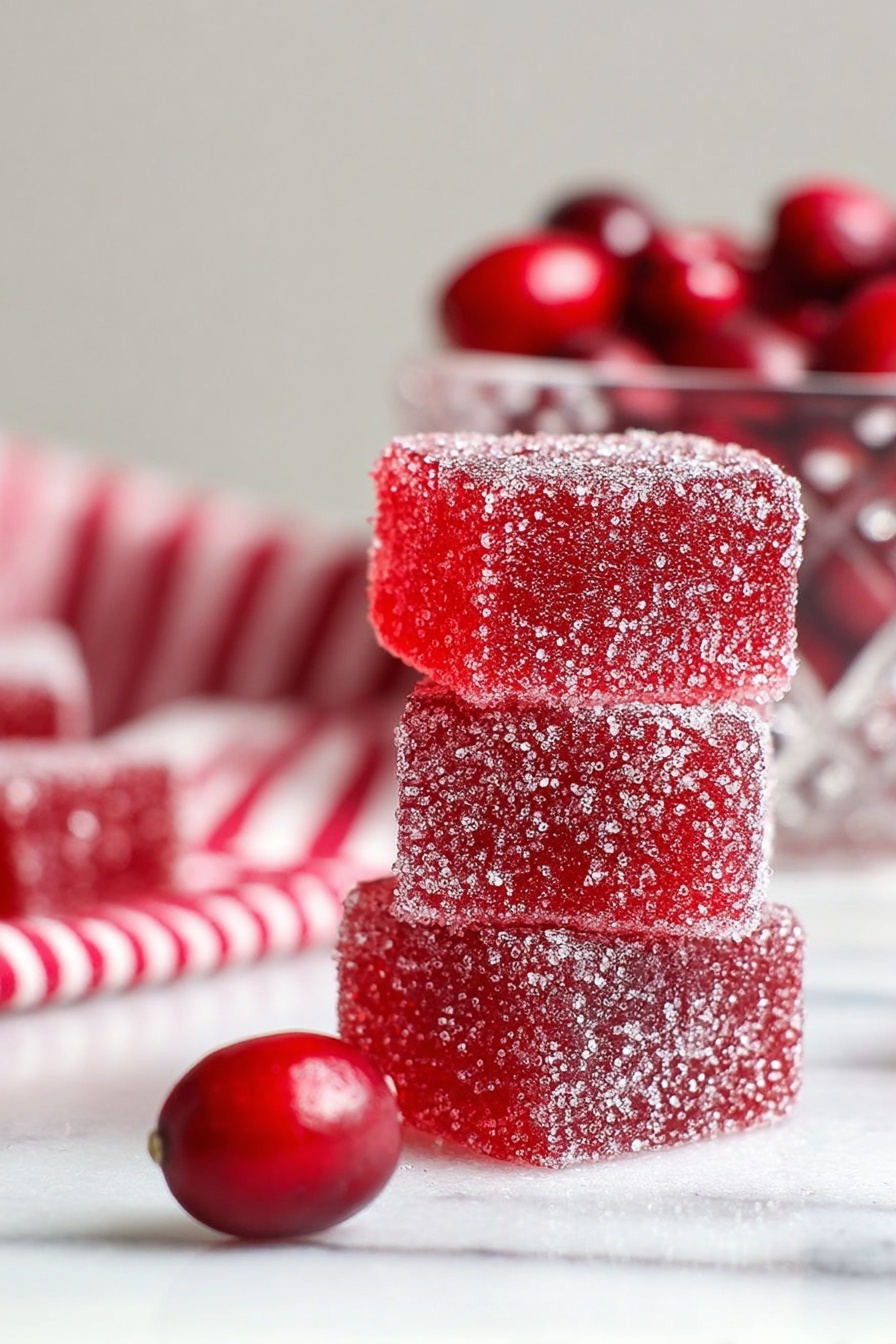
If you’re looking for a treat that’s both festive and utterly delicious, you have to try this Cranberry Jelly Candies Recipe. I absolutely love how these candies turn out—bright, tangy, with that perfect balance of sweet and tart that cranberry juice brings. Plus, they have the most delightful jelly texture coated in sugar crystals that simply melt in your mouth. Trust me, once you make them, you’ll want to keep these candies on hand for holidays, parties, or just because. Keep reading, and I’ll walk you through every step to make sure your candies come out perfect every time!
Why You’ll Love This Recipe
- Bright, Tangy Flavor: The cranberry juice gives these candies a fresh, festive zing that you just won’t find in store-bought versions.
- Fun and Unique Candy Texture: These little jelly squares have the perfect chew with a crunchy sugar coating that your family will go crazy for.
- Made With Simple Ingredients: You likely have everything in your pantry already, making these a great last-minute homemade gift or treat.
- Customizable and Festive: The recipe allows you to tweak sweetness and size, so they’re perfect for any occasion.

Ingredients You’ll Need
The magic in this Cranberry Jelly Candies Recipe comes from just a few simple ingredients that work in harmony. Using pure cranberry juice (not cocktail) ensures the perfect tartness, while the gelatin and sugar provide that classic jelly texture and sweet balance. A digital thermometer is your best friend here to get the consistency just right!
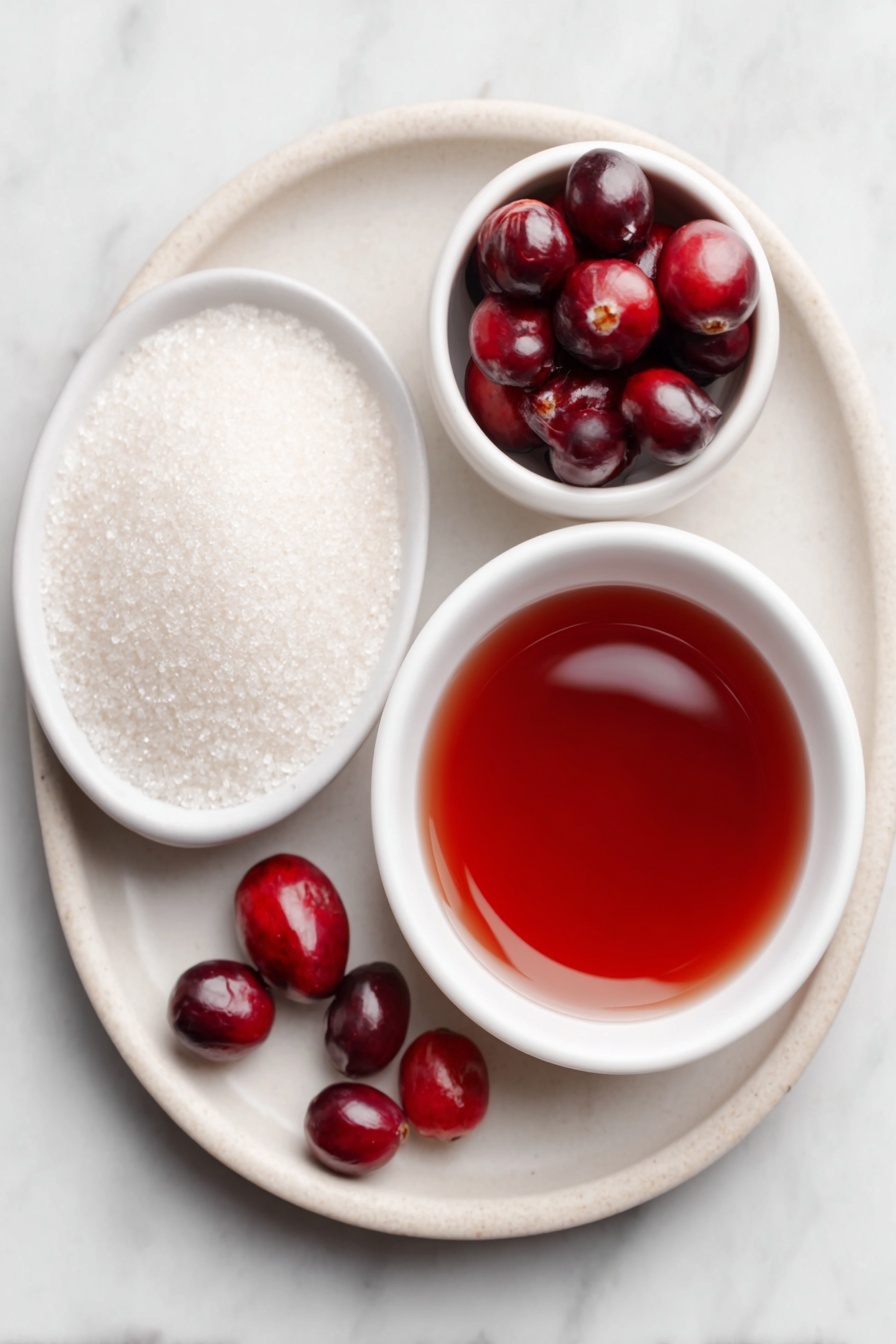
- Cranberry Juice: I recommend 100% pure cranberry juice for a bright, tangy flavor—avoid cranberry cocktail, which can make candies too sweet.
- Gelatin (Powdered): This is what gives the candies their perfect jelly bounce; I used powdered gelatin and it worked wonderfully.
- Granulated Sugar: Essential for sweetness and coating the candies later; use extra for rolling the jelly squares.
- Nonstick Spray: For greasing your pan and knife, so nothing sticks and cutting is smooth.
Variations
I love experimenting with this Cranberry Jelly Candies Recipe depending on the season or my mood. You can easily tweak it to suit dietary needs, or add a little twist to surprise your friends and family. Don’t be afraid to get creative—after all, candies are the best playground for your kitchen adventures!
- Lemon Zest Variation: Adding a teaspoon of lemon zest to the mixture adds a bright citrus note that pairs beautifully with cranberry—my family always requests this twist during the holidays.
- Low-Sugar Version: I’ve reduced sugar slightly and used a sugar substitute coating for a less sweet option, which still tastes great but feels lighter.
- Other Fruit Juices: Feel free to swap cranberry for pomegranate or cherry juice to experiment with new colors and flavors.
- Gelatin-Free Alternative: For friends avoiding gelatin, agar-agar can work, though the texture will be a bit different—plan on some trial and error.
How to Make Cranberry Jelly Candies Recipe
Step 1: Prep Your Pan and Equipment
First things first, line an 8×8-inch square pan with parchment paper in a criss-cross pattern so you get a nice overhang on all sides—this makes flipping your jelly slab out later a breeze. Then generously spray the parchment with nonstick spray. Trust me, this step saved me from major sticky situations when I first tried this recipe!
Step 2: Bloom the Gelatin
Pour the cold cranberry juice into a large stockpot and sprinkle the gelatin evenly over the top. Give it a good whisk to combine. This blooming process hydrates the gelatin so it dissolves smoothly. Take your time with it—it’s key for that perfect jelly texture.
Step 3: Add Sugar and Hot Juice
Next, stir in the granulated sugar and add the boiling cranberry juice. Whisk everything together until it’s combined. You’ll notice the sugar starts dissolving, getting you one step closer to delicious candy magic.
Step 4: Cook to Exact Temperature
This part requires patience: Bring your mixture to a boil over high heat. Once boiling, reduce to medium and simmer gently, stirring occasionally with a heat-resistant spoon. Use a digital thermometer and wait until the mixture hits 107° C (225° F). This usually takes 20-25 minutes, and I learned the hard way not to rush this step. If you pull it off too early, your candies won’t set properly!
Step 5: Remove Bubbles and Pour
After removing from heat, use a skimmer or fine mesh strainer to gently scoop out any large bubbles on the surface. Don’t worry if it still looks foamy or has some white streaks—that’s normal and disappears once you coat the candies in sugar. Pour your syrup into the prepared pan, smoothing it out as best you can.
Step 6: Chill Until Firm
Pop the pan into the fridge and let it chill for at least 4 hours—overnight is best. This waiting game is where the jelly firms up into those perfect, squishable candies we all love.
Step 7: Cut and Sugar Coat Your Candies
Line a tray with parchment and dust a large cutting board with plenty of granulated sugar—this trick keeps the jelly from sticking as you work. Flip your jelly slab onto the sugared board, peel off the parchment, and spread sugar all over the surface to coat both sides. Then lightly score squares with the back of your knife for cutting guides. I like 7×7 or 8×8 for manageable bite sizes. Using a sharp, oiled chef’s knife, carefully cut the slab into squares. Finally, roll each square in sugar for that classic crunchy coating.
Step 8: Dry and Store
Lay your sugared candies out on the tray so they’re not touching, and let them dry uncovered at room temperature for 1 to 2 days. This step develops the signature crunchy sugar crust that’s so addictive. Once dry, layer the candies between sheets of parchment and store them in an airtight container at room temperature. They’ll keep beautifully for up to a month—if you don’t devour them first!
Pro Tips for Making Cranberry Jelly Candies Recipe
- Don’t Skip the Thermometer: Getting your candy to exactly 107° C / 225° F guarantees the right set—this was a game changer for me.
- Use Nonstick Spray Generously: I make sure to spray my knife before each cut to prevent sticking and messy edges.
- Patience with Drying: Leaving candies uncovered for a couple of days is key, so don’t rush this step or your coating won’t crystallize fully.
- Pure Cranberry Juice Only: Using cranberry cocktail will affect texture and sweetness negatively—learned that lesson early!
How to Serve Cranberry Jelly Candies Recipe
Garnishes
I like to dust these candies with a bit of extra powdered sugar or finely grated white chocolate for a festive touch when serving. Sometimes, I sprinkle tiny edible gold flakes for holiday parties—it makes them look so special and fancy, perfect as a gift or centerpiece on a dessert table.
Side Dishes
These cranberry jelly candies pair beautifully with a warm cup of tea or mulled wine. I often serve them alongside a cheese board with sharp cheddar or creamy brie—the tartness of the jelly complements those rich flavors amazingly well.
Creative Ways to Present
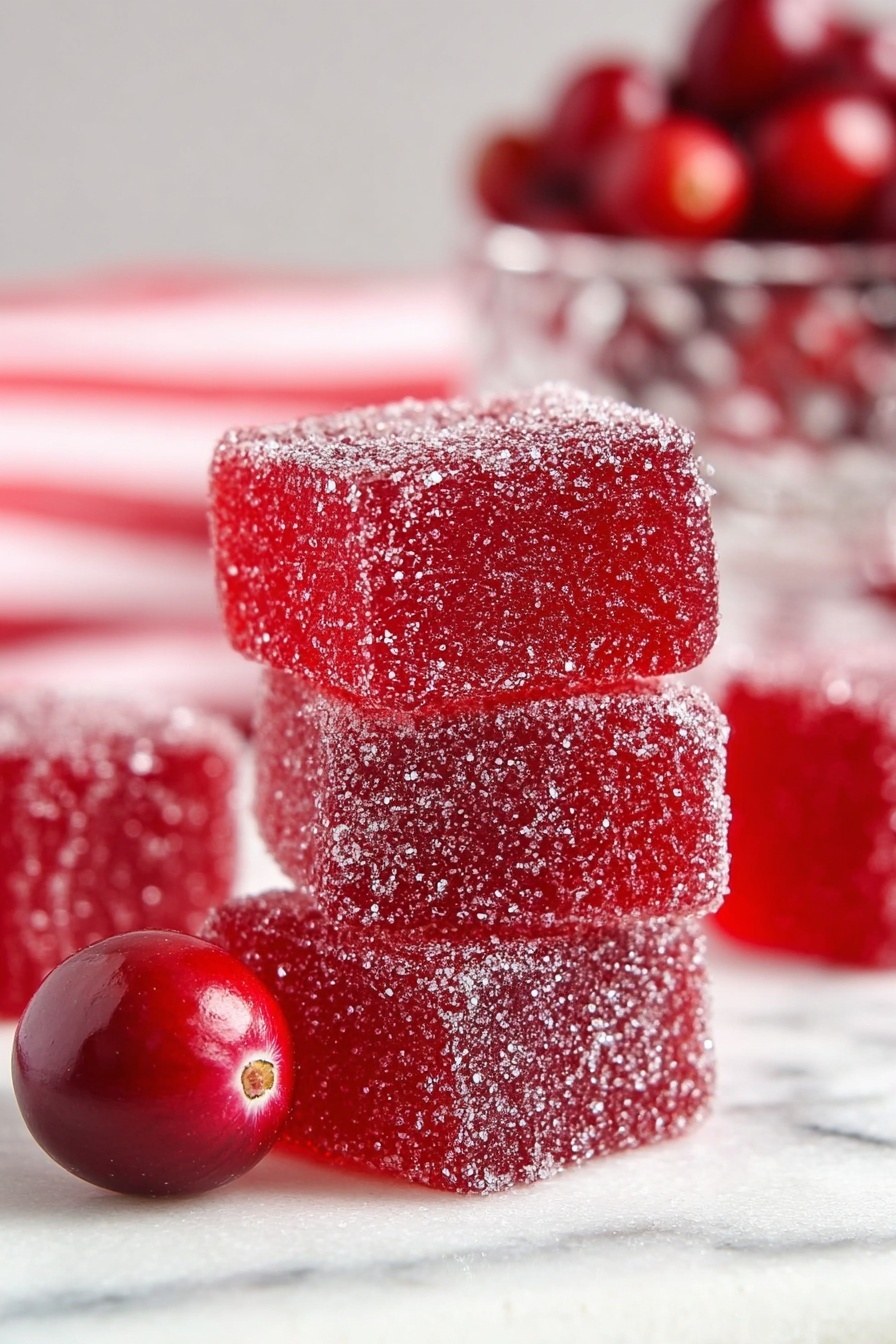
For special occasions, I like to arrange the candies in glass jars with colorful ribbons or in small gift boxes layered with parchment paper. For holiday parties, stacking them on pretty trays with fresh cranberries and rosemary sprigs adds to the festive vibe. You can also pop a few into clear cellophane bags tied with twine for edible favors guests love!
Make Ahead and Storage
Storing Leftovers
I store leftover cranberry jelly candies in airtight containers at room temperature, layered between parchment paper. I found that keeping them cool but not refrigerated preserves their texture best. They last beautifully for up to a month, though mine rarely survive that long!
Freezing
Freezing isn’t my go-to for these candies because the sugar coating can become sticky once thawed, but in a pinch, you can freeze them in a sealed container with parchment layers. Just let them thaw fully at room temperature before serving.
Reheating
Since these are candies, you won’t actually reheat them, but if the sugar coating softens, just let them sit out uncovered for a few hours to re-crystallize. It’s a little trick I learned after storing in a more humid environment.
FAQs
-
Can I use cranberry juice cocktail instead of pure cranberry juice?
I don’t recommend using cranberry juice cocktail because it usually contains added sugars and other juices, which changes the candy’s texture and sweetness. Pure cranberry juice gives you that perfect tartness and helps the candies set properly.
-
What’s the best way to cut the jelly candies without them sticking?
After chilling, coat the jelly slab thoroughly with granulated sugar, and generously grease your knife with nonstick spray before each cut. This stops the candy from sticking and gives you clean edges.
- How long do cranberry jelly candies last?
Stored properly in an airtight container at room temperature, your candies will stay fresh for up to a month. Just make sure to layer them between parchment paper to prevent sticking.
-
Do I need a special thermometer for this recipe?
It’s best to use a digital candy thermometer for accuracy. You can use a handheld probe or one that clamps to your pot, which frees up your hands while cooking. Accurate temperature is key to perfect gummies!
Final Thoughts
This Cranberry Jelly Candies Recipe has become one of my favorite homemade treats—simple ingredients, a few key techniques, and just a bit of patience lead to candy that feels special and tastes incredible. Whether you’re making them for the holidays, a party, or a sweet gift, they never disappoint. I can’t wait for you to try this recipe yourself and hear what you think—once you make your first batch, you might just be hooked like me!
Print
Cranberry Jelly Candies Recipe
- Prep Time: 30 minutes
- Cook Time: 30 minutes
- Total Time: 5 hours plus 1-2 days drying time
- Yield: 50-60 squares
- Category: Candy
- Method: Stovetop
- Cuisine: American
Description
Festive Cranberry Jelly Candies are delightful, tangy-sweet treats made from pure cranberry juice and gelatin, coated in sugar for a crunchy finish. These homemade jelly candies are perfect for holiday gifting or festive gatherings, combining a satisfying chew with a beautiful crystalline sugar coating.
Ingredients
Candy Ingredients
- Nonstick spray, for greasing tin and knife
- 240 milliliters cold cranberry juice (1 cup)
- 35 grams powdered gelatin (five 7-gram packets, or about 3 1/2 tablespoons)
- 650 grams granulated sugar (about 3 1/4 cups, plus more for coating candies)
- 180 milliliters boiling cranberry juice (3/4 cup)
Instructions
- Prepare Pan: Line an 8×8-inch square tin with parchment paper in a criss-cross pattern allowing a 1-inch overhang on all sides. Generously grease the parchment with nonstick spray to prevent sticking. Set this prepared pan aside.
- Mix Gelatin with Cold Juice: Pour the cold cranberry juice into a large stock pot. Sprinkle the powdered gelatin evenly over the surface and whisk to combine, allowing the gelatin to bloom into the liquid.
- Add Boiling Juice and Sugar: Add the boiling cranberry juice and granulated sugar to the pot. Whisk thoroughly to dissolve the sugar and blend all ingredients evenly.
- Cook to Temperature: Bring the mixture to a boil over high heat, which takes about 5 minutes. Then reduce heat to medium and simmer, stirring occasionally with a heat-resistant spoon, until the mixture reaches 107°C (225°F) on a digital thermometer. This step takes 20-25 minutes or longer, requiring patience to avoid scorching.
- Remove Bubbles and Pour: Remove the pot from heat. Use a skimmer or fine mesh strainer to gently remove any large bubbles that have formed on the surface to ensure a smooth jelly. Pour the mixture into the prepared tin. Don’t worry about residual bubbles or foam; these will be masked when coated with sugar.
- Refrigerate Until Firm: Refrigerate the pan for at least 4 hours or overnight until the jelly slab is firm and set.
- Prepare Sugar Coating Area: Line a large tray with parchment paper or a silicone baking mat. Generously coat a large chopping board with 2-3 scoops of granulated sugar for rolling the candies.
- Unmold and Sugar Coat: Flip the chilled cranberry jelly slab onto the sugared chopping board and peel away the parchment liner. Use your hands to spread granulated sugar all over the slab, coating both sides thoroughly to prevent sticking.
- Score the Candy: Lightly mark the candy slab with the back of your knife into squares as a cutting guide. You can mark 7 x 7 rows for approximately 49 candies or 8 x 8 rows for about 64 candies.
- Cut Candies: Using a sharp, well-oiled chef’s knife, cut along the guidelines into squares carefully.
- Roll in Sugar: Roll each individual candy square in granulated sugar to coat all sticky surfaces completely, enhancing texture and preventing sticking.
- Arrange and Dry: Place the coated candies on the prepared tray, ensuring they do not touch each other. Leave them uncovered at room temperature to dry for 1-2 days. During this time, the sugar crystallizes forming a crunchy outer coating.
- Store Properly: Once dried, layer the cranberry jelly candies between sheets of parchment paper and store in an airtight container at room temperature for up to one month.
Notes
- Use 100% cranberry juice rather than cranberry juice cocktail to avoid overly sweet final candies due to added sugars in juice blends.
- A digital thermometer is essential for accurate temperature measurement; use either a standard probe or one that clamps to your pot to free your hands.
- This recipe uses powdered gelatin, but leaf gelatin can also be used with appropriate conversion. Understanding the differences helps in ensuring texture consistency.
- Plan ahead as after coating, the candies require 1-2 days of drying at room temperature to develop the characteristic crunchy sugar coating.
Nutrition
- Serving Size: 1 candy (approximate)
- Calories: 70 kcal
- Sugar: 17 g
- Sodium: 5 mg
- Fat: 0 g
- Saturated Fat: 0 g
- Unsaturated Fat: 0 g
- Trans Fat: 0 g
- Carbohydrates: 18 g
- Fiber: 0 g
- Protein: 0 g
- Cholesterol: 0 mg


