
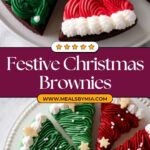
If you’re dreaming of desserts that bring that merry sparkle to your holiday table, I’ve got just the thing for you: a fun and easy Festive Christmas Brownie Decorations Recipe that’ll make your brownies the star of the party. I absolutely love how these frosted Christmas brownies turn out — thick, fudgy, and dressed up in all the red, green, and gold trimmings. Stick with me, and I’ll walk you through all the little secrets to make your brownies look as magical as they taste!
Why You’ll Love This Recipe
- Simple yet Stunning: You don’t have to be a pro baker to make these brownies look festive and impressive.
- Customizable Colors: Adjust your frosting colors to suit your style or to avoid artificial dyes.
- Family Favorite: I’ve seen kids and adults alike go crazy for these sweet treats every single year.
- Perfect for Gifting: Wrapped in holiday boxes, these brownies make thoughtful and homemade gifts.

Ingredients You’ll Need
The magic of this Festive Christmas Brownie Decorations Recipe lies in combining trusty basic ingredients that you probably already have with a few special decorative touches. Picking good-quality frosting and edible decorations really brings it all together.
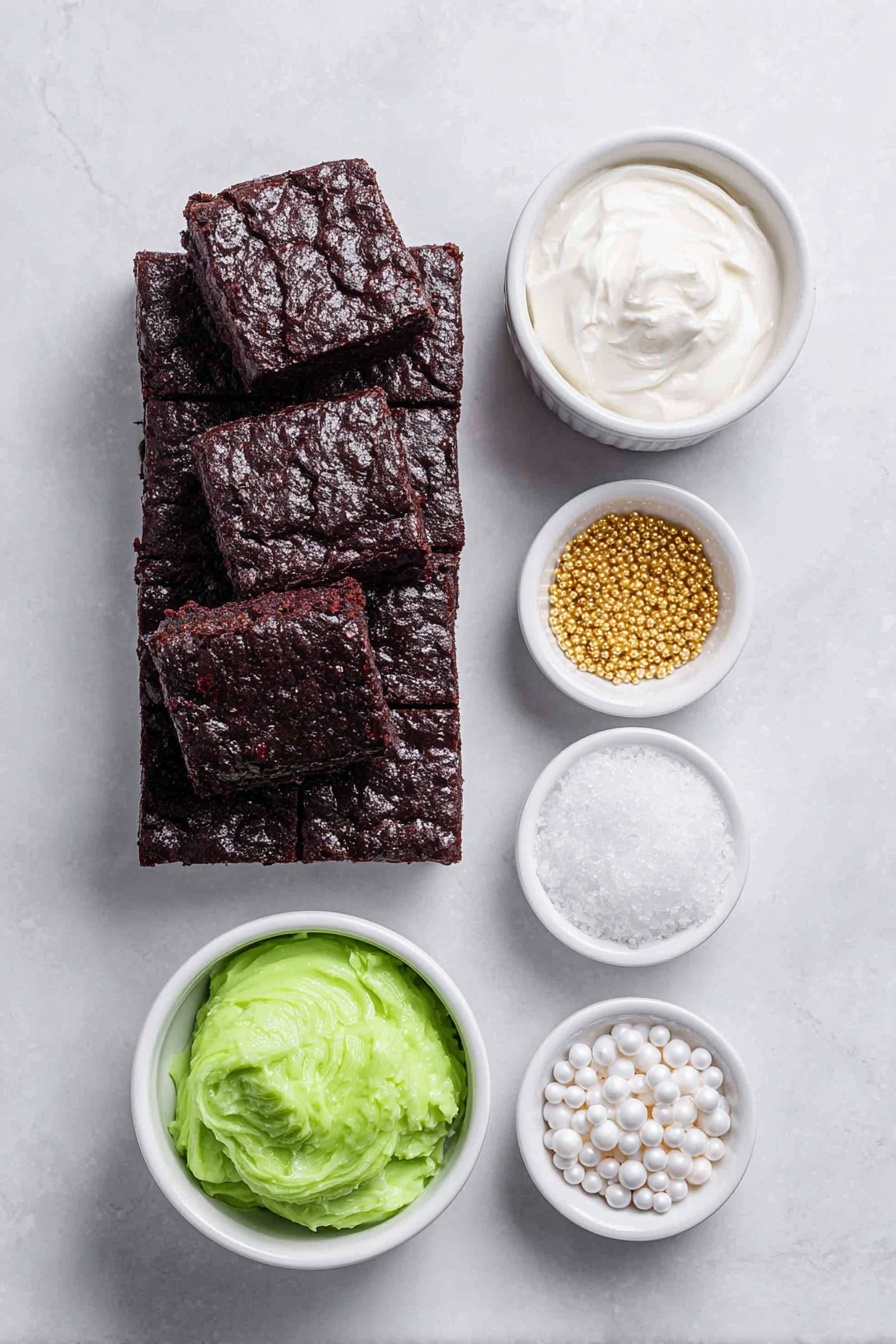
- Brownie Mix: Using two boxes or a double batch gives you thick, fudgy brownies that hold up well to all the frosting and decorations.
- White Frosting: This is your canvas! I prefer a creamy, smooth frosting that’s easy to color and pipe.
- Edible Gel Food Coloring: Gel colors give vibrant shades without thinning your frosting — plus you can avoid artificial dyes if you like.
- Edible Gold Stars: These add a classy sparkle that screams Christmas cheer.
- White Pearl Sprinkles: I love how these mimic snowflakes or fairy dust on the brownie trees.
- Icing Bags and Frosting Tips: Essential for piping neat shapes and details—you can keep it simple with a large star tip like 1M or get creative.
Variations
I love playing around with this Festive Christmas Brownie Decorations Recipe to suit different tastes and occasions. You can make it as classic or as quirky as you want — the decorating part is perfect for getting creative.
- Gluten-Free Variation: I once swapped in a gluten-free brownie mix and still got fantastic texture and flavor—just watch the baking times closely.
- Vegan Version: Using dairy-free frosting and eggless brownies lets you share these treats with everyone at your holiday gathering.
- Nutty Twist: Adding chopped nuts to the brownie batter ups the crunch factor, which some of my family adore.
- Flavor Infusions: You can infuse your frosting with peppermint extract or orange zest to echo classic Christmas flavors.
How to Make Festive Christmas Brownie Decorations Recipe
Step 1: Bake Your Brownies Just Right
Start by preheating your oven according to the brownie mix instructions. I love using a 9-inch springform pan sprayed with oil because it helps create those thick, luscious brownies — plus it’s easy to pop them out without a mess. Mix both boxes or your double batch of brownie dough, then pour it evenly into the pan. Since it’s a double batch, I learned that baking can take a bit longer than the box says, so keep eyeing it after the standard time and use a toothpick to test doneness—it should come out clean or with a few moist crumbs. Patience here pays off with fudgy perfection!
Step 2: Prepare Your Frosting Colors
While your brownies cool (a crucial step or your frosting will just melt off!), get your frostings ready. In small bowls, mix some white frosting with red and green gel food coloring. The gel colors let you tweak the shade bit by bit—I prefer a vibrant but slightly translucent tone that still lets the frosting’s creaminess shine through. Keep some pure white frosting aside for contrast. Load each color into separate icing bags fitted with your favorite frosting tip. Trust me, having nice, snug bags with tips like the large star (1M) will help you get those clean, festive shapes.
Step 3: Slice & Decorate Like a Pro
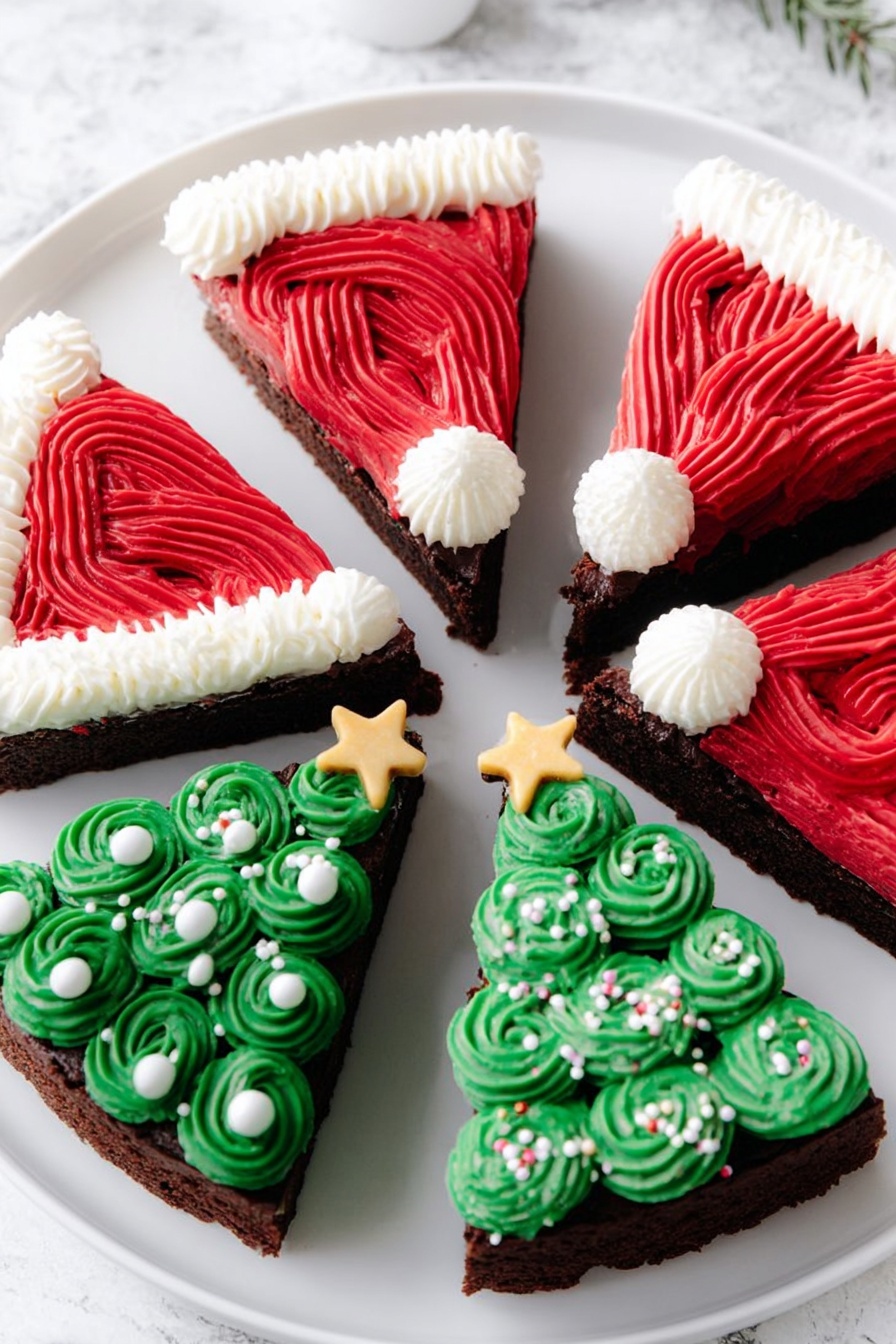
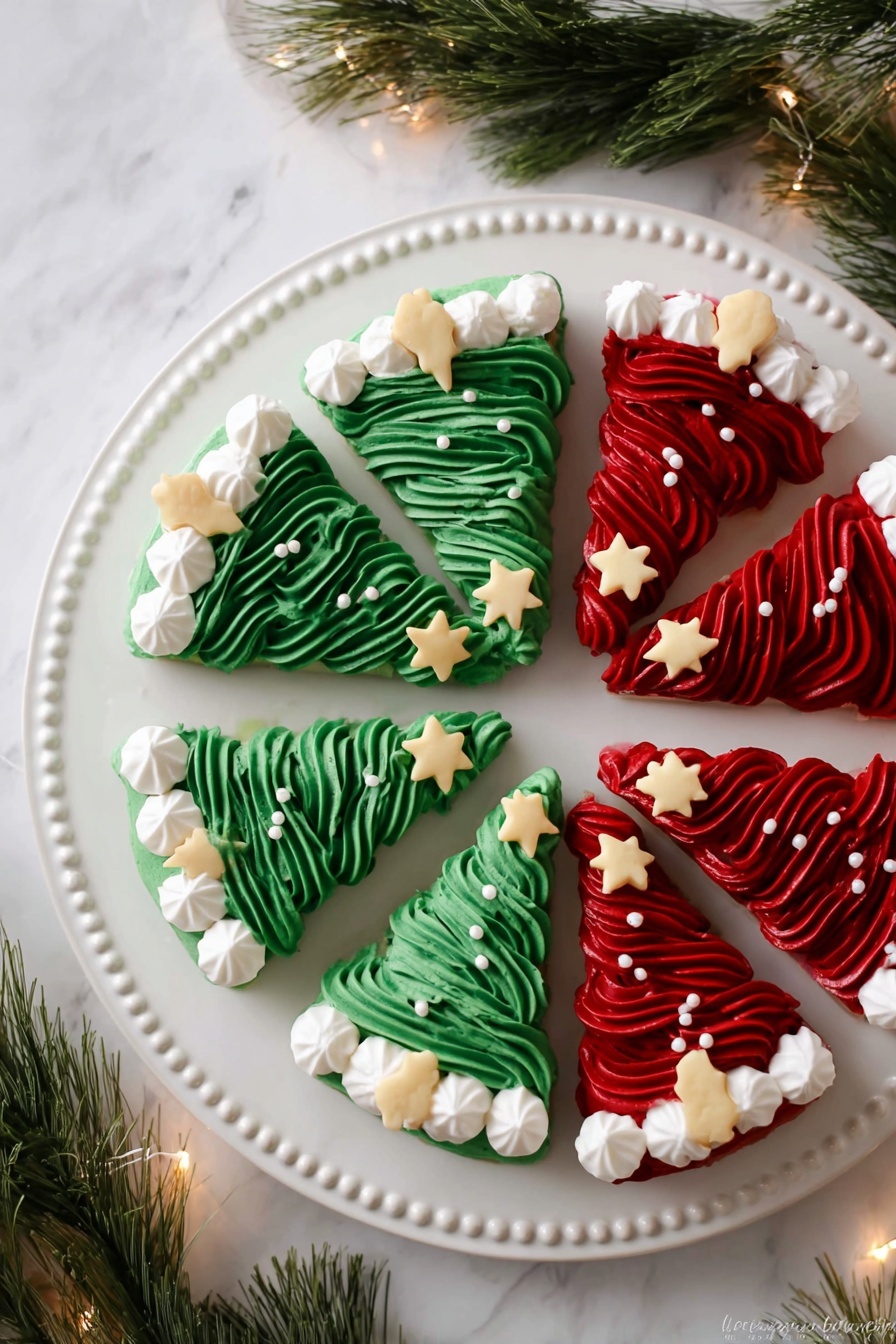
Once your brownies are fully cooled, remove them gently from the pan and slice into 8 even triangles. These triangle shapes make perfect little “christmas trees” for your decorating. Pipe green frosting to create tree shapes, then add white pearl sprinkles to mimic snow and top with edible gold stars for that magical glow. For Santa hat brownies, use red and white frosting stripes and a fluffy-looking white frosting base. This step is where your personality shines — I love how relaxing it can be to slowly decorate each square, and kids get so involved (and proud!) when they help out.
Serve these beauties at your holiday gatherings or gift them wrapped up with festive ribbons. Watching everyone’s faces light up as they bite into these festive treats is a highlight of my Christmas season.
Pro Tips for Making Festive Christmas Brownie Decorations Recipe
- Cool Completely Before Frosting: This one’s huge! Warm brownies will melt your frosting and make decorating a sticky disaster.
- Use Gel Food Colorings: They give you vibrant colors without thinning the frosting like liquid dyes do.
- Practice Piping on Parchment: If you’re new to icing bags, test a few swirls on parchment paper before decorating your brownies.
- Double Batch Caution: Since I used two boxes of mix, baking took longer—watch carefully so your brownies don’t dry out!
How to Serve Festive Christmas Brownie Decorations Recipe
Garnishes
For me, the white pearl sprinkles and edible gold stars are the MVPs of garnishes — they add that classic holiday shimmer and a bit of texture. I sometimes dust a tiny sprinkle of powdered sugar for a dusting of “snow” that gives an extra dreamy effect right before serving.
Side Dishes
These brownies are rich, so I like pairing them with lighter companions like fresh fruit platters, a tangy cranberry sauce, or even a cool scoop of vanilla bean ice cream to balance out the sweetness.
Creative Ways to Present
One Christmas, I arranged the brownies on a platter shaped like a wreath, using green frosting trees to form a ring and little red candies to mimic berries. Wrapping individual brownies in clear cellophane with festive ribbons also makes them feel extra special as gifts or party favors.
Make Ahead and Storage
Storing Leftovers
I store leftover decorated brownies in an airtight container at room temperature for up to 3 days. If your holiday party runs long, you can refrigerate them too, but I like to bring them back to room temp before serving for maximum fudgy goodness.
Freezing
If you want to freeze them, I recommend frosted but undecorated brownies. Freeze in a single layer, wrapped tightly in plastic wrap and foil. When ready, thaw overnight and decorate freshly for best results — frosting textures can change after freezing.
Reheating
Reheat unfrosted brownies briefly in the microwave (15-20 seconds) or oven (300°F for 10 minutes) to bring back softness. Avoid reheating decorated brownies since frosting can melt and decorations shift.
FAQs
-
Can I use homemade brownies for this Festive Christmas Brownie Decorations Recipe?
Absolutely! Homemade brownies work wonderfully, especially if you prefer your own texture and flavors. Just be sure they’re baked thick and fully cooled before decorating.
-
What’s the best way to avoid frosting melting on warm brownies?
Patience is key! Let the brownies cool completely at room temperature, or even chill them briefly before frosting. This prevents the frosting from sliding off or melting too quickly.
- Can I make the brownie decorations ahead of time?
You can prepare the brownies ahead and store them frozen without frosting. Decorate them a day before your event and keep them covered in an airtight container if possible.
- Are there alternatives to edible gold stars if I can’t find them?
Yes! You can use gold sugar sprinkles, glitter, or even tiny dried fruit pieces like cranberries for a festive touch. Just make sure anything you use is safe to eat!
Final Thoughts
I can’t recommend this Festive Christmas Brownie Decorations Recipe enough if you want a guaranteed crowd-pleaser that also lets you have fun decorating. I remember the first time I tried it—I was nervous about frosting the brownies, but it ended up being so rewarding (and delicious). Whether you’re baking for family, friends, or a festive potluck, these brownies bring that warm, joyful holiday spirit to every bite. Trust me, once you start, you’ll want to keep coming back to this recipe every Christmas!
Print
Festive Christmas Brownie Decorations Recipe
- Prep Time: 15 minutes
- Cook Time: 35 minutes (may vary with double batch)
- Total Time: 50 minutes
- Yield: 8 brownies
- Category: Dessert
- Method: Baking
- Cuisine: American
Description
Celebrate the holiday season with these festive Frosted Christmas Brownies. Thick, rich brownies are transformed into delightful Christmas tree and Santa hat shapes with colorful red, green, and white frostings, sprinkled with edible gold stars and white pearls for an extra touch of holiday magic. Perfect for holiday parties or a sweet seasonal treat.
Ingredients
Brownies
- 2 Boxes of Brownie Mix, or a double batch of homemade brownies
- Cooking spray for pans
Frosting and Decorations
- 1 to 3 jars of White Frosting
- Edible Gel Food Coloring (red and green colors; alternatives allowed to no artificial dyes)
- Edible Gold Stars
- White Pearl Sprinkles
- Icing Bags
- Frosting Tips (large star tip – 1M)
Instructions
- Preheat and Prepare Pan: Preheat your oven following the directions on your brownie mix box. Spray a 9-inch springform pan with cooking spray to prevent sticking.
- Mix and Bake Brownies: Prepare the brownie batter using two boxes or a double batch of your homemade brownie recipe. Pour the batter into the prepared springform pan and bake according to package instructions or until a toothpick inserted comes out clean. Note that a double batch may require additional baking time.
- Cool and Cut Brownies: Allow the brownies to cool completely. Remove the springform pan side and place the baked brownies onto a cutting board. Slice the brownies into 8 triangular pieces.
- Prepare Frosting: Divide white frosting into three small bowls. Mix one bowl with red edible gel food coloring and another with green edible gel food coloring to your preferred shade. Leave one bowl as plain white for contrast.
- Fill Icing Bags: Spoon each colored frosting (red, green, and white) into separate icing bags fitted with your preferred frosting tips, such as a large star tip (1M) for decorative effects.
- Decorate Brownies: Use the green frosting to pipe Christmas tree shapes on the brownies and decorate with white pearl sprinkles and edible gold stars. For Santa hat brownies, combine green and white frosting for a festive look.
- Serve and Enjoy: Plate your decorated Christmas brownies and serve as a delicious holiday treat that’s sure to impress family and friends.
Notes
- You can use one box or single batch of brownies if you prefer thinner brownies; two boxes create extra thick brownies.
- Double batches may take longer than the recommended bake times on the box, so check doneness with a toothpick.
- Adjust the amount of frosting depending on how thick and colorful you want the frosting decorations.
- No artificial food coloring alternatives can be used to keep it natural.
Nutrition
- Serving Size: 1 brownie
- Calories: 350
- Sugar: 28g
- Sodium: 170mg
- Fat: 18g
- Saturated Fat: 7g
- Unsaturated Fat: 9g
- Trans Fat: 0g
- Carbohydrates: 45g
- Fiber: 2g
- Protein: 3g
- Cholesterol: 25mg

