
I absolutely love sharing this Garlic Dill Pickle Recipe because it s a timeless classic that never fails to brighten up any meal. When I first tried making pickles at home, I was amazed by how fresh and flavorful they turned out compared to store-bought versions. This recipe hits that perfect balance of garlicky punch and dill freshness, making each bite delightfully crisp and tangy.
You ll find that these pickles aren’t just great on their own-they elevate sandwiches, burgers, and even charcuterie platters effortlessly. Plus, it s a perfect project for when cucumbers are in season and you want to stash away some homemade goodness for months.
Why You’ll Love This Recipe
- Authentic Flavor: This Garlic Dill Pickle Recipe captures a traditional taste that s both tangy and garlicky, just like my family s favorite homemade jars.
- Simple Ingredients: You only need a handful of pantry staples and fresh cucumbers to whip up a batch of these pickles with ease.
- Long-Lasting Storage: Proper canning lets you enjoy these crunchy pickles for months, perfect for snacking or gifting.
- Great for Beginners: The step-by-step instructions and helpful tips ensure you nail the canning process even if it s your first time.

Ingredients You’ll Need
Each ingredient plays a crucial role in making your Garlic Dill Pickle Recipe pop with flavor and stay crisp. When shopping, choose the freshest cucumbers you can find-preferably pickling cucumbers for that classic crunch.
- Pickling Cucumbers: Look for firm, small to medium-sized cucumbers that are perfect for pickling; they stay crunchy better than regular slicing cucumbers.
- Water: Using filtered water can help avoid any off-flavors that tap water might add to your brine.
- Cider Vinegar: I love using apple cider vinegar for its subtle fruitiness that rounds out the tang.
- Canning or Kosher Salt: This is key-avoid iodized table salt, as it can cloud the brine and affect flavor.
- Garlic Cloves: Fresh garlic cloves give that bold, aromatic kick essential for this garlic dill pickle recipe.
- Fresh Dill: A large head or bunch of fresh dill per jar adds that signature herbaceous note; I prefer to pick mine from my garden when possible.
Variations
I like to tweak this Garlic Dill Pickle Recipe every now and then depending on what flavors I m craving. Feel free to personalize the level of garlic or try adding different spices to make it your signature batch.
- Lemon Dill Pickles: Adding a slice of lemon to each jar gives a bright citrusy lift that my family thoroughly enjoys during summer BBQs.
- Spicy Kick: Toss in a few red chili flakes or a couple of fresh jalapeño slices if you want a hot and tangy punch.
- Low-Sodium Version: You can reduce the salt slightly, but I recommend not cutting it out completely to keep those crisp pickles and safe preservation.
- Herb Twists: Experiment with fresh tarragon or thyme alongside dill for something a little different but just as delicious.
How to Make Garlic Dill Pickle Recipe
Step 1: Soak Cucumbers for Crispiness
Start by soaking your cucumbers in ice-cold water for 3-4 hours. This step is a game-changer because it helps the cucumbers stay crisp after pickling. I discovered this trick after struggling with soggy pickles, and trust me-it really makes a difference.
Step 2: Sterilize Your Jars
Fill a large pan with water and bring it to a boil. Use this boiling water to sterilize your canning jars and lids by submerging them for about 10 minutes. This step ensures your pickles stay safe and delicious for longer storage. I always line my countertop with a clean towel to set the hot jars on, so I don’t risk cracking them.
Step 3: Make the Brine
In a large saucepan, bring 2 quarts of water, 2 cups of apple cider vinegar, and ½ cup of kosher salt to a full boil. Once boiling, reduce the heat to keep the brine hot but not boiling. Hot brine helps purify the jars and infuse the pickles with flavor.
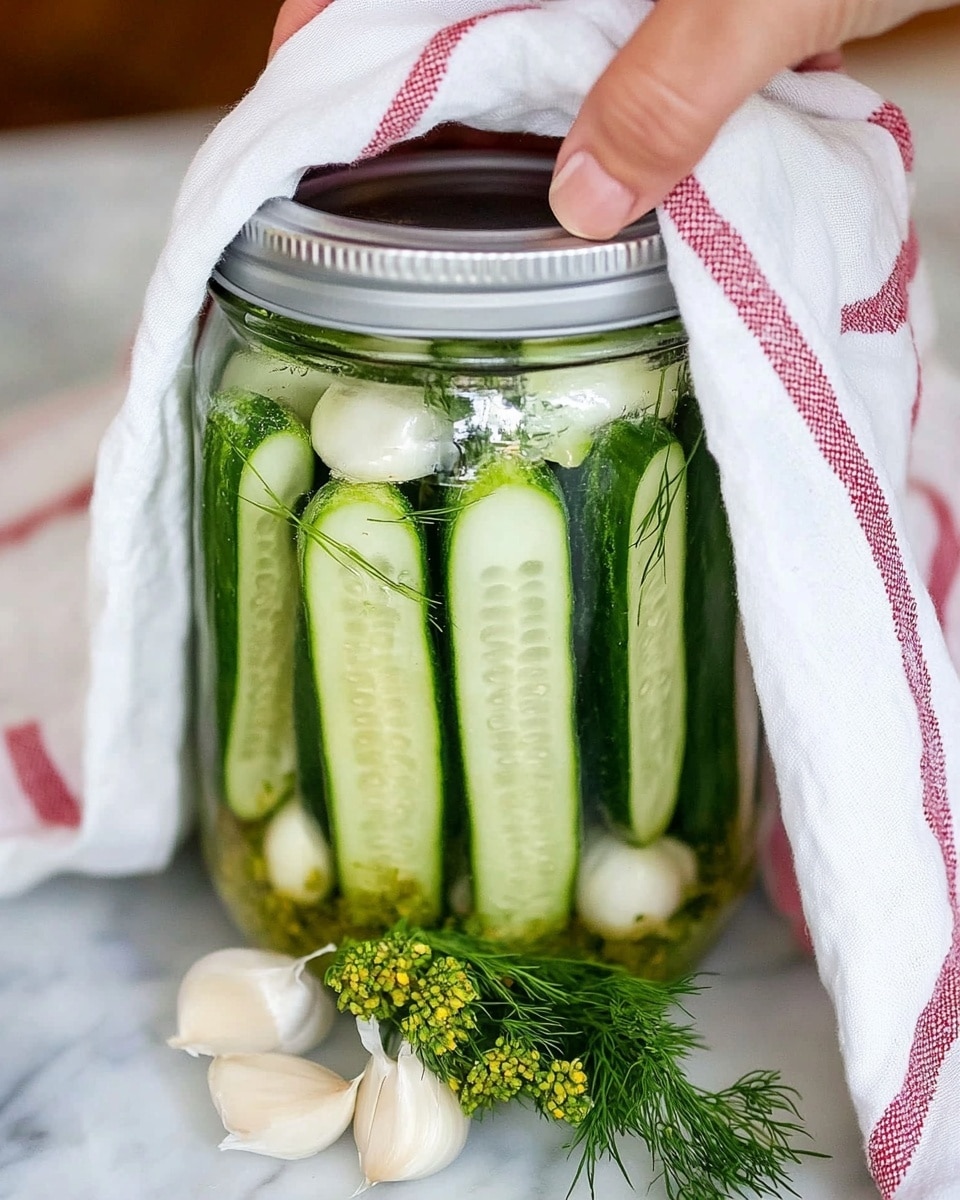
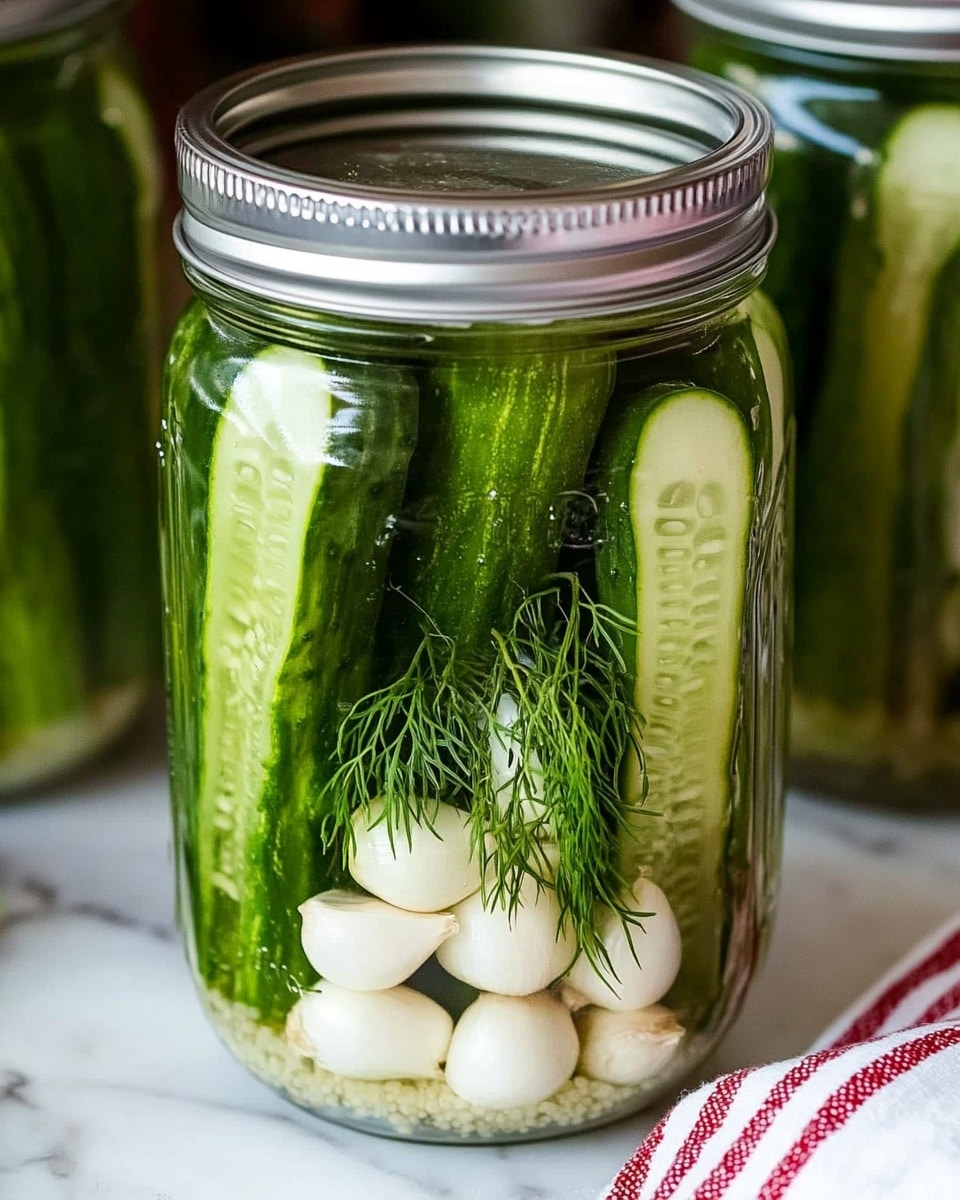
Step 4: Pack Jars with Cucumbers, Garlic, and Dill
Remove a hot jar from the sterilizing pot using tongs and place it on your towel-lined counter. Add 4 peeled garlic cloves and a large head of fresh dill to each jar. Then tightly pack your pre-soaked cucumbers into the jar, standing them upright if you can-it helps maximize space and flavor infusion.
Step 5: Pour Brine and Seal
Pour the hot brine over the cucumbers, filling the jar almost to the top. Use a thin rubber spatula to slide around the jar and release any trapped air bubbles-this little trick helps prevent spoilage and guarantees crisp pickles. Wipe the rim clean with a towel before sealing tightly with sterilized lids and screw bands.
Step 6: Cool and Process Jars Safely
Place your filled jars on a towel and cover with another towel to keep them warm while they cool-this prevents drafts that could affect sealing. With updated safety recommendations, I now recommend a hot water bath at 180°F for 15 minutes to properly seal your jars and keep your pickles safe for shelf storage. If any jars don t seal, simply refrigerate those to enjoy within a few weeks.
Pro Tips for Making Garlic Dill Pickle Recipe
- Choose Pickling Cucumbers: I ve learned that these cucumbers keep their crunch and absorb flavors better than regular ones.
- Don t Skip the Ice Water Soak: Soaking the cucumbers for a few hours really sets these pickles apart by making them extra crisp.
- Use a Rubber Spatula for Air Bubbles: This simple step prevents soft spots and helps your pickles store safely.
- Always Check Jar Seals: I avoid storage headaches by refrigerating any jars that don t seal properly and enjoying them first.
How to Serve Garlic Dill Pickle Recipe
Garnishes
I love serving these pickles with a sprinkle of freshly chopped dill or even a little cracked black pepper on top when I slice them for platters-it adds that fresh, inviting look and boosts the flavor even more. Garlic dill pickles on a cheeseboard with some olives and nuts always wow my guests!
Side Dishes
These pickles are my go-to side for summer burgers, pulled pork sandwiches, or a classic Reuben. They also bring a nice acidic crunch next to rich potato salad or creamy deviled eggs, cutting through the heaviness perfectly.
Creative Ways to Present
For special occasions, I like to stuff some of these pickles with cream cheese and wrap them with a strip of smoked salmon or bacon-it’s a fun appetizer twist. You can also arrange pickles in mason jars with layered herbs and garlic for gifts that look homemade and heartfelt.
Make Ahead and Storage
Storing Leftovers
I store sealed jars in a cool, dark pantry and they stay perfectly crunchy and flavorful for up to 12 months. Once opened, keep pickles refrigerated in their brine, and they ll happily last for several weeks. I always mark the date on the jar to keep track.
Freezing
Freezing isn t my go-to for this Garlic Dill Pickle Recipe since it can alter the texture and make cucumbers mushy, so I typically avoid freezing them. Instead, I focus on canning multiple jars and sharing with friends and family.
Reheating
Since pickles are meant to be enjoyed cold or at room temperature, I don t recommend reheating. Just take them straight from the fridge or let them sit out a bit for the best crunch and flavor.
FAQs
-
Can I use regular cucumbers instead of pickling cucumbers?
You can, but regular slicing cucumbers tend to be more watery and might turn out less crisp after pickling. Pickling cucumbers have thinner skin and fewer seeds, which helps them stay crunchy and soak up the brine better.
-
How long does it take for the pickles to be ready to eat?
After sealing and cooling, allow the pickles to cure for at least 1 to 2 weeks for the best flavor development. Though you can try them sooner, the taste and texture improve significantly with time.
-
Is the hot water bath really necessary?
Yes, the hot water bath is essential for safe canning. It ensures that all bacteria are destroyed and creates a proper vacuum seal, which prevents spoilage and keeps your pickles shelf-stable.
-
What if my jar doesn t seal properly?
If a jar doesn t seal, don t panic! Just store it in the refrigerator and consume those pickles within a few weeks. You can also reprocess the jar with a fresh lid using the hot water bath method if you want to shelf store it.
Final Thoughts
This Garlic Dill Pickle Recipe has become a cherished staple in my kitchen because it s straightforward, rewarding, and produces pickles that everyone raves about. I love how a simple handful of fresh ingredients, paired with a little patience and proper technique, can turn into jars full of crunchy, garlicky goodness. If you re looking to try your hand at pickling, give this recipe a go-you ll enjoy the process just as much as the delicious pickles that come out of it!
Print
Garlic Dill Pickle Recipe
- Prep Time: 20 minutes
- Cook Time: 15 minutes
- Total Time: 35 minutes
- Yield: Approximately 112 servings (based on quantity of cucumbers packed in jars)
- Category: Pickling
- Method: No-Cook
- Cuisine: American
- Diet: Gluten Free
Description
This Garlic Dill Pickle Recipe offers a traditional method for making crisp, tangy pickles infused with fresh garlic and dill. It uses a simple brine of water, cider vinegar, and salt, followed by a hot water bath canning process to ensure safety and longevity. Perfect for those who love homemade pickles with a classic flavor and satisfying crunch.
Ingredients
Vegetables
- 14 pounds pickling cucumbers
Brine
- 2 quarts water
- 2 cups cider vinegar
- 1/2 cup canning or kosher salt
For Each Jar
- 4 garlic cloves
- 1 large head of fresh dill
Instructions
- Soak the cucumbers: Soak the cucumbers in ice cold water for 3-4 hours to hydrate and ensure crispness.
- Sterilize jars and lids: Fill a large pan with water and bring it to a boil. Add the canning jars and lids to sterilize thoroughly.
- Prepare the brine: In a large saucepan, combine water, apple cider vinegar, and salt. Bring to a full boil, then reduce heat to low to keep the brine hot.
- Fill jars with garlic, dill, and cucumbers: Remove one hot jar using tongs and place it on a towel-lined countertop. Add 4 garlic cloves and 1 large head of fresh dill. Pack the prepared cucumbers tightly into the jar.
- Add the brine and remove air bubbles: Pour the hot brine over the cucumbers in each jar, filling it completely. Slide a thin rubber spatula around the inside of the jar to release any trapped air bubbles. Wipe the rim of the jar clean with a towel.
- Seal the jars: Place the sterilized sealing lid on the jar and screw on the cap securely. Repeat this process for all jars.
- Cool the jars: Place the sealed jars on a towel and cover with another towel to prevent air circulation. Allow them to cool completely at room temperature.
- Check seals and process in hot water bath: Ensure all lids have sealed tightly. For safety, process sealed jars in a hot water bath at 180°F (82°C) for 15 minutes, especially if stored beyond refrigeration. If any jars do not seal, refrigerate those immediately.
Notes
- This is a traditional family canning method for dill pickles that has worked for years.
- Due to updated safety recommendations, it is highly advised to process the pickles in a hot water bath for 15 minutes at 180°F to ensure safe sealing and storage.
- If a jar does not seal properly, refrigerate it and consume those pickles first.
Nutrition
- Serving Size: 1 medium pickle (approx. 30g)
- Calories: 10
- Sugar: 1g
- Sodium: 350mg
- Fat: 0g
- Saturated Fat: 0g
- Unsaturated Fat: 0g
- Trans Fat: 0g
- Carbohydrates: 2g
- Fiber: 1g
- Protein: 0.3g
- Cholesterol: 0mg

