
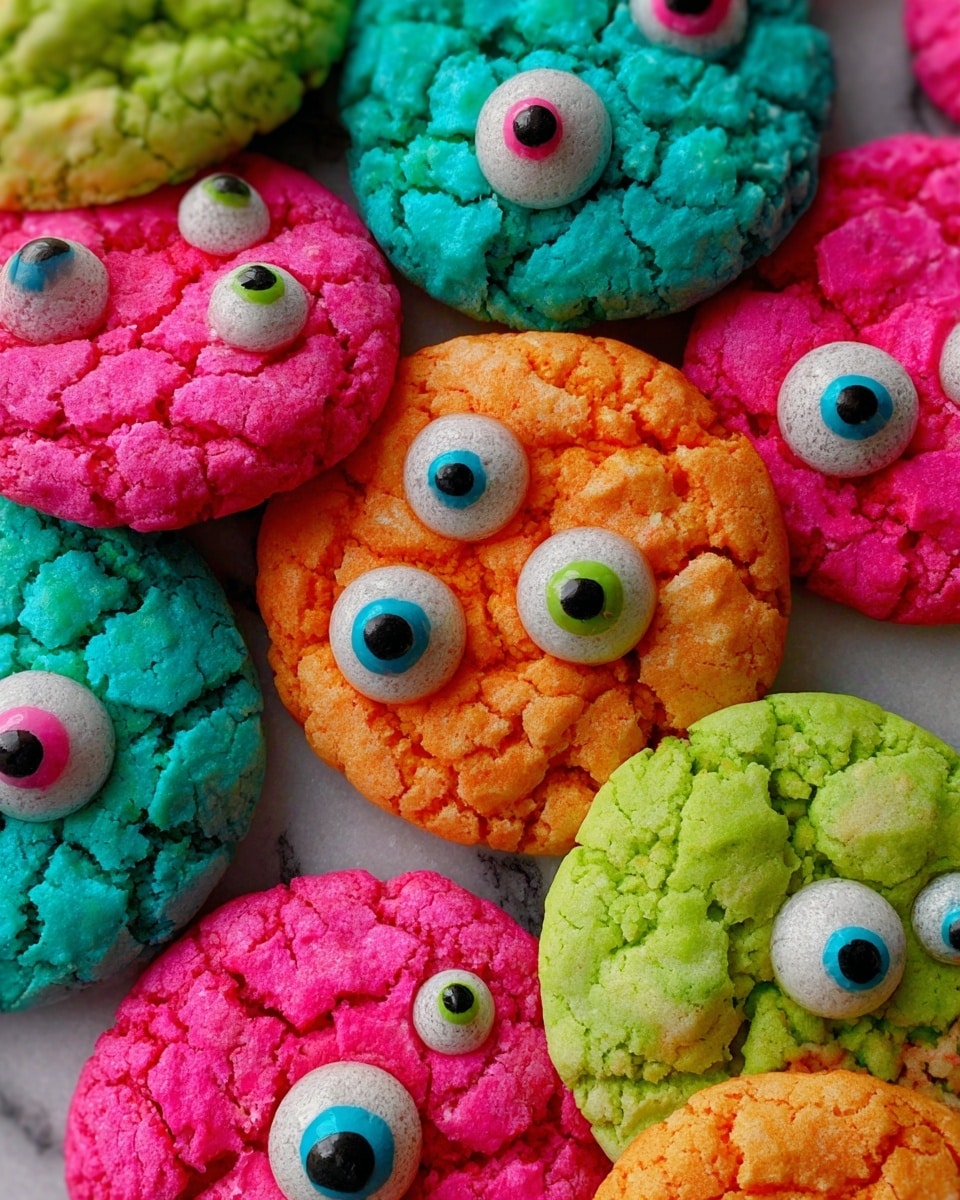
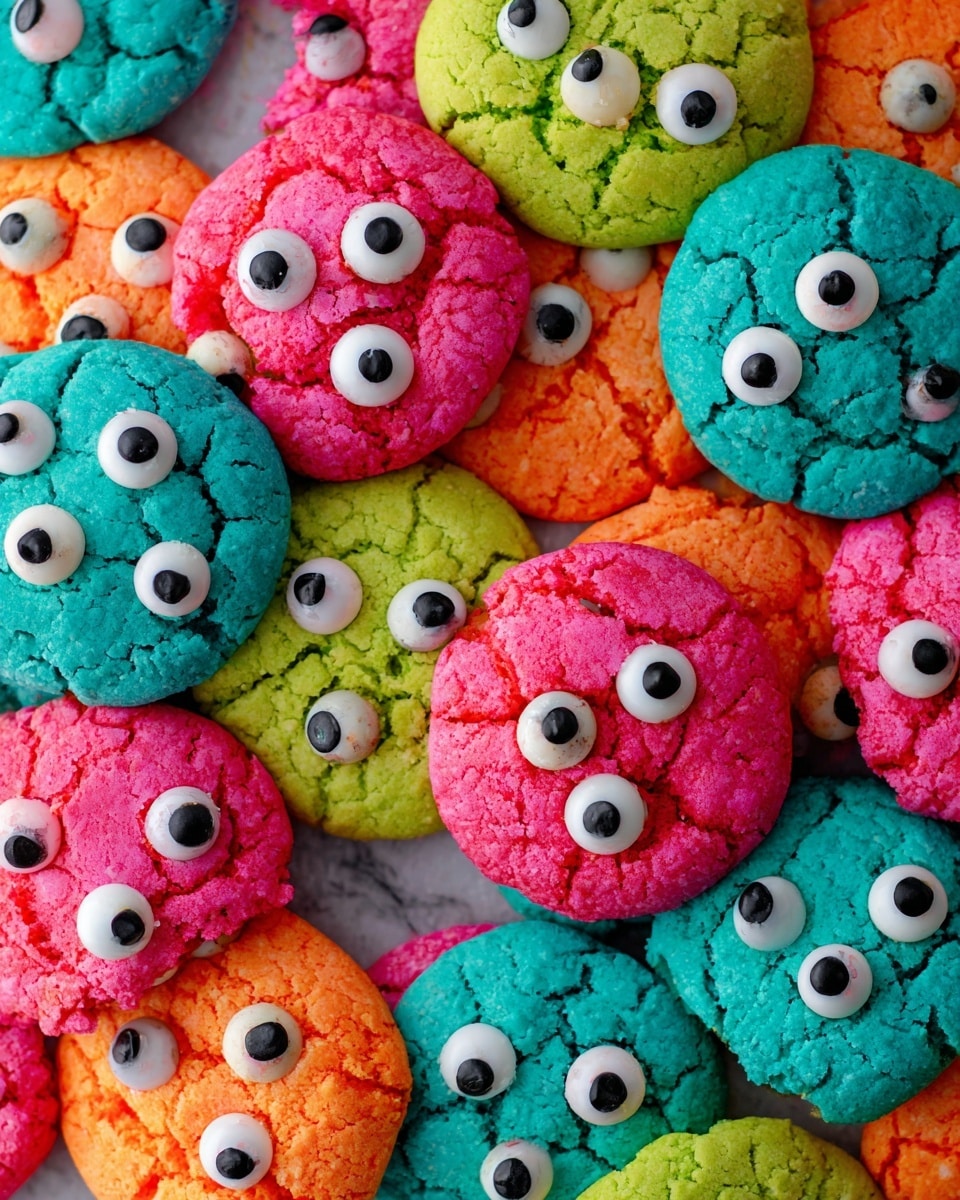
If you’re on the hunt for a fun, vibrant twist on classic cookies that also packs a delightful gooey center, then you absolutely must try this Gooey Monster Cookie Recipe. I absolutely love how these cookies come out with their neon colors and those quirky candy eyeballs, making them perfect for parties, holidays, or just a fun baking day. Trust me, once you make them, you’ll be hooked on their soft, creamy texture and colorful charm!
Why You’ll Love This Recipe
- Vibrant and Fun: Neon food coloring makes every cookie pop with a playful, eye-catching look.
- Soft and Gooey Texture: The cream cheese in the batter creates a rich, tender cookie you just can’t resist.
- Quick and Easy to Make: Using cake mix streamlines the process, so you spend less time mixing and more time enjoying.
- Perfect Party Treat: Candy eyeballs add a whimsical touch that kids and adults adore alike.

Ingredients You’ll Need
These ingredients come together in a way that’s both super simple and deliciously indulgent. The cream cheese keeps things gooey, while the white cake mix offers just the right sweetness and structure. I recommend grabbing neon food coloring—you really want those colors to sing!
- White cake mix: Using a boxed mix saves time and creates a soft, tender base—no need to start from scratch.
- Butter, softened: Helps keep the cookies rich and moist.
- Vanilla extract: Adds warmth and depth of flavor to balance the sweetness.
- Cream cheese, softened: This is the secret to the gooey inside—I always make sure it’s room temperature for easy mixing.
- Egg: Binds everything together and helps with that tender crumb.
- Powdered sugar: Used to coat the cookie balls, it adds a delicate sweetness and a little festive sparkle.
- Neon food coloring: I love using neon shades to make my cookies stand out—be bold!
- Candy eyeballs: These little details make the cookies delightfully “monster-ish” and fun for all ages.
Variations
One of the best parts about this Gooey Monster Cookie Recipe is how you can make it your own. I’ve played around with different colors and even swaps for dietary needs, so feel free to customize to your heart’s content.
- Chocolate Lover’s Variation: I once added mini chocolate chips to the batter before chilling, which gave an extra layer of gooey chocolate goodness.
- Gluten-Free Option: You can swap the cake mix for a gluten-free blend—just make sure it’s for white cake for best texture.
- Less Sweet: If you’re watching sugar, reduce the powdered sugar coating or try a cinnamon-sugar mix for a cozy twist.
- Seasonal Themes: Change up the food coloring and candy eyeballs for holidays—think red and green with festive sprinkles for Christmas monsters!
How to Make Gooey Monster Cookie Recipe
Step 1: Cream Together the Good Stuff
Start by beating the butter, vanilla extract, egg, and cream cheese until everything is smooth and fluffy. This step is key because you want your batter light and airy, which helps create that melt-in-your-mouth texture. I use a stand mixer but a hand mixer works just as well. Just make sure your cream cheese and butter are softened properly—that makes all the difference.
Step 2: Mix in the Cake Mix and Color It Up
Next, mix in the white cake mix until fully combined. Then divide the batter evenly into as many bowls as you want colors (I usually do 3 or 4 to keep things lively). Add a few drops of neon food coloring to each bowl and mix well. This part is so fun—I love watching the colors deepen and become so vibrant!
Step 3: Chill, Roll, and Sugar-Coat
Pop the colored dough balls into the fridge for about 30 minutes to firm up. This step helps the dough handle better so your cookies hold their shape. When chilled, roll the dough into balls and dip each one in powdered sugar—this not only creates a pretty coating but adds a little crunch.
Step 4: Bake and Add the Eyes
Arrange the sugared dough balls on a greased baking sheet, then gently pat them down to flatten slightly. Bake at 350°F (175°C) for 10 to 12 minutes until the edges are set but the centers still look soft—that gooey texture happens here! Right after you take them out, press candy eyeballs into the warm cookies. Let them cool a bit, then prepare to be amazed!
Pro Tips for Making Gooey Monster Cookie Recipe
- Soften Your Cream Cheese Properly: I found that letting cream cheese sit out for at least 30 minutes makes mixing smoother and the texture perfect.
- Don’t Skip the Chilling: Chilling the dough firms it so colors don’t run together and rolling is easier—learned this the hard way!
- Watch Baking Time Closely: Overbaking means losing gooeyness; set a timer and check at 10 minutes for that perfect soft center.
- Add Eyes While Warm: The candy eyeballs stick best to warm cookies—press gently but firmly for a festive finish.
How to Serve Gooey Monster Cookie Recipe
Garnishes
I like to keep it simple with a dusting of extra powdered sugar or a few sprinkles around the edges. Sometimes, I add a drizzle of white chocolate for an extra sweet touch on special occasions. It just ups the “wow” factor without overwhelming the monster vibe!
Side Dishes
These cookies are a sweet star on their own, but I love pairing them with a cold glass of milk or a hot cup of cocoa for cozy moments. They’re also a fun addition to dessert trays next to fruit skewers or vanilla ice cream, balancing the gooey richness.
Creative Ways to Present
For Halloween parties, I’ve arranged them on a platter with small plastic spiders and cobwebs to amp up the monster theme. For kids’ birthdays, stacking them in a colorful cookie tower with matching colored napkins never fails to impress. Presentation definitely adds to the fun!
Make Ahead and Storage
Storing Leftovers
I usually store leftover cookies in an airtight container at room temperature, lined with parchment paper to prevent sticking. They stay soft and delicious for about 3 days if you don’t gobble them up first!
Freezing
These cookies freeze wonderfully. After baking and cooling, wrap them individually in plastic wrap and place in a freezer-safe bag. When I’ve done this, they keep their gooey texture for up to 2 months. Just thaw at room temperature before serving.
Reheating
To reheat, I pop a cookie or two in the microwave for about 10 seconds—it warms them right up and revives that gooey center. You can also heat them briefly in a 300°F oven wrapped in foil, but microwave is my go-to for quick fixes.
FAQs
-
Can I use a different type of cake mix for the Gooey Monster Cookie Recipe?
Absolutely! While white cake mix gives the brightest colors and sweetest base, you can experiment with yellow or even funfetti cake mixes to add a different flavor and look. Just keep in mind that darker mixes might tone down the neon coloring a bit.
-
What if I don’t have neon food coloring?
No problem! Regular food coloring works just fine. The neon shades are just a fun twist to amp up the visual impact of your monster cookies, but classic colors will still make delicious, festive treats.
-
How do I ensure the cookies stay gooey and don’t overbake?
The key is to watch the baking time closely and pull them out when the edges look set but the centers still look soft and slightly underbaked. They’ll firm up a bit as they cool but stay delightfully gooey inside.
-
Can I make the dough ahead of time?
Yes! You can mix the dough and store it covered in the fridge for up to 24 hours before rolling and baking. It actually helps the flavors develop and makes handling easier when you bake the next day.
Final Thoughts
This Gooey Monster Cookie Recipe has quickly become one of my all-time favorites because it’s easy, fun, and delivers that wow factor every single time. Whether you’re baking with kids or looking to add some color and fun to your cookie game, these monsters never disappoint. I can’t wait for you to try them—you’ll love having these quirky, gooey treats in your baking repertoire as much as I do!
Print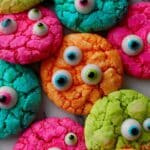
Gooey Monster Cookie Recipe
- Prep Time: 10 minutes
- Cook Time: 10-12 minutes
- Total Time: 50-52 minutes (including chilling time)
- Yield: 24 cookies
- Category: Dessert
- Method: Baking
- Cuisine: American
Description
These Gooey Monster Cookies are vibrant, fun, and irresistibly soft treats perfect for any occasion. Made with white cake mix, cream cheese, and neon food coloring, they’re delightfully gooey with a sweet powdered sugar coating and adorable candy eyeballs to bring the monsters to life. Easy to make and sure to impress kids and adults alike!
Ingredients
Main Ingredients
- 1 box white cake mix
- 1/2 cup butter, softened
- 1/2 teaspoon vanilla extract
- 8 oz cream cheese, softened
- 1 egg
Additional Ingredients
- Powdered sugar (for coating)
- Neon food coloring (to create vibrant colors)
- Candy eyeballs (for decoration)
Instructions
- Prepare Wet Ingredients: In a large mixing bowl, beat the softened butter, vanilla extract, egg, and softened cream cheese together until the mixture becomes fluffy and well combined, creating the base for your cookie batter.
- Add Dry Ingredients: Mix in the white cake mix thoroughly into the wet mixture until a uniform batter forms, ensuring no lumps remain.
- Divide and Color Batter: Divide the batter evenly into separate bowls depending on how many vibrant colors you want your cookies to be. Add a few drops of neon food coloring to each bowl and mix until the color is evenly incorporated.
- Chill the Dough: Place the colored dough bowls in the refrigerator and chill for 30 minutes. This step helps the dough firm up so it’s easier to handle and shape.
- Shape and Coat: Roll the chilled dough into small balls. Dip each ball into a bowl of powdered sugar to coat them generously, which helps create the gooey, sweet exterior after baking.
- Prepare for Baking: Place the powdered sugar-coated dough balls onto a greased cookie sheet and gently pat them down slightly to form cookie shapes.
- Bake the Cookies: Bake the cookies in a preheated oven at 350°F (175°C) for 10-12 minutes. Bake just until the edges are set but the centers remain soft and gooey.
- Add Monster Eyes: Remove the cookies from the oven and while still warm, press candy eyeballs onto the cookies to give them a fun, monster-like appearance.
- Serve and Enjoy: Allow cookies to cool slightly then enjoy these gooey, colorful monster cookies fresh for the best texture and flavor.
Notes
- Using neon food coloring gives the cookies bright, fun colors but any food coloring can be used.
- Chilling the dough is essential for easy handling and to prevent cookies from spreading too much during baking.
- Do not overbake; cookies should be soft and gooey in the middle.
- Store leftovers in an airtight container to maintain softness for up to 3 days.
- Feel free to customize with different candy eyes or add-ins like sprinkles for extra fun.
Nutrition
- Serving Size: 1 cookie
- Calories: 110
- Sugar: 10g
- Sodium: 110mg
- Fat: 5g
- Saturated Fat: 3g
- Unsaturated Fat: 2g
- Trans Fat: 0g
- Carbohydrates: 15g
- Fiber: 0.3g
- Protein: 1g
- Cholesterol: 20mg


