
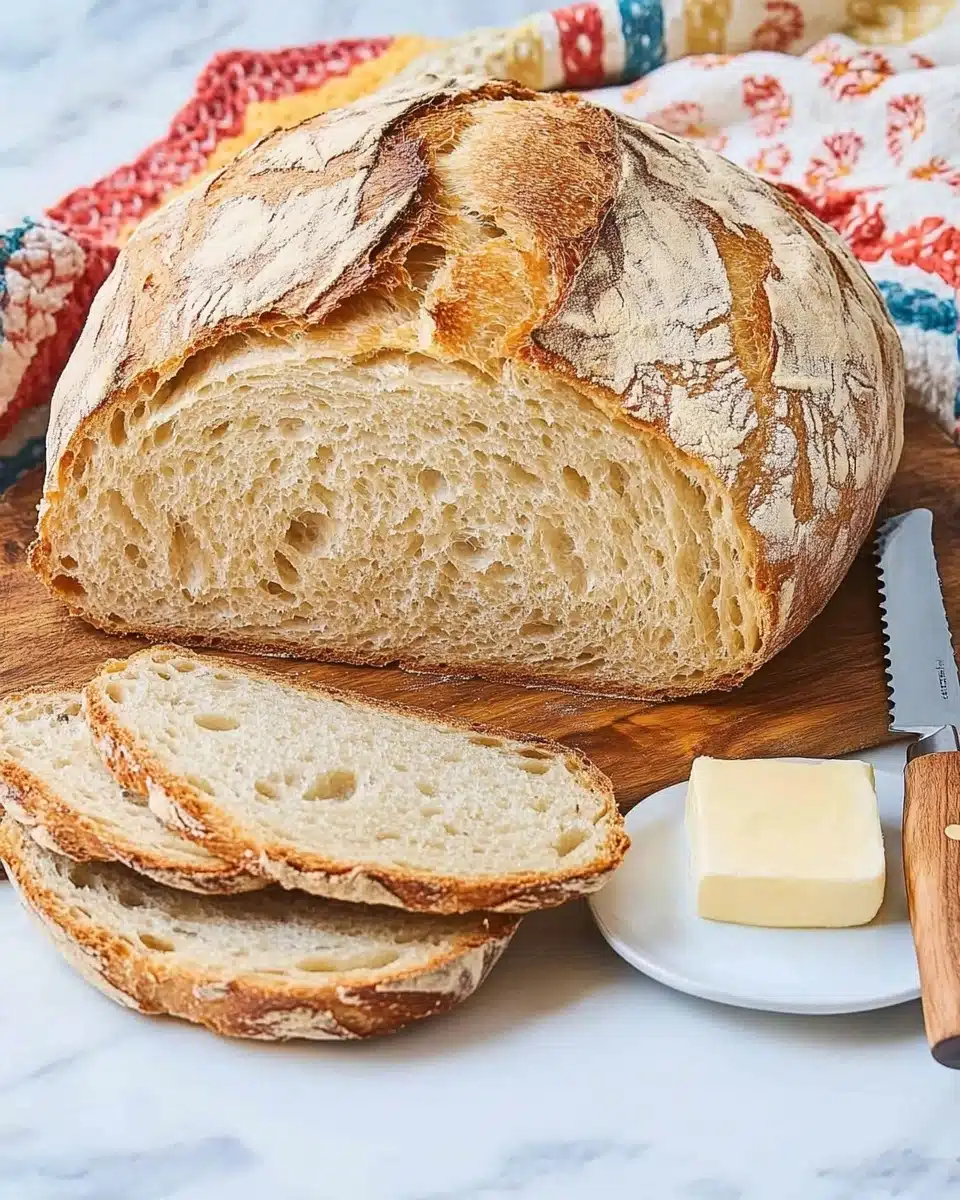
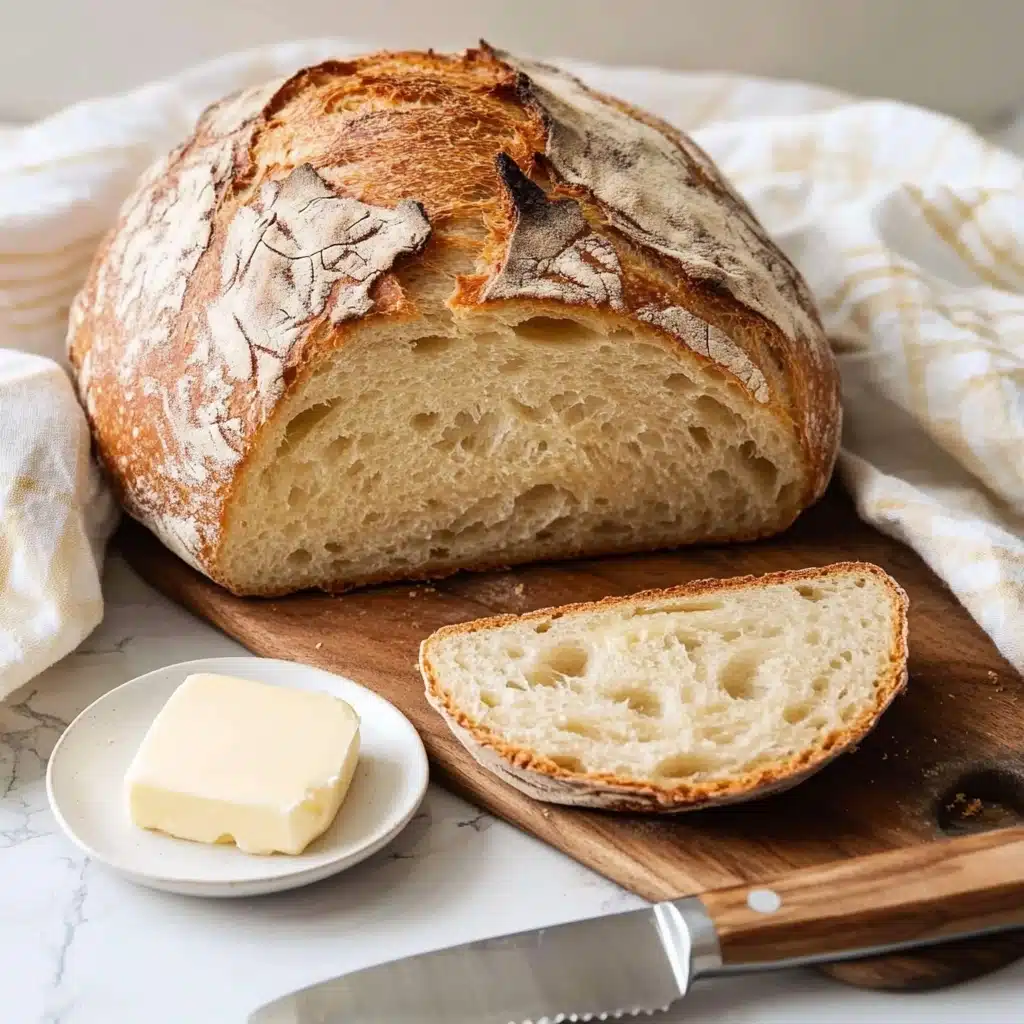
If there’s any recipe that will transport you straight to your Nonna’s cozy kitchen, it’s Grandma’s Italian Bread. Imagine a loaf so warm, golden, and crusty that simply tearing it apart with your hands creates a cloud of yeasty, bakery-scented nostalgia—this is the bread that has been the heart of every Italian table in my family for generations.
Why You’ll Love This Recipe
- Crusty on the Outside, Pillowy on the Inside: You get that irresistible golden crust with a tender, airy crumb that makes every bite a pure comfort.
- Deeply Nostalgic: Baking Grandma’s Italian Bread fills your home with that old-world aroma you remember (or dream of!), instantly transporting you to Sunday dinner in an Italian kitchen.
- Simple Pantry Staples: No fancy tools or mysterious ingredients here—just humble basics coming together in a showstopping loaf!
- Perfect for Sharing: This recipe makes two generous loaves, so there’s always enough for family, friends, or—let’s be honest—seconds and thirds.

Ingredients You’ll Need
One of the joys of Grandma’s Italian Bread is just how wonderfully unfussy the ingredient list is. Each piece—from the flour down to that touch of sugar—plays a role in perfectly balancing flavor, creating a sturdy crumb, and developing that signature golden crust.
- Dry yeast: The backbone of the bread’s gentle rise and its classic hint of ferment-y flavor. For best results, make sure your yeast is fresh and active.
- Warm water: Activates the yeast and hydrates the flour, resulting in a beautifully textured dough. Be sure your water isn’t too hot—think bath water warm.
- All-purpose flour (divided): The trusty base for the dough, contributing both structure and that fluffy bite. Adding it in stages helps everything incorporate smoothly.
- Shortening: This little touch adds tenderness, ensuring your bread stays moist and soft—not dry.
- Salt: Essential for both flavor and helping to strengthen the gluten network. Don’t skip or skimp!
- Sugar: Just enough to feed the yeast and round out the flavors without making the bread sweet.
- Hot water for baking: Poured into a hot pan, this creates steam, giving the crust that irresistible crackly finish.
Variations
One of my favorite things about Grandma’s Italian Bread? It’s just begging for a personal twist! Whether you want to spice it up, swap ingredients, or adapt it for special diets, this recipe welcomes your creativity.
- Whole Wheat Version: Replace up to half of the all-purpose flour with whole wheat flour for a heartier, earthier loaf (add a bit more water if needed).
- Herbed Italian Loaf: Knead in chopped fresh rosemary or oregano during the final minutes of mixing for an aromatic upgrade that’s stunning with soups.
- Dairy-Free Adaptation: Swap out the shortening for a non-dairy alternative like coconut oil or vegan butter if you’re catering to a dairy-free crowd.
- Seeded Crust: Before baking, brush the loaf lightly with water and sprinkle with sesame or poppy seeds for a delightful crunch and visual flair.
How to Make Grandma’s Italian Bread
Step 1: Activate the Yeast
Start by dissolving your dry yeast in warm water in a large mixing bowl. Give it a gentle stir, then let it sit for a few minutes until it looks a bit foamy on top—this means your yeast is alive and ready to turn your dough into beautifully risen bread. If the water is too hot or too cold, the yeast won’t wake up, so aim for that cozy bathwater temperature.
Step 2: Mix the Dough
Add 3 cups of your flour to the yeast mixture, along with shortening, salt, and sugar. Using an electric mixer makes quick work of the first mix—beat for two minutes to build the dough’s structure and add some air. After that, gradually add in the remaining flour, mixing until a sticky but cohesive dough ball forms. Don’t worry if it clings to your hands a bit—that’s exactly right for this recipe!
Step 3: Knead to Perfection
Turn your dough out onto a floured surface and sprinkle just a bit of flour on top to keep things from sticking. Knead gently for about 7 minutes—you’re looking for a springy, elastic dough that bounces back under your fingers. Too much flour can make the bread dense, so use the bare minimum to prevent sticking, and trust the process!
Step 4: First Rise
Once the dough is smooth and supple, let it rest for 5 minutes, then transfer it to a well-greased bowl. Flip it over so both sides get a light coating of oil—this keeps it from drying out. Cover the bowl loosely with a clean towel and let the dough rise in a warm, draft-free spot for at least two hours, or until doubled in size. This slow rise is where the magic (and flavor) happens.
Step 5: Shape & Second Rise
Punch the dough down to release the air, then divide it in half. With lightly floured hands, form each portion into a gently rounded ball and place each on its own sheet of parchment. Let these loaves rest and rise for another 40 minutes; this helps create an airy, tender crumb once baked.
Step 6: Preheat the Oven
Place a pizza stone in the middle of your oven, then slide a broiler pan or heavy metal tray onto the lower rack—this will hold hot water and create steam. Preheat to 450°F and give your stone at least 20 minutes to soak up the heat. No pizza stone? No problem! An upside-down rimmed baking sheet preheated for 10 minutes does the trick.
Step 7: Score & Bake
Lightly dust the first loaf with flour, then use a sharp knife to score a big “X” on top—this helps the bread expand (and looks incredibly rustic). Slide the dough and parchment onto your hot stone or pan, pour a cup of hot water into the broiler pan, and close the oven door fast to keep in that lovely steam. Bake for 24–28 minutes, until your bread is golden and sounds hollow when tapped on the bottom. Repeat for the second loaf.
Step 8: Cool & Enjoy
Once baked, transfer your loaves to a wire rack to cool. The hardest part? Resisting the urge to dive in immediately! Give the bread at least 20 minutes to set its crumb—then enjoy every torn or sliced bite of Grandma’s Italian Bread, just as generations have before you.
Pro Tips for Making Grandma’s Italian Bread
- The Steam Secret: Adding hot water to a preheated pan is what gives this Italian bread its shatteringly crisp crust—don’t skip this step, but be quick so you don’t lose essential steam!
- Warm Rise Spot: For a consistent rise, place the covered dough in your oven (turned off) with the light on, or briefly warmed as per the notes—perfect conditions for light, airy bread.
- Score Like a Pro: Dust your knife with flour before slashing the “X”—this helps you get clean cuts, allowing the loaf to bloom open beautifully while baking.
- Minimal Flour for Kneading: Resist the urge to over-flour your work surface; a stickier dough leads to a softer, more authentic Italian loaf.
How to Serve Grandma’s Italian Bread
Garnishes
A light dusting of flour before baking not only gives Grandma’s Italian Bread that signature rustic look but also creates a stone-baked vibe at home. For a touch of color and aroma, try brushing the loaf with olive oil after baking and sprinkling with flaky sea salt or fresh-chopped herbs. It’s simple, classic, and always gets compliments at the table.
Side Dishes
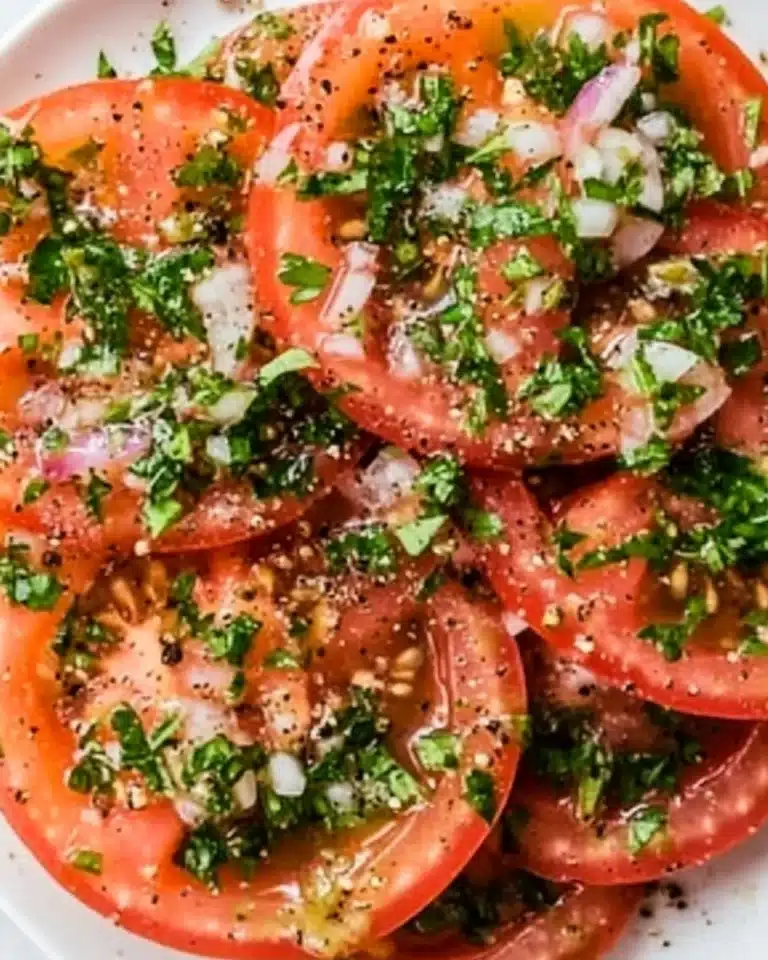
Honestly, I could happily eat this bread on its own, still warm from the oven! But it’s also made for soaking up tomato sauce from a bubbling pot of Sunday gravy, dipping into olive oil and balsamic vinegar, or sitting pretty beside hearty minestrone. For a summery touch, pair slices with a bright caprese salad or a generous spread of roasted vegetables.
Creative Ways to Present
For a gathering, slice the loaves into thick wedges and serve atop a wooden board alongside olives, cheeses, and cured meats—a rustic Italian-style antipasto that’s impossible to resist. Or, for Sunday brunch, turn Grandma’s Italian Bread into the world’s best French toast! For individual servings, bake minis using the same dough and serve in a vintage breadbasket lined with a linen napkin for cozy, homespun charm.
Make Ahead and Storage
Storing Leftovers
To keep your loaves fresh, let them cool completely, then store cut-side down on a cutting board (old-school Italian nonnas swear by this method!). For longer storage, wrap tightly in foil or a bread bag and keep at room temperature for up to two days. Avoid sealing warm bread in plastic, which can soften that precious crust too much.
Freezing
Grandma’s Italian Bread freezes beautifully! Once completely cooled, wrap each loaf tightly in plastic wrap and then foil, or pop into a freezer bag. It will keep for up to three months. To serve, just thaw at room temp (unwrapped to prevent condensation) and re-crisp in a warm oven for about 5-10 minutes.
Reheating
To recapture that just-baked aroma and crust, place sliced or whole bread in a preheated 350°F oven for 5-10 minutes. If reheating from frozen, no need to defrost—just bake a little longer until warmed through. Avoid the microwave if possible; oven heat helps bring back that lovely texture.
FAQs
-
Can I use bread flour instead of all-purpose flour?
Absolutely! Bread flour will give Grandma’s Italian Bread even more structure and chew, though the crumb may be a touch denser. Both types are delicious—the all-purpose version is a bit lighter, while bread flour delivers that classic bakery stretchiness.
-
Why do I need to add water to the oven while baking?
Adding hot water to a preheated pan creates steam. This steam is the secret to that crisp, glossy crust on Italian bread—the outer layer expands before setting, resulting in a chewy and artisan-like loaf with a beautiful sheen.
-
Can I halve the recipe if I only want one loaf?
Yes! Simply split all the ingredients in half and follow the exact same process. The second loaf freezes well, but if you want to bake just one, it’s easy to downsize for a smaller gathering (or, let’s be real, just yourself!).
-
How do I know if my yeast is still good?
Your yeast is good if it foams when mixed with warm water and a pinch of sugar after a few minutes. If there’s no bubbling or froth, it’s time for a fresh packet. Always store yeast in a cool, dry place to keep the magic alive for your next batch of Grandma’s Italian Bread.
Final Thoughts
Baking Grandma’s Italian Bread is so much more than mixing dough and setting a timer—it’s about sharing love, tradition, and a little slice of heritage with every loaf. I hope you’ll give this recipe a try, fill your kitchen with the scent of home, and create memories (and sandwiches!) for years to come. Buon appetito!
Print
Grandma’s Italian Bread Recipe
- Prep Time: 20 minutes
- Cook Time: 28 minutes
- Total Time: 3 hours 33 minutes
- Yield: 2 loaves
- Category: Bread
- Method: Baking
- Cuisine: Italian
- Diet: Vegetarian
Description
Delight in the rustic flavors of traditional Italian bread with this recipe straight from Grandma’s kitchen. This simple yet rewarding recipe yields two loaves of crusty, homemade bread that will transport you to the cobblestone streets of Italy.
Ingredients
Dry Yeast Mixture:
- 2 1/4 teaspoons dry yeast
- 3 1/2 cups warm water
Bread Dough:
- 8 cups all-purpose flour divided
- 1 tablespoon shortening
- 3 teaspoons salt
- 1 teaspoon sugar
- 1 cup of hot water for baking
Instructions
- Prepare Yeast Mixture: In a large bowl, dissolve yeast in the 3 1/2 cups warm water.
- Mix Dough: Add 3 cups flour, shortening, salt, and sugar. Beat with an electric mixer and gradually add remaining flour until a sticky dough forms.
- Knead Dough: Turn out onto a floured surface, knead for 7 minutes, adding minimal flour to prevent sticking.
- Rise Dough: Let dough rest, rise for 2 hours, then shape into loaves.
- Bake: Preheat oven, place loaves on a pizza stone, score the tops, and bake until golden brown.
Notes
- This recipe yields two loaves.
- You can substitute dry yeast with 1 package.
- For rising, preheat the oven, then turn it off before placing the dough to rise.
Nutrition
- Serving Size: 1 slice (estimated)
- Calories: 180
- Sugar: 1g
- Sodium: 300mg
- Fat: 1g
- Saturated Fat: 0g
- Unsaturated Fat: 1g
- Trans Fat: 0g
- Carbohydrates: 38g
- Fiber: 2g
- Protein: 5g
- Cholesterol: 0mg


