
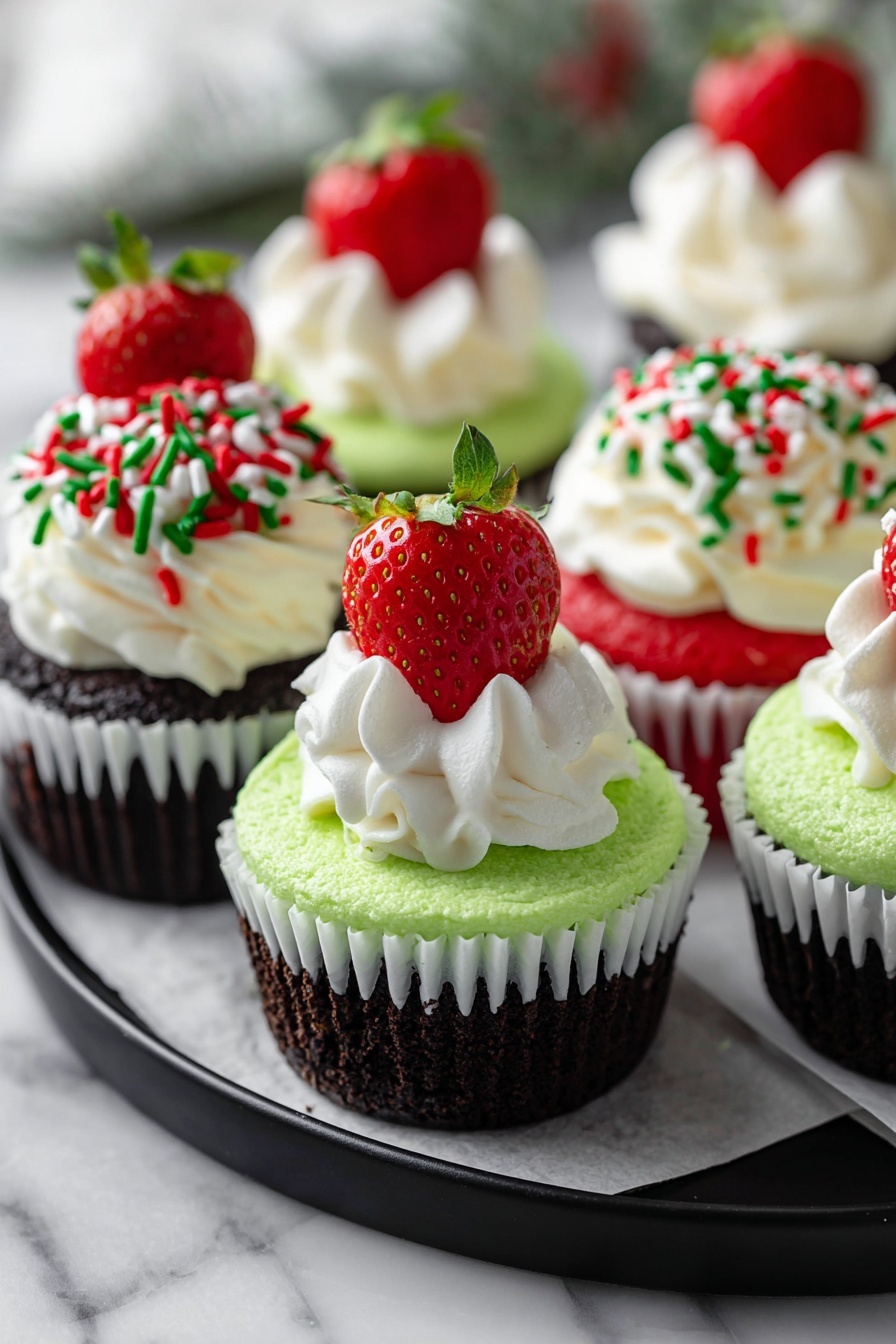
If you’re searching for a fun, festive dessert that’s sure to wow your guests, you’ve come to the right place! I’m so excited to share this Grinch Mini Cheesecakes Recipe because it’s not only adorable but downright delicious. Perfect for holiday parties or anytime you want a bright pop of green on your table, these little cheesecakes pack a creamy punch and give you all the Christmas vibes. Trust me, once you try them, you’ll see why my family goes crazy for this recipe!
Why You’ll Love This Recipe
- Festive and Fun: The neon green color instantly lifts your holiday spirit and makes these cheesecakes memorable.
- Simple Ingredients: You probably have most of these pantry staples already, making it easy to whip up.
- Perfect Portion Size: Mini cheesecakes mean no guilt over a big slice, and they’re great for parties or gifts.
- Kid-Approved: My kids adore the bright color and creamy texture, making it an instant hit with the younger crowd.

Ingredients You’ll Need
The magic of these Grinch Mini Cheesecakes starts with a simple Oreo crust and a velvety cream cheese filling. I always find that using softened cream cheese is key for that silky texture, and the neon green food coloring lets you be as Grinchy as you want!
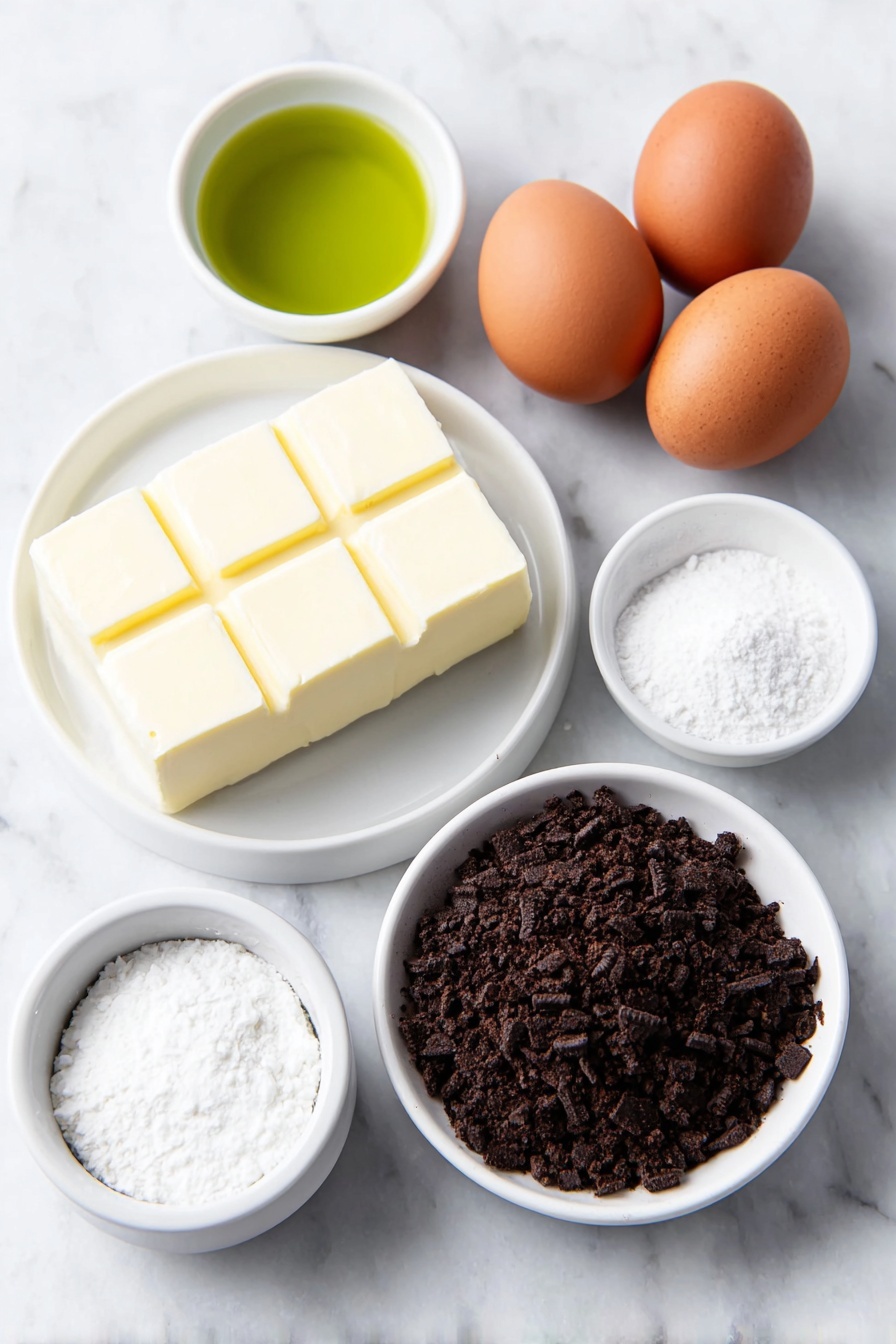
- Oreo Crumbs: Using classic Oreos provides the perfect chocolatey base with just the right amount of crunch.
- Butter: Melted butter binds the crumbs and creates a sturdy crust that holds up well.
- Cream Cheese: Softened for the best creamy, smooth texture—don’t skip this step!
- Sugar: Balances the tanginess of the cream cheese nicely without overpowering the flavor.
- Eggs: Help set the cheesecake while keeping it soft and luscious.
- Vanilla Extract: Adds warmth and depth to the cheesecake flavor.
- Neon Green Food Coloring: The star of the show—use as much as you need to get the fun, bright Grinch green.
Variations
I love how versatile this Grinch Mini Cheesecakes Recipe is! While the original is a classic, feel free to get creative or adjust the color to suit your style. I like to switch up the crust sometimes or add a fun topping to keep things fresh.
- Crust Swap: I once tried a graham cracker crust instead of Oreos, and it added a nice golden crunch that was less chocolatey but just as tasty.
- Flavor Booster: Adding a teaspoon of lemon zest to the batter gives it a bright, tangy twist that balances the richness perfectly.
- Food Coloring Alternatives: If you’re not into neon colors, try a matcha powder for a natural green tint and subtle earthiness.
- Diet-Friendly: Using a dairy-free cream cheese and gluten-free cookies makes this recipe approachable for all diets.
How to Make Grinch Mini Cheesecakes Recipe
Step 1: Prep Your Pan and Crust
Start by preheating your oven to 350°F and lining a cupcake pan with liners—this is crucial to getting those cute mini shapes. Now, pulse about 10-11 Oreos in a food processor until you get fine crumbs, then add the melted butter and pulse until the crumbs stick together like wet sand. Press this crumb mixture firmly into each liner to create a solid crust base. I like to use the bottom of a small glass or measuring cup to get it nice and even.
Step 2: Mix Up That Creamy Filling
In a medium bowl, beat the softened cream cheese with sugar until super smooth—no lumps here! Then beat in the eggs, one at a time, and add the vanilla extract. When everything is mixed well, add neon green food coloring bit by bit until you reach your perfect Grinch green shade. I discovered that using gel food coloring works best to avoid thinning out the batter.
Step 3: Bake and Chill
Spoon about 1/4 cup of the green cheesecake batter on top of each crust, filling them evenly. Bake for 15-17 minutes—you’ll want to pull them out when the centers are just slightly jiggly. Let them cool completely in the pan before transferring to the fridge to chill for at least a couple of hours or until firm. This cooling step always ensures they slice cleanly and hold their shape.
Step 4: Add Your Favorite Finishing Touches
Once chilled, top each mini cheesecake with a dollop of whipped cream and some fun sprinkles if you like—this little step really makes them party-ready. Personally, I like to add a tiny red candy or mini chocolate chips to represent the Grinch’s signature red Santa hat.
Pro Tips for Making Grinch Mini Cheesecakes Recipe
- Use Room Temperature Cream Cheese: I learned the hard way that cold cream cheese gives you lumps—softened is the way to go.
- Press Crust Firmly: Pressing the crust down firmly helps it hold together and keeps the cheesecake intact when you bite in.
- Don’t Overbake: Pull your mini cheesecakes when the center still jiggles slightly; they’ll set as they cool and stay creamy.
- Gel Food Coloring Is Best: Using gel coloring keeps the batter thick and vibrant without watering it down like liquid colors do.
How to Serve Grinch Mini Cheesecakes Recipe
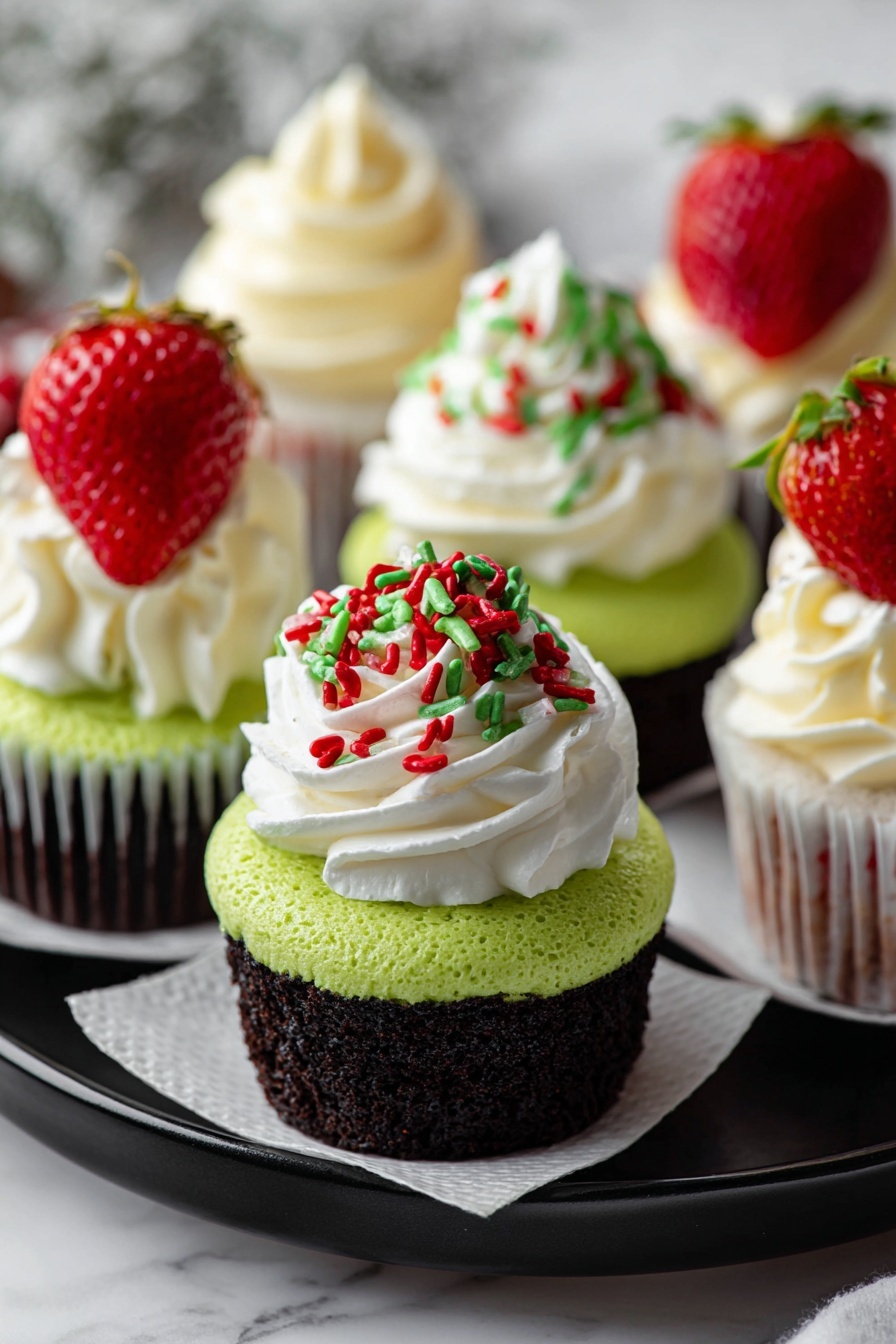
Garnishes
I swear, simple whipped cream and a sprinkle of festive red or green nonpareils do wonders. Sometimes I add a tiny mint leaf or a maraschino cherry for an extra pop of color. Honestly, the bright green almost stands on its own, but the whipped cream balances the richness beautifully.
Side Dishes
These mini cheesecakes pair nicely with a cup of peppermint tea or hot cocoa for a cozy combo. If you want to make it extra special, serve alongside a tray of classic Christmas cookies or fresh fruit for a lighter contrast.
Creative Ways to Present
I once arranged these on a tray lined with pine branches and mini ornaments for a holiday party centerpiece—it was a real showstopper! You could also serve them in festive cupcake wrappers or on a tiered dessert stand for a more elegant feel. For a kid’s party, let the little ones decorate their own with sprinkles and candies!
Make Ahead and Storage
Storing Leftovers
I like to store leftovers in an airtight container in the fridge—these cheesecakes keep really well and stay fresh for about 3-4 days. Just make sure to keep any whipped cream toppings separate or add fresh ones before serving.
Freezing
Freezing these mini cheesecakes works great if you want to make them ahead for a party. I wrap each one individually in plastic wrap, then place them in a freezer-safe container. When you’re ready, thaw overnight in the fridge for best texture.
Reheating
Since these are best chilled, I typically just let frozen cheesecakes thaw in the fridge and serve cold. If you need to slightly warm them, a few seconds in the microwave can soften the edges but be careful not to melt the whole thing!
FAQs
-
Can I use regular cream cheese or does it have to be full fat?
I recommend using full-fat cream cheese for the creamiest texture and richest taste, but you can use reduced-fat if needed. Just keep in mind that lower-fat versions might make your cheesecake less smooth and slightly less rich.
-
What if I don’t have neon green food coloring?
You can definitely use regular green food coloring, though the fun neon brightness may be a bit muted. Another natural option is to mix in a small amount of matcha powder for green color with a subtle earthy flavor.
-
How do I avoid cracks on the cheesecake surface?
To minimize cracking, be careful not to overmix your batter or overbake. Also, baking in a water bath can help, but for mini cheesecakes like these, simply removing them when centers are a little jiggly and letting them cool gradually works well.
-
Can I make this recipe dairy-free or vegan?
Yes! Substitute the cream cheese for a plant-based cream cheese alternative and use dairy-free butter and cookies for the crust. Baking times might vary slightly, so keep an eye on the jiggly center as your cue to pull them out.
-
How long does the Grinch Mini Cheesecakes Recipe take from start to finish?
Prep and baking take about 40 minutes total, but remember you’ll need extra time for them to chill in the fridge—at least two hours for best results.
Final Thoughts
I absolutely love how this Grinch Mini Cheesecakes Recipe turns out every single time—bright, creamy, and perfectly portioned for holiday celebrations or anytime you want a fun dessert. When I first tried making mini cheesecakes, I struggled with cracking and soggy crusts, but this recipe and the tips I shared here really helped me nail it. I can’t wait for you to try them and share how much your family loves these little green treats. Trust me, once you make them, they’ll become a holiday tradition at your house too!
Print
Grinch Mini Cheesecakes Recipe
- Prep Time: 15 minutes
- Cook Time: 17 minutes
- Total Time: 40 minutes
- Yield: 12 mini cheesecakes
- Category: Dessert
- Method: Baking
- Cuisine: American
Description
These Grinch Mini Cheesecakes are a festive and fun dessert perfect for holiday celebrations. Featuring a crunchy Oreo crust and a vibrant neon green cream cheese filling, they capture the mischievous spirit of the Grinch. Baked to creamy perfection, these bite-sized treats are topped optionally with whipped cream and sprinkles to add extra holiday cheer.
Ingredients
Crust
- 1 cup Oreo Crumbs
- 2 1/2 tbsp Butter, Melted
Cheesecake Filling
- 2 (8 oz) Cream Cheese, Softened
- 1/2 cup Sugar
- 2 Eggs
- 1 tsp Vanilla Extract
- Neon Green Food Coloring, to desired color
Topping (Optional)
- Whipped Cream
- Sprinkles
Instructions
- Preheat Oven and Prepare Pan: Preheat your oven to 350°F (175°C). Line a cupcake pan with cupcake liners to ease removal of the mini cheesecakes after baking.
- Make the Crust: Pulse about 10-11 Oreo cookies in a food processor until finely ground into crumbs. Add the melted butter and pulse again until the crumbs are well coated and combined.
- Form the Crust: Evenly divide the Oreo crumb mixture among the cupcake liners. Firmly press the crumbs into the bottom of each liner to form compact crusts.
- Prepare the Cheesecake Filling: In a medium bowl, beat the softened cream cheese and sugar together until smooth and creamy. Add the eggs one at a time, beating well after each addition. Mix in the vanilla extract.
- Add Color: Incorporate neon green food coloring into the cheesecake mixture until you reach the desired vibrant Grinchy color.
- Fill the Cups: Spoon approximately 1/4 cup of the green cheesecake mixture into each crust-lined cupcake liner, filling them evenly.
- Bake: Place the cupcake pan in the preheated oven and bake for 15-17 minutes. The centers should remain slightly jiggly when done.
- Cool and Chill: Remove the pan from the oven and allow the cheesecakes to cool completely in the pan. Once cooled, refrigerate until they are fully firm and chilled.
- Serve: Optionally top each mini cheesecake with whipped cream and festive sprinkles before serving for extra holiday flair.
Notes
- Use room temperature cream cheese to ensure a smooth batter without lumps.
- Do not overbake; the centers should still be slightly jiggly when you remove them from the oven.
- For extra holiday decoration, use red or white sprinkles to contrast with the green cheesecake.
- Mini cheesecakes can be made a day ahead and stored covered in the refrigerator.
- If you don’t have a food processor, place the Oreos in a sealed plastic bag and crush with a rolling pin.
Nutrition
- Serving Size: 1 mini cheesecake
- Calories: 220
- Sugar: 15g
- Sodium: 110mg
- Fat: 15g
- Saturated Fat: 8g
- Unsaturated Fat: 6g
- Trans Fat: 0g
- Carbohydrates: 18g
- Fiber: 1g
- Protein: 4g
- Cholesterol: 55mg
