
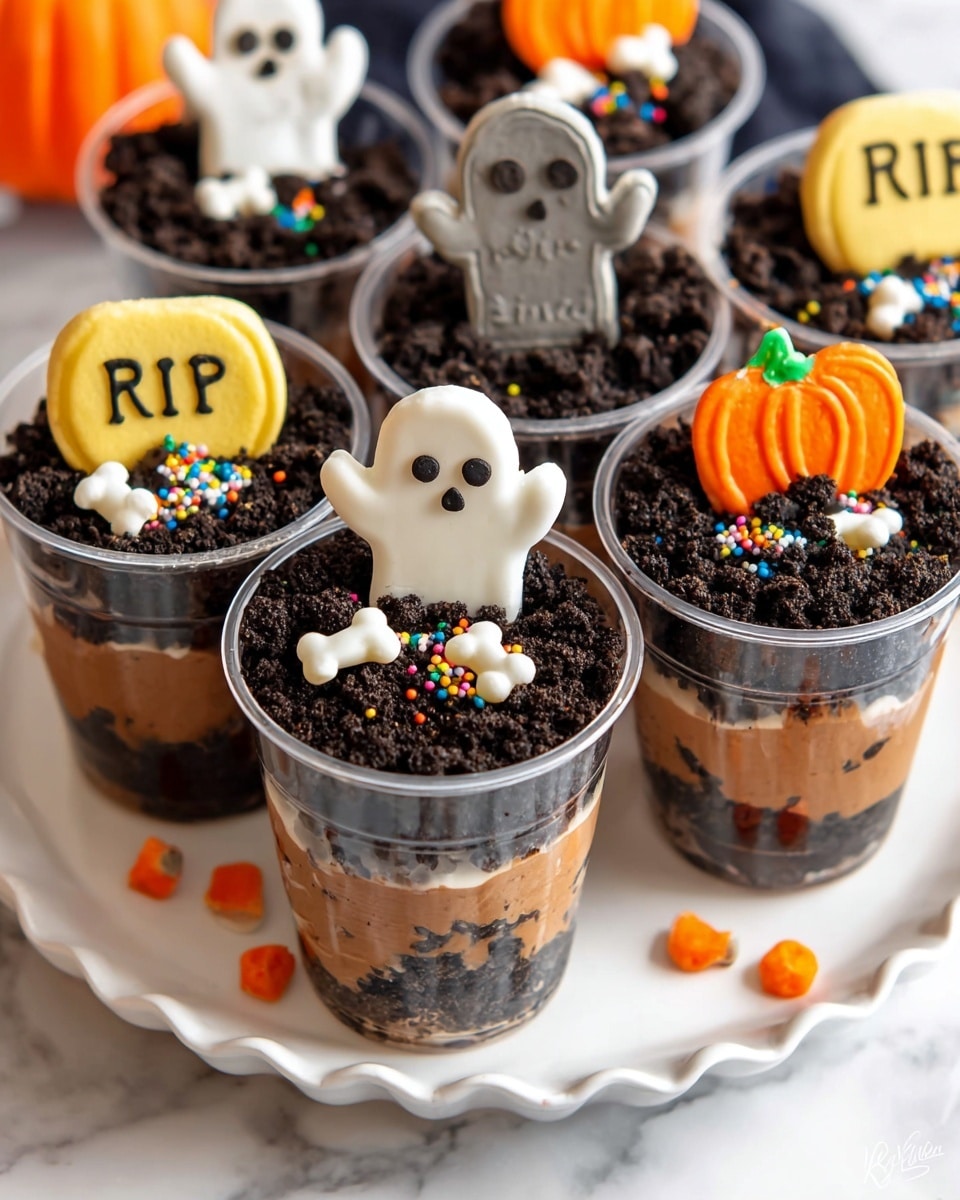
If you’re on the hunt for a spooky, fun dessert that’s as delicious as it is visually delightful, you’re in the right place. This Halloween Dirt Cups Recipe is a total family favorite around here, and I absolutely love how it captures the festive spirit with layers of creamy pudding and crunchy Oreo “dirt.” Whether you’re making it for a kid’s party or just want a festive treat to enjoy, I promise these dirt cups will make your Halloween extra special. Let me walk you through everything you need to know to nail this recipe perfectly!
Why You’ll Love This Recipe
- Simple Ingredients: You probably already have everything in your pantry or can find it easily!
- Kid-Friendly Fun: Kids love helping build these dirt cups and can’t get enough of the spooky decorations.
- Make-Ahead Friendly: You can prep most of it ahead of time and simply assemble or decorate before serving.
- Eye-Catching Presentation: These cups look stunning on any Halloween party table, guaranteed to impress!

Ingredients You’ll Need
These ingredients come together to create that perfect mix of creamy, crunchy, and gorgeously chocolatey “dirt” flavor. Don’t skimp on the Oreos—they give that authentic crumbly texture that’s so key.
- Oreos: The star of the show for that signature dark, crumbly dirt texture. Family size packages are best for quantity.
- Milk: Needed to bring the instant pudding mix to life; whole milk works best for creamy richness.
- Instant Chocolate Pudding Mix: The quick and easy way to get rich chocolate pudding without fuss.
- Frozen Whipped Topping: Adds lightness and creaminess when folded into the pudding.
- Chocolate Syrup: Divided use; swirled through pudding and mixed with cookie crumbs for a moist, clumpy texture that mimics freshly dug dirt.
- Milano Cookies and Black Decorator Icing: For crafting “RIP” tombstones – adds whimsy and visual interest.
- Ghost Peeps, Pumpkin Candies, Halloween Sprinkles: Fun festive accents to take your dirt cups over the top!
Variations
I love how versatile this Halloween Dirt Cups Recipe is. You can easily tweak it to suit what you have on hand or your family’s taste buds. Don’t be afraid to experiment with the mix-ins or toppings!
- Make it Dairy-Free: Swap milk and whipped topping for coconut milk and coconut-based whipped cream—I tried this once and it was surprisingly delicious!
- Add Candy Surprises: My kids love hiding gummy worms inside the layers for that classic dirt cup effect—it’s such a fun surprise.
- Swap Oreo Variations: Use golden Oreos or seasonal-flavored Oreos for a unique twist on the classic dirt look and taste.
- Spookier Decorations: Try little edible eyeballs or edible glitter sprinkled on top for more Halloween flair.
How to Make Halloween Dirt Cups Recipe
Step 1: Whip Up the Chocolate Pudding Base
Start by whisking together the instant chocolate pudding mix and 4 cups of milk in a large bowl. I like to whisk for about 2-3 minutes until it’s smooth and thick enough to coat the back of a spoon—this gives you that silky pudding texture you want. Then, let it rest for 5 minutes so it firms up just right. Once it’s set, gently fold in the thawed whipped topping. This step is key because it lightens the pudding and adds creaminess that makes every bite melt in your mouth.
Step 2: Add a Chocolate Syrup Swirl
Pour in half a cup of chocolate syrup into the pudding mixture and gently stir just a few times. You want to keep those streaks of chocolate syrup visible—it looks cool when assembled and adds that extra depth of flavor. Then cover the bowl and pop it in the fridge while you prepare the “dirt.”
Step 3: Crush the Oreos into Dirt
This is the fun part! Use a food processor or blender to pulse the Oreo cookies into a fine crumb that resembles actual dirt. Don’t rush this step—working in batches helps you get the right texture without turning the crumbs into paste. Place all your cookie “dirt” into a large bowl once you’re done.
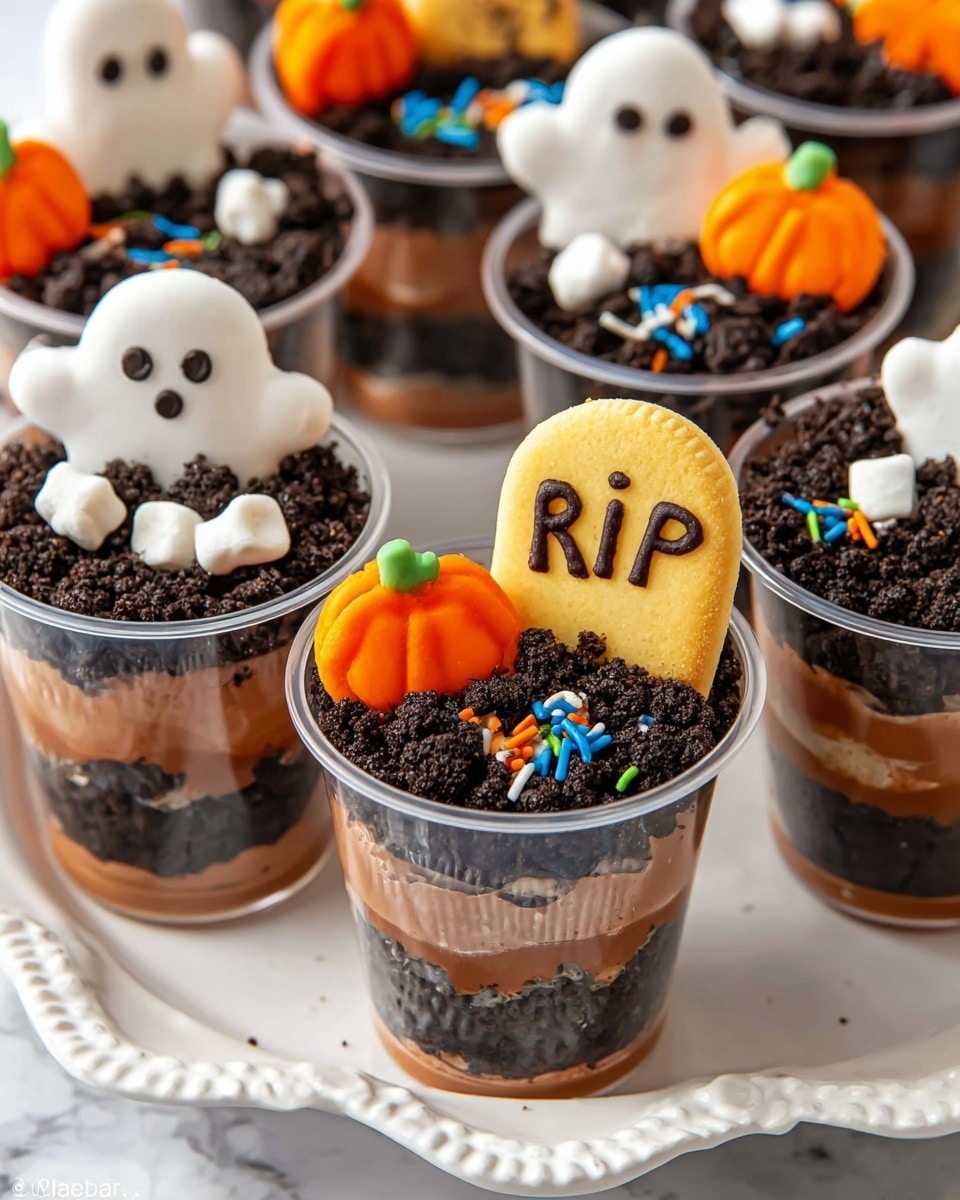
Step 4: Assemble Your Dirt Cups
Grab about 9-ounce dessert cups for the best size—I like disposable plastic ones for easy cleanup, but small mason jars work beautifully, too. Start by spooning roughly 2 tablespoons of Oreo crumbs as the first dirt layer, then add about 1/4 cup of the pudding. Repeat with another layer of Oreo crumbs, then pudding again. Top everything with a final tablespoon of Oreo crumbs for that perfect dirt look.
Step 5: Make the Moist ‘Freshly Dug Dirt’
Mix the remaining half cup of chocolate syrup with the leftover cookie crumbs until clumpy and moist—this mimics freshly dug-up dirt in the graveyard, trust me, it’s worth it! Set this aside for decorating.
Step 6: Add Spooky Decorations
Get creative with your decorations! I love to decorate Milano cookies with black icing to write “RIP” and place them angled in some cups. Adding ghost-shaped Peeps and pumpkin candies turns these from dessert to a Halloween masterpiece. Finally, sprinkle the clumpy cookie crumb mixture over the top to look like freshly disturbed dirt, and finish with Halloween sprinkles. This step is where your cups go from tasty to festive showstoppers.
Pro Tips for Making Halloween Dirt Cups Recipe
- Pulse Don’t Overblend: When crushing Oreos, pulse gently to keep that crumbly dirt texture—not powdery or pasty.
- Pudding Rest Time: Let your pudding sit for 5 minutes after whisking to thicken properly before folding in whipped topping for perfect set.
- Decorate Last Minute: Add cookie and candy toppings right before serving so crumbs stay crisp, not soggy.
- Using the Right Cup Size: Around 9-ounce cups keep the layers balanced—too large and it’s hard to get the perfect dirt-to-pudding ratio.
How to Serve Halloween Dirt Cups Recipe
Garnishes
I tend to keep my garnishes playful and thematic: black iced Milano cookies with “RIP,” ghost Peeps for that classic Halloween ghost vibe, mini pumpkin candies for a pop of color, and a sprinkle of festive Halloween confetti sprinkles. These not only look amazing but add different textures and flavors kids (and adults) adore.
Side Dishes
Since these dirt cups are pretty rich, I usually pair them with lighter fare – think fresh fruit platters or simple veggie sticks with dips. This lets the dessert really shine as the showstopper at your Halloween gatherings.
Creative Ways to Present
For a spooky twist, I’ve served these dirt cups in mini pumpkin bowls or black cauldron-style containers at parties—it amps up the Halloween vibe instantly. Another fun idea is to add little plastic skeletons or edible dirt worms poking out, which totally impresses the kids and makes your dessert table unforgettable.
Make Ahead and Storage
Storing Leftovers
If you have any leftovers (which sometimes I’m lucky to have!), I cover them tightly with plastic wrap and keep them in the refrigerator. Just a heads-up—the Oreo layers soften and get a bit soggy over time, so these are best eaten within a day or two.
Freezing
I’ve experimented freezing these once or twice, and it’s not my favorite method—the texture changes and the dirt cups become a bit watery after thawing. I’d recommend enjoying them fresh or stored chilled in the fridge instead.
Reheating
Since these dirt cups are served cold, there’s no need to reheat. Just give leftovers a gentle stir and maybe refresh the top with some extra crushed Oreos before serving again—you’ll keep that fresh dirt vibe intact!
FAQs
-
Can I make this Halloween Dirt Cups Recipe vegan?
Absolutely! Swap regular milk for almond or oat milk, use a dairy-free chocolate pudding mix (or make your own with cornstarch and cocoa powder), and substitute whipped topping with a coconut-based whip. Also, check that your Oreos are vegan-friendly where you live—many are, but it’s worth double-checking!
-
How long can I prepare Halloween Dirt Cups in advance?
I recommend assembling up to one day ahead and keeping them refrigerated. Avoid adding decorative toppings too early to prevent sogginess. Making them much earlier than that affects the Oreo texture negatively.
-
What size cups work best for these dirt cups?
Around 9-ounce cups are ideal. They allow you to build delicious layers that are perfectly balanced—not too shallow and not too deep. Plus, they’re great for individual servings at parties.
-
Can I use homemade chocolate pudding instead of instant?
Yes, homemade pudding works wonderfully and tastes extra rich! Just make sure it’s well set and chilled before folding in the whipped topping to maintain the right texture for layering.
Final Thoughts
This Halloween Dirt Cups Recipe is one of those festive treats that brings out the kid in me every time I make it. I remember the first time I served these at a casual Halloween gathering—the compliments just kept coming, and my kids couldn’t get enough of digging their spoons into the dirt layers. The best part? It’s simple but looks like you spent hours creating something magical. I promise if you give these a try, they’ll quickly become a Halloween tradition in your house too. So grab those Oreos and pudding mix, and let’s bring some edible spooky fun to your party table!
Print
Halloween Dirt Cups Recipe
- Prep Time: 30 minutes
- Cook Time: 0 minutes
- Total Time: 30 minutes
- Yield: 18 servings
- Category: Dessert
- Method: No-Cook
- Cuisine: American
- Diet: Vegetarian
Description
Halloween Dirt Cups are a fun and festive no-bake dessert perfect for Halloween parties. Layers of crushed Oreo cookies and creamy chocolate pudding are assembled in individual cups, then topped with spooky decorations like ghost Peeps, mini pumpkin candies, and Milano cookies decorated with ‘RIP’. This easy-to-make treat combines creamy, crunchy, and chocolaty textures to delight kids and adults alike.
Ingredients
Base and Filling
- 2 (19 ounce) family size packages of Oreos
- 4 cups milk
- 2 (3 ounce) packages instant chocolate pudding mix
- 16 ounces frozen whipped topping, thawed
- 1 cup chocolate syrup, divided
Decorations
- Milano cookies
- Black decorator icing
- Ghost Peeps
- Pumpkin candies
- Halloween sprinkles
Instructions
- Prepare the pudding: In a large bowl, whisk together the instant chocolate pudding mix and 4 cups of milk for 2-3 minutes. Let it stand for 5 minutes to thicken, then gently fold in the thawed whipped topping to create a creamy mousse-like pudding layer.
- Add chocolate syrup: Stir ½ cup of chocolate syrup into the pudding mixture just a few times so it becomes streaky. Cover and chill the pudding in the refrigerator until ready to assemble the cups.
- Crush the Oreos: Place Oreo cookies in a food processor or blender and pulse until they reach a dirt-like consistency. Process in batches as needed, then transfer the crumbs to a large bowl.
- Layer the dirt cups: Using approximately 9-ounce dessert cups, start by adding about 2 tablespoons of Oreo crumbs as the first layer. Next, add about ¼ cup of the pudding mixture. Repeat with another layer of Oreo crumbs and pudding. Finish by sprinkling 1 tablespoon of Oreo crumbs on top.
- Prepare moist dirt topping: Mix the remaining ½ cup of chocolate syrup into the leftover Oreo crumbs until clumpy and moist. Set aside for decorating.
- Decorate the cups: Decorate Milano cookies with black icing to write “RIP,” and place them into some of the cups. Add ghost Peeps to others. Top all cups with the moist clumpy Oreo and chocolate syrup mixture to simulate freshly dug graves, then sprinkle with mini pumpkin candies and Halloween sprinkles.
- Serve or store: Serve the dirt cups immediately or refrigerate until serving. For best texture, add toppings right before serving if stored overnight.
Notes
- Use approximately 9-ounce disposable plastic cups, small mason jars, or similarly sized containers for assembling the dirt cups.
- Prepare the dirt cups up to one day in advance and store covered in the refrigerator. Avoid making them earlier to prevent the Oreo layers from becoming soggy.
- Do not add cookie crumb or candy toppings until right before serving to keep textures fresh and crunchy.
- Store leftovers covered in the fridge; Oreo layers may soften, but topping with fresh crushed Oreos before serving can refresh the texture.
Nutrition
- Serving Size: 1 cup (approx. 9 ounces)
- Calories: 320
- Sugar: 28g
- Sodium: 210mg
- Fat: 16g
- Saturated Fat: 10g
- Unsaturated Fat: 5g
- Trans Fat: 0g
- Carbohydrates: 40g
- Fiber: 2g
- Protein: 3g
- Cholesterol: 10mg


