
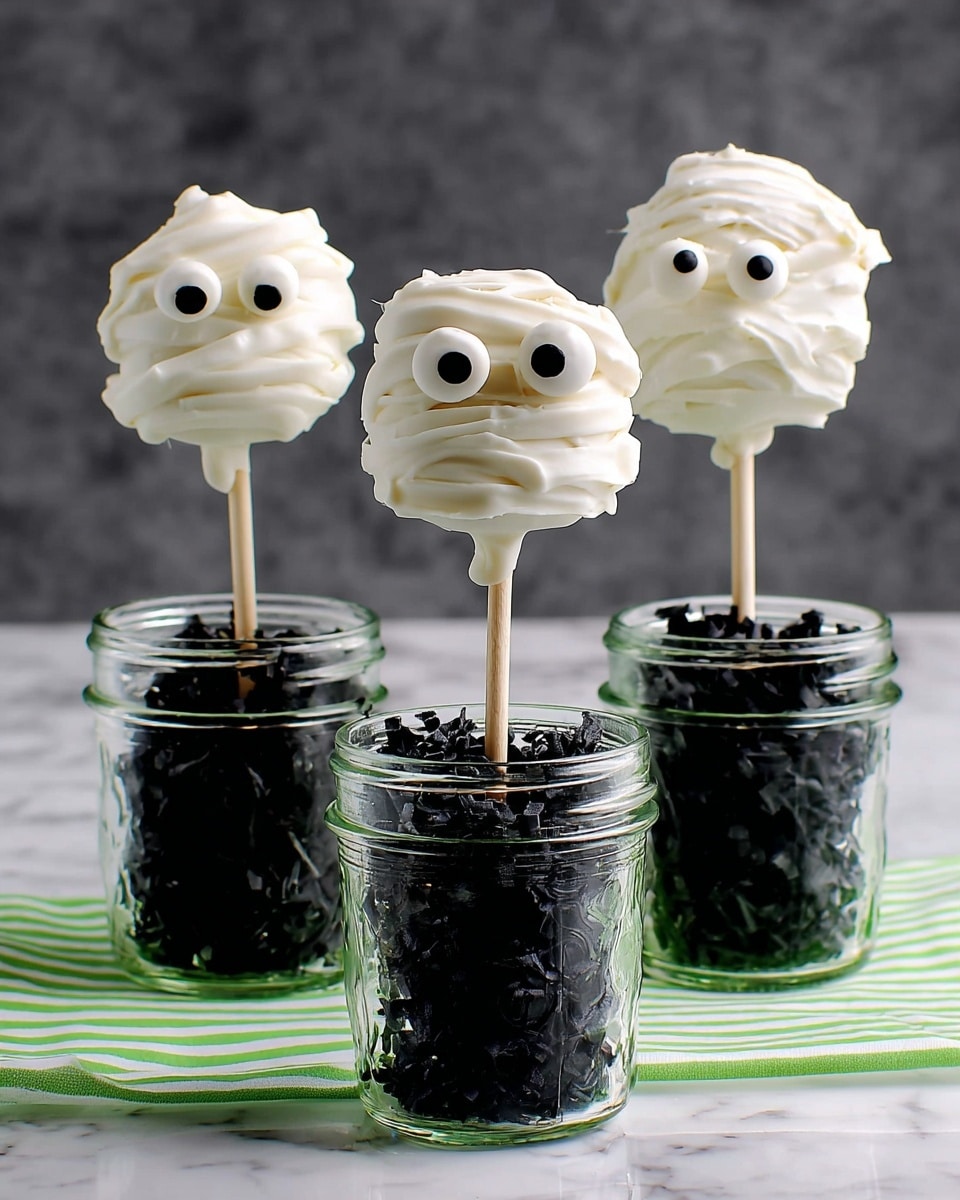
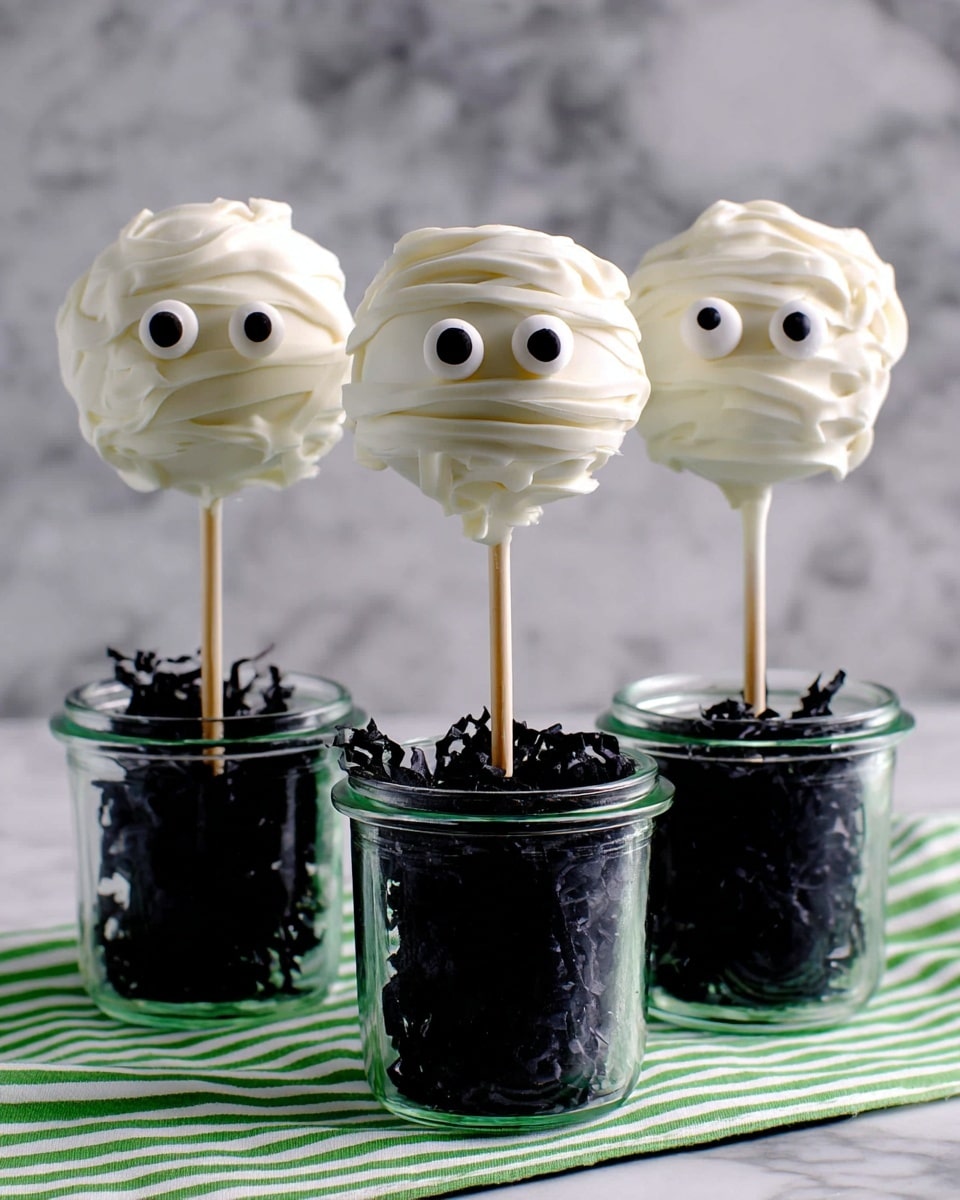
I’m beyond excited to share this fun and festive treat that’s perfect for spooking up your Halloween party — the Halloween Mummy Brownie Pops Recipe. These adorable mummy pops are not only super cute but also incredibly delicious and surprisingly easy to put together. Imagine fudgy brownie balls wrapped in sweet white chocolate “bandages” with googly candy eyes staring right at you — they’re a guaranteed hit with kids and adults alike! Stick with me, and I’ll walk you through every cozy kitchen step so your mummy pops come out picture-perfect and ready to impress.
Why You’ll Love This Recipe
- Fun and Festive: These pops bring the perfect Halloween vibe with minimal effort and maximum delight.
- Kid-Friendly and Easy to Make: You’ll find that the steps are straightforward enough to enjoy a little baking party with the kids.
- Delicious Flavor Combo: The mix of peanut butter, Butterfinger chunks, and rich chocolate is a flavor bomb every time.
- Great Make-Ahead Treat: These brownie pops keep well and look fantastic whenever you need a sweet fix.

Ingredients You’ll Need
Each ingredient here works together to create those perfectly soft, peanut buttery brownie bites wrapped in a crisp white chocolate shell. When buying the candy melts, look for good quality melts or wafers so the coating is smooth and shiny — it really makes a difference in presentation!
- Betty Crocker™ Milk Chocolate Brownie Mix: Using a boxed mix cuts down on prep without sacrificing flavor or texture.
- Water, vegetable oil, eggs: These are required for baking the brownie mix; stick to the amounts on the box for the best cakey brownies.
- Betty Crocker™ Rich & Creamy Milk Chocolate Frosting: Blended with peanut butter, this adds moisture and creaminess to keep the brownie pops soft.
- Creamy peanut butter: Adds a lovely, nutty richness that pairs surprisingly well with chocolate.
- Butterfinger™ candy bars: Chopped up to add a sweet crunch and that unmistakable butterscotch yum.
- White candy melts or coating wafers: This is your “mummy wrap” – melted smooth for dipping and drizzling.
- Paper lollipop sticks: Essential for turning these brownie bites into pops and giving them that fun party feel.
- Candy eyes: Don’t skimp here — quality candy eyes really bring these mummies to life!
- Block of plastic foam: To stand your pops upright while the candy coating sets.
Variations
I’m all about making recipes your own, so I encourage you to play around with this Halloween Mummy Brownie Pops Recipe to match your taste buds. Whether that means switching up mix-ins or trying out different coatings, these treats are super versatile.
- Nut-Free Version: Swap out the peanut butter and Butterfinger bars for sunflower seed butter and chopped pretzels for a crunchy texture my niece loves.
- Dark Chocolate Twist: I’ve tried substituting white candy melts for dark or semi-sweet chocolate melts — the contrast against the brownie adds a spooky elegance.
- Extra Spooky Eyes: Use colored candy eyes or add mini orange sprinkles to amp up the festive look, which really impresses the kids.
- Vegan Adaptation: Though I haven’t personally tested this vegan yet, you could use dairy-free brownie mixes and frosting, plus plant-based peanut butter, to make it that way.
How to Make Halloween Mummy Brownie Pops Recipe
Step 1: Bake Your Brownies and Mix Them Up
Start by following the brownie box instructions for cakey brownies — that means using the water, oil, and eggs exactly as directed. When your brownies come out of the oven, let them cool completely. I learned the hard way that warm brownies can make your pops fall apart during shaping. Once cool, crumble the brownies into a bowl, but be sure to toss the edges since they’re usually crusty and dry. Mix in your peanut butter and frosting blend, plus the chopped Butterfinger pieces — they add a delightful crunch and flavor punch. This is the base that holds your pops together, so get your hands in and really mix it thoroughly for best results.
Step 2: Shape and Chill the Brownie Balls
Roll the mixture into one-inch balls — don’t worry if they’re not perfectly round; these little guys are meant to be rustic and fun. Place each ball on a waxed paper-lined cookie sheet, and pop them into the fridge to firm up. This chilling step is key because it makes the coating process much easier later on. While they chill, prepare your melted white candy melts, heating them slowly until smooth and glossy.
Step 3: Insert Sticks and Coat with Candy Melts
Dip the tip of each lollipop stick about half an inch into your melted candy, then insert it halfway into a brownie ball — this “glue” helps secure the stick inside so your pops don’t slide off when dipped. Stand the pops back on the cookie sheet and refrigerate for another 30 minutes; this step solidifies the candy glue. Then, dip each pop into the remaining melted candy, gently tapping off any excess. For me, holding the pop steady and using a slight wrist flick helps keep the coating even and smooth. Let these set until firm before moving on.
Step 4: Add the Mummy Bandages and Eyes
This is the fun part that gives you the classic mummy look! Spoon the reserved melted candy into a small squeeze bag (a plastic freezer bag with a tiny corner snipped works perfectly), then pipe crisscrossing lines all over each pop to mimic bandages. Right after piping, stick on two candy eyes before the candy dries so they stay put. Finally, poke the opposite end of each stick into a block of foam to let your mummy pops dry completely and avoid smushed bandages. The moment you see those eyes staring back at you, I swear it’s impossible not to smile!
Pro Tips for Making Halloween Mummy Brownie Pops Recipe
- Use Cakey Brownie Instructions: I discovered this trick when my first batch was too dense — cakey brownies make shaping so much easier.
- Chill, Chill, Chill: Refrigerate the brownie balls and stick-glued pops well before dipping to keep everything together.
- Smooth Candy Melts: Melt candy slowly over low heat or in short microwave bursts to avoid clumps and get the perfect coating.
- Attach Eyes Immediately: Piping the bandages and placing eyes while the candy is still wet ensures they stick without falling off later.
How to Serve Halloween Mummy Brownie Pops Recipe
Garnishes
I love adding a little extra flair by dusting my finished mummy pops with a tiny sprinkle of edible glitter or orange sanding sugar — it adds just the right touch of sparkle to the white “bandages.” Sometimes I also use a bit of black edible marker to gently add spooky smile lines if I’m feeling extra creative.
Side Dishes
These pops are often the star on their own, but if I’m setting a Halloween dessert table, I’ll pair them with simple vanilla or pumpkin cupcakes and a bowl of candy corn for a classic seasonal spread.
Creative Ways to Present
I’ve had lots of fun arranging my mummy pops standing upright in mini pumpkin “pots” filled with candy corn or green tissue paper to mimic grass. For parties, I’ve wrapped them individually in cello bags tied with orange and black ribbon for cute take-home favors that guests rave about.
Make Ahead and Storage
Storing Leftovers
I keep my mummy brownie pops stored in an airtight container in the refrigerator. They generally stay fresh for up to a week, and I love that the chill actually keeps the candy coating nice and firm.
Freezing
Freezing these pops is totally doable! I wrap each one individually in plastic wrap and place them in a freezer-safe container. When I thaw them in the fridge overnight, they come back almost as good as fresh without any sogginess.
Reheating
Since these are best enjoyed cold and have that candy coating, I usually serve them straight from the refrigerator. If you want the peanut butter filling a little softer, just leave them at room temperature for 15 minutes before serving — easy and mess-free!
FAQs
-
Can I make these Halloween Mummy Brownie Pops gluten-free?
Absolutely! You can use a gluten-free brownie mix in place of the boxed brownie mix. Just make sure any add-ins like frosting and candy are also gluten-free to keep these mummy pops safe for anyone with gluten sensitivities.
-
What’s the best way to melt candy melts without clumping?
Microwave your candy melts in short 20- to 30-second bursts on low power, stirring well between intervals until smooth. I also like using a double boiler to gently melt them to prevent overheating and clumps.
-
Can I prepare the brownie balls a day in advance?
Yes! Making the brownie balls the day before saves time — just keep them covered and chilled in the fridge until you’re ready to dip and decorate.
-
How do I prevent the candy coating from cracking?
Ensure your brownie balls are well chilled before dipping, and avoid applying thick layers of candy melts. Also, let them set at room temperature or in a cool place, avoiding rapid temperature changes.
Final Thoughts
This Halloween Mummy Brownie Pops Recipe has quickly become one of my favorite seasonal treats because it’s so darn charming and delicious. I love how much joy these little mummy pops bring to my family and friends — they’re a perfect blend of playfulness and flavor. If you want to wow your guests or just enjoy some festive fun in the kitchen, I can’t recommend this recipe enough. Trust me, once you try them, you’ll be dreaming up new ways to dress them up for every holiday!
Print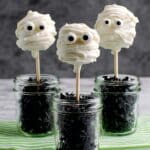
Halloween Mummy Brownie Pops Recipe
- Prep Time: 1 hour
- Cook Time: 40 minutes
- Total Time: 3 hours 40 minutes
- Yield: 38 pops
- Category: Dessert
- Method: No-Cook
- Cuisine: American
Description
These Halloween Mummy Brownie Pops are a festive and fun treat featuring cakelike chocolate brownies blended with creamy peanut butter frosting and chopped Butterfinger candy bars. Coated in white candy melts and decorated with candy eyes, these spooky mummy pops are perfect for Halloween parties and celebrations.
Ingredients
Brownie Base
- 1 box Betty Crocker™ Milk Chocolate Brownie Mix
- Water, vegetable oil, and eggs called for on brownie mix box (for cakelike brownies)
Mix-ins
- 1/3 cup Betty Crocker™ Rich & Creamy Milk Chocolate Frosting
- 2 tablespoons creamy peanut butter
- 1 cup chopped Butterfinger™ candy bars (from 10-oz package)
Coating and Decoration
- 4 cups white candy melts or coating wafers, melted
- 38 paper lollipop sticks
- 76 candy eyes
- Block of plastic foam (for drying the pops)
Instructions
- Prepare Brownies: Make and bake the brownie mix as directed on the box for cakelike brownies, using the water, vegetable oil, and eggs. Once baked, allow the brownies to cool completely. Line a cookie sheet with waxed paper.
- Mix Filling: In a small bowl, combine the milk chocolate frosting and creamy peanut butter until thoroughly blended. Crumble cooled brownies into a large bowl, discarding the edges. Stir in the chopped Butterfinger candy bars, then add the frosting-peanut butter mixture and mix well to combine.
- Shape Balls: Shape the mixture into 1-inch balls and place them on the prepared cookie sheet. Refrigerate the brownie balls until firm, about 30 minutes.
- Prepare Lollipop Sticks: Reserve 1 cup of the melted white candy melts in a separate bowl. Dip the tip of each lollipop stick about 1/2 inch into the remaining melted candy and insert it halfway into a brownie ball. Repeat with all sticks and balls. Return to the cookie sheet and refrigerate for another 30 minutes to set.
- Dip Pops: Remove a few brownie pops from the refrigerator at a time. Dip each ball into the melted candy, coating it completely, and tap off the excess. Place the dipped pops upright on the waxed paper-lined cookie sheet and allow them to set until firm.
- Decorate as Mummies: Spoon the reserved melted candy into a resealable plastic bag, seal it, and cut off a small corner to create a piping bag. Pipe crisscross patterns over each coated brownie pop to resemble mummy bandages. While the candy is still wet, immediately attach two candy eyes to each pop.
- Set and Store: Poke the opposite end of each stick into a block of plastic foam to let the mummy pops stand upright and fully set. Once set, the pops are ready to serve or can be stored in an airtight container.
Notes
- Ensure brownies are completely cooled before mixing to avoid melting the frosting.
- Use waxed paper or parchment paper to prevent sticking during dipping and setting.
- For easier candy melting, use a microwave in short intervals, stirring frequently to prevent burning.
- Store finished pops in an airtight container at room temperature or in the refrigerator for longer freshness.
- If peanut allergies are a concern, the peanut butter can be substituted with a nut-free alternative or additional frosting.
Nutrition
- Serving Size: 1 brownie pop
- Calories: 190
- Sugar: 18g
- Sodium: 110mg
- Fat: 11g
- Saturated Fat: 5g
- Unsaturated Fat: 5g
- Trans Fat: 0g
- Carbohydrates: 22g
- Fiber: 1g
- Protein: 2g
- Cholesterol: 15mg

