
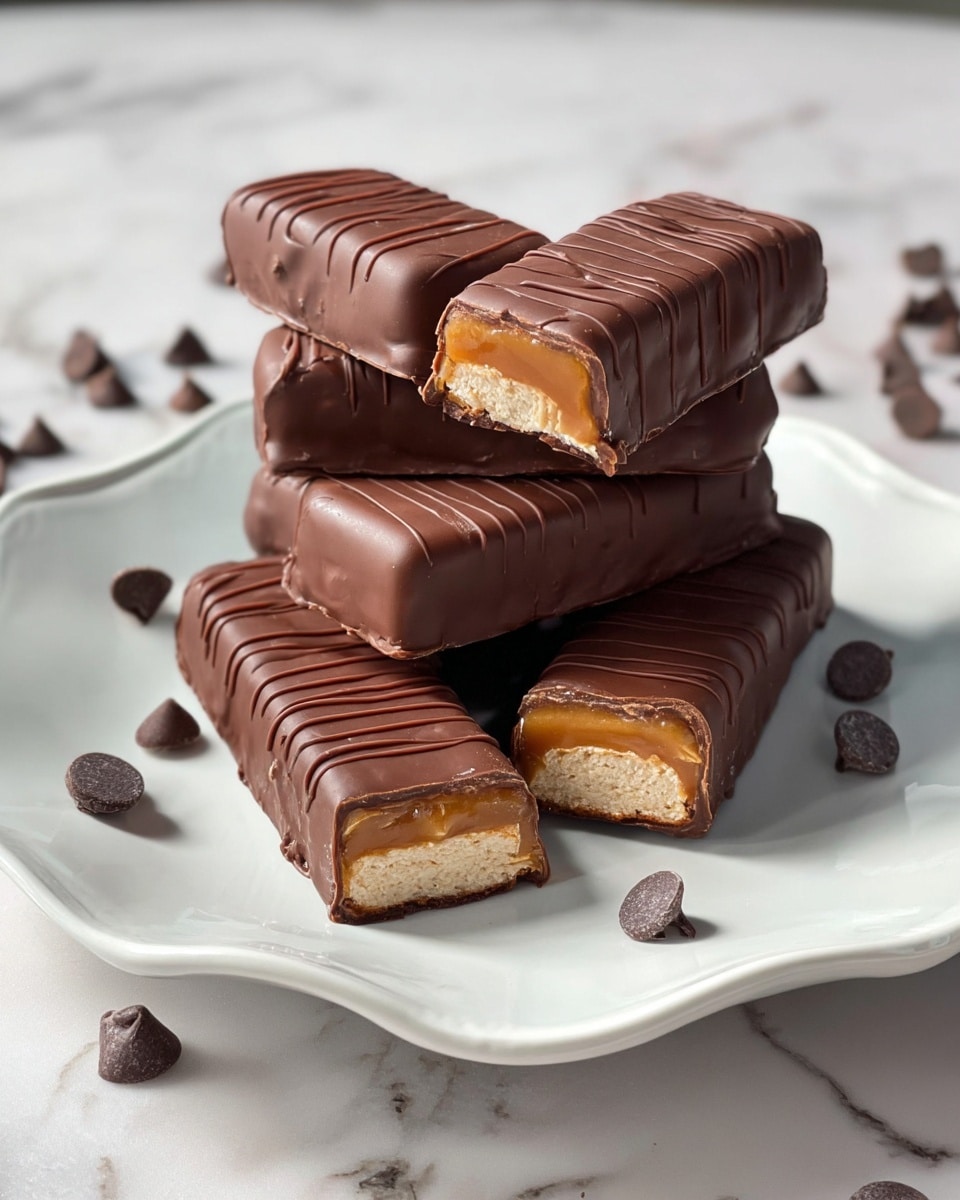
I absolutely love sharing this Healthy Gluten-Free Homemade Twix Bars Recipe with you because it’s everything you crave in a chocolaty, caramel treat without the guilt or gluten worries. I first tried to make a healthier version of Twix bars when I was craving something sweet but wanted to keep things clean and nourishing. These bars strike that perfect balance between indulgence and wholesome ingredients — and you’ll find they’re surprisingly easy to make in your own kitchen.
These bars come together beautifully whenever I need a special homemade dessert that suits everyone’s dietary needs. Whether it’s for a lunchbox surprise, a cozy movie night snack, or a thoughtful gift, this Healthy Gluten-Free Homemade Twix Bars Recipe is a total winner. Plus, making them yourself means you get to control every ingredient — no mysterious fillers or preservatives here!
Why You’ll Love This Recipe
- Gluten-Free and Nourishing: Crafted with almond flour and natural sweeteners, making it gentle on digestion and great for gluten sensitivities.
- Simple, Real Ingredients: You won’t find any artificial nonsense—just good-for-you items that taste amazing.
- Hands-On but Easy: Step-by-step instructions that even beginners can follow to create a stunning treat.
- Customizable Layers: You can tweak the caramel or chocolate coatings to suit your own taste or dietary preferences.

Ingredients You’ll Need
These ingredients come together to replicate the classic Twix texture and flavors but with wholesome twists. When shopping, opt for high-quality almond flour and pure maple syrup — they make all the difference.
- Almond Flour: Provides a naturally gluten-free, nutty base that’s perfect for shortbread and adds protein.
- Butter: Adds richness to the shortbread; I use unsalted for better control over salt levels.
- Maple Syrup: A natural sweetener that blends seamlessly into both shortbread and caramel layers for sweetness with depth.
- Vanilla Extract: Elevates all flavors with a warm, comforting aroma.
- Salt: Just a pinch to balance sweetness and enhance all the other flavors.
- Creamy Peanut Butter: This creamy nut butter is the star of the caramel layer, giving it that rich, fudgy texture.
- Chocolate Chips: I love using dark chocolate chips for a less sweet, more sophisticated coating.
- Coconut Oil: Helps melt and smooth the chocolate to give a shiny, even coating on the bars.
Variations
Everyone’s sweet tooth is a little different, right? I often switch up ingredients in this Healthy Gluten-Free Homemade Twix Bars Recipe depending on what I have or who I’m making it for. Feel free to make it your own!
- Nut-Free Variation: I once swapped peanut butter for sunflower seed butter for a nut allergy-friendly treat — just as delicious!
- Vegan Option: Use coconut oil instead of butter, and check your chocolate chips for dairy-free options.
- Sweetener Swaps: Honey or agave syrup can replace maple syrup, but maple adds that rich, signature flavor.
- Chocolate Type: Experiment with milk or white chocolate if you prefer a sweeter coating.
- Add Sea Salt: Sprinkling flaky sea salt over the chocolate elevates the flavors with a beautiful salty-sweet contrast.
How to Make Healthy Gluten-Free Homemade Twix Bars Recipe
Step 1: Prepare and Bake the Almond Flour Shortbread Base
First, preheat your oven to 350°F (175°C) and line an 8×8 inch pan with parchment paper, making sure the edges peek out on all sides. This little extra step means your shortbread will lift out like a charm once it’s done baking. Combine almond flour, melted butter, maple syrup, vanilla extract, and salt in a big bowl until it forms a soft dough. Press it evenly into your pan — firm pressure here is key to getting that nice, dense shortbread. Bake for 10 to 12 minutes until the edges are a lovely golden brown. Let it cool fully while you move on to the caramel.
Step 2: Make the Luscious Peanut Butter Caramel Layer
In a medium bowl, stir together creamy peanut butter, maple syrup, vanilla, and almond flour for that perfect, thick caramel texture. Once your shortbread base is completely cooled, gently spread the caramel mixture all over the top, smoothing it out into an even layer. This is the fun part where your bars start feeling like a real Twix! Pop the pan into the freezer for at least an hour to help the caramel set hard enough for chocolate dipping later.
Step 3: Melt the Chocolate Coating Perfectly
While the caramel chills, melt your chocolate chips with coconut oil in a heat-safe bowl using a gentle double boiler or microwave in 30-second bursts, stirring often to prevent scorching. You want it smooth, glossy, and fully melted to get a silky coating on those bars. If your chocolate is too thick, the coconut oil thins it just enough to give a perfectly smooth finish.
Step 4: Slice and Dip Your Twix Bars
Remove your set block from the freezer and carefully lift it out using the parchment paper edges. Place it on a cutting board, then cut in half lengthwise. Slice each half into eight equal bars so you end up with 16. Now, here’s where this Healthy Gluten-Free Homemade Twix Bars Recipe really shines: dip each bar into your melted chocolate, ensuring each piece is fully coated. Don’t rush this — it’s worth it! Tap off excess chocolate gently and place bars on parchment paper to set.
Step 5: Add Final Touches and Chill
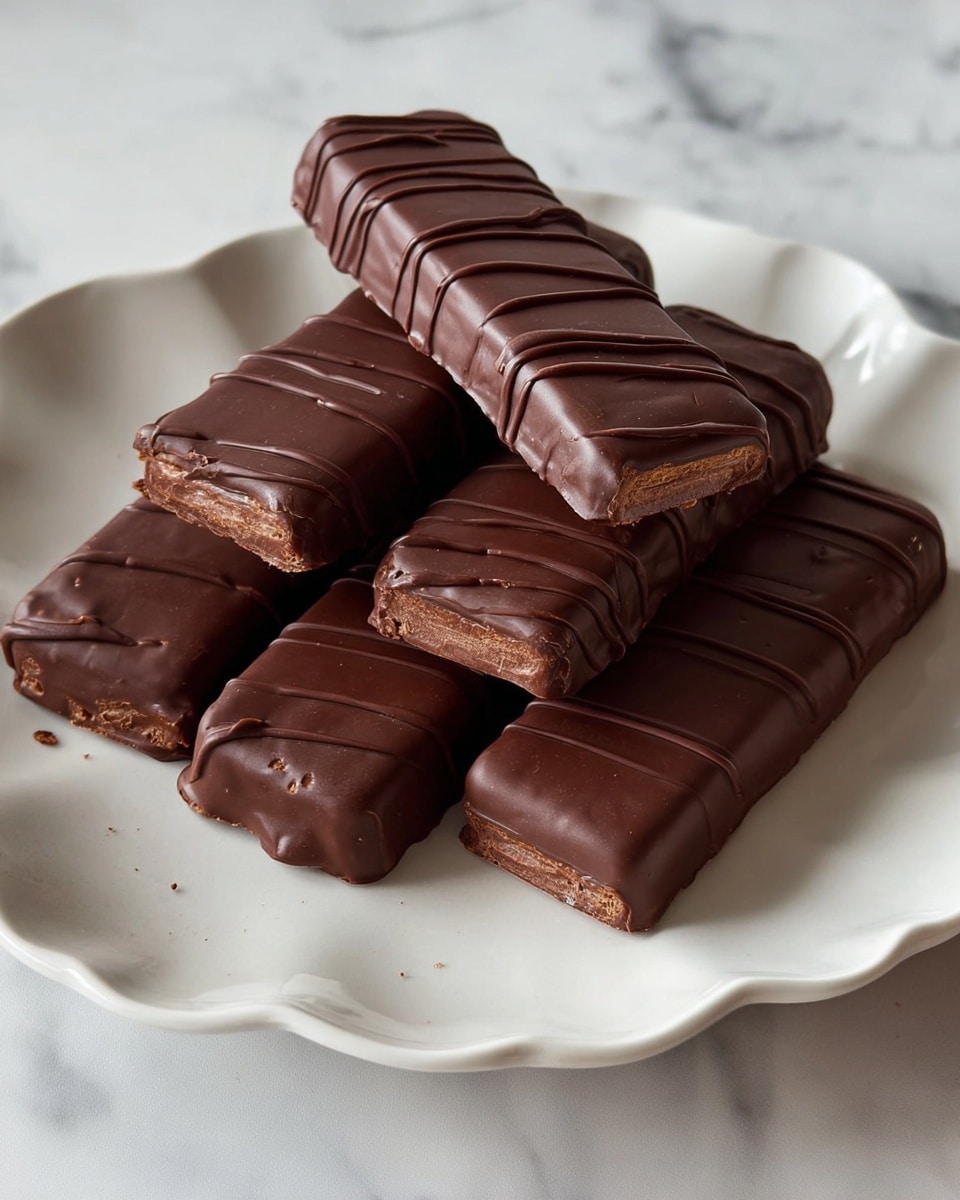
If you have any melted chocolate left, drizzle it decoratively over the bars and sprinkle with flaky sea salt for a sophisticated touch. Pop the bars back in the freezer for 10 minutes until the chocolate hardens. Once set, they’re ready for you to enjoy — rich, crunchy, chewy, and utterly satisfying.
Pro Tips for Making Healthy Gluten-Free Homemade Twix Bars Recipe
- Perfect Crust Pressing: I learned that pressing the shortbread dough firmly into the pan gives a sturdier base that won’t crumble when you slice.
- Cooling is Key: Don’t rush cooling before adding caramel layer — a warm base makes your caramel slide off, so be patient!
- Dipping Technique: Use a fork or toothpick to dip bars one at a time to ensure even chocolate coverage without breaking.
- Storage Strategy: Quickly returning dipped bars to freezer prevents melting and keeps the chocolate smooth.
How to Serve Healthy Gluten-Free Homemade Twix Bars Recipe
Garnishes
I like to sprinkle a tiny pinch of flaky sea salt on top right after dipping — it adds that gorgeous salty-sweet flavor combo that really makes these bars pop. Sometimes a light dusting of crushed nuts adds both texture and visual appeal for sharing with company.
Side Dishes
These bars are sweet enough to stand alone but pair wonderfully with a cup of coffee or a glass of almond milk. For a brunch spread, I love serving them alongside fresh fruit or a dollop of coconut whipped cream for a decadent treat.
Creative Ways to Present
For birthdays or holidays, I line a pretty box or tin with parchment and arrange the bars like little treasure bars, sometimes tied with a rustic ribbon. They also make fun toppings for ice cream sundaes or crushed over yogurts for a crunchy surprise.
Make Ahead and Storage
Storing Leftovers
Since these bars have a rich caramel and chocolate coating, I always store leftovers in an airtight container in the fridge to keep them firm but fresh. They last about a week this way — perfect for when you want a sweet fix ready to go.
Freezing
Freezing these bars in a sealed container works great for long-term storage. Just layer parchment paper between bars to prevent sticking. When I do this, they last for a couple of months without flavor loss.
Reheating
Since these are best enjoyed cold or room temperature, I usually let frozen bars thaw on the counter for 10-15 minutes before serving. If you like your chocolate slightly softer, a quick 5-second zap in the microwave does the trick without melting the layers.
FAQs
-
Can I make this Healthy Gluten-Free Homemade Twix Bars Recipe nut-free?
Absolutely! For a nut-free version, swap almond flour for oat flour (make sure it’s gluten-free if needed) and use a seed butter like sunflower seed butter instead of peanut butter. This will keep the bars delicious while accommodating nut allergies.
-
Is it possible to use a different sweetener in this recipe?
Yes! Maple syrup works best because of its rich flavor and liquid consistency, but you can substitute honey or agave nectar. Just note that honey may make the bars slightly denser while agave keeps them lighter.
-
Can I make these bars ahead of time?
Definitely. These bars actually benefit from being made ahead since chilling helps everything set perfectly. They store well in the fridge up to a week or in the freezer for longer-term enjoyment.
-
How do I prevent the chocolate coating from cracking?
Make sure to melt chocolate gently and add coconut oil to keep it flexible when set. Also, store bars in a cool, but not freezing, environment after dipping to avoid cracking due to temperature shocks.
Final Thoughts
This Healthy Gluten-Free Homemade Twix Bars Recipe has quickly become one of my go-to indulgences — not just because it’s gluten-free, but because it tastes just like the classic with a fresh, wholesome spin. I love knowing exactly what’s in my treats and sharing that with you feels like a little kitchen hug. So go ahead, try making these bars; I promise you’ll enjoy every rich, crunchy bite and be proud you made them yourself!
Print
Healthy Gluten-Free Homemade Twix Bars Recipe
- Prep Time: 20 minutes
- Cook Time: 12 minutes
- Total Time: 2 hours 30 minutes
- Yield: 16 bars
- Category: Dessert
- Method: Baking
- Cuisine: American
- Diet: Gluten Free
Description
These Healthy Twix Bars are a delicious gluten-free treat that combines a buttery almond flour shortbread base with a creamy peanut butter caramel filling, all coated in rich chocolate. Perfect for a guilt-free indulgence, these homemade bars are easy to make and ideal for satisfying sweet cravings with wholesome ingredients.
Ingredients
Shortbread Base:
- 1 ½ cups Almond Flour
- 3 tablespoon Butter, melted
- 1 ½ tablespoon Maple Syrup
- ½ teaspoon Vanilla Extract
- ¼ teaspoon Salt
Caramel Filling:
- 1 cup Creamy Peanut Butter
- ⅓ cup Maple Syrup
- 1 teaspoon Vanilla Extract
- ¼ cup Almond Flour
Chocolate Coating:
- 1 cup Chocolate Chips
- 1 ½ tablespoon Coconut Oil
Instructions
- Preheat Oven and Prepare Pan: Preheat your oven to 350°F (175°C). Line an 8×8 inch baking pan with parchment paper, ensuring the edges are well covered for easy removal of the base later.
- Prepare the Shortbread: In a large mixing bowl, combine almond flour, melted butter, maple syrup, vanilla extract, and salt. Stir until fully incorporated to form a dough. Press mixture firmly and evenly into the prepared pan. Bake for 10-12 minutes until edges are golden brown. Set aside to cool.
- Make the Caramel Filling: In a medium bowl, mix peanut butter, maple syrup, vanilla extract, and almond flour until smooth. Once the shortbread is cooled, spread the caramel evenly over it. Place the pan in the freezer for at least 1 hour to let the caramel set.
- Prepare the Chocolate Coating: Melt chocolate chips and coconut oil together in a shallow bowl over boiling water or microwave in 30-second intervals, stirring until smooth.
- Assemble the Bars: Remove the frozen pan using parchment edges, place on a cutting board, and slice into 16 bars (cut in half, then each half into 8 bars).
- Coat the Bars: Dip each bar into the melted chocolate until fully covered. Tap off excess and place bars on a parchment-lined tray. Repeat for all bars.
- Final Touch: Optionally, drizzle remaining melted chocolate over bars and sprinkle with flaky sea salt. Return to freezer for about 10 minutes until chocolate hardens.
- Serve and Store: Enjoy your healthy Twix bars! Store leftovers in an airtight container in the fridge or freezer.
Notes
- Ensure the shortbread base is fully cooled before spreading the caramel layer to prevent melting.
- Freezing the bars before coating helps the caramel layer set firmly for easier handling.
- You can substitute peanut butter with almond or cashew butter if preferred.
- For a dairy-free option, use vegan butter instead of regular butter.
- Store bars in an airtight container in the fridge for up to one week or freeze for longer storage.
- Optional sea salt enhances the chocolate flavor but can be omitted for a sweeter bar.
Nutrition
- Serving Size: 1 bar (approx. 50g)
- Calories: 220
- Sugar: 9g
- Sodium: 60mg
- Fat: 16g
- Saturated Fat: 5g
- Unsaturated Fat: 10g
- Trans Fat: 0g
- Carbohydrates: 15g
- Fiber: 3g
- Protein: 5g
- Cholesterol: 15mg

