
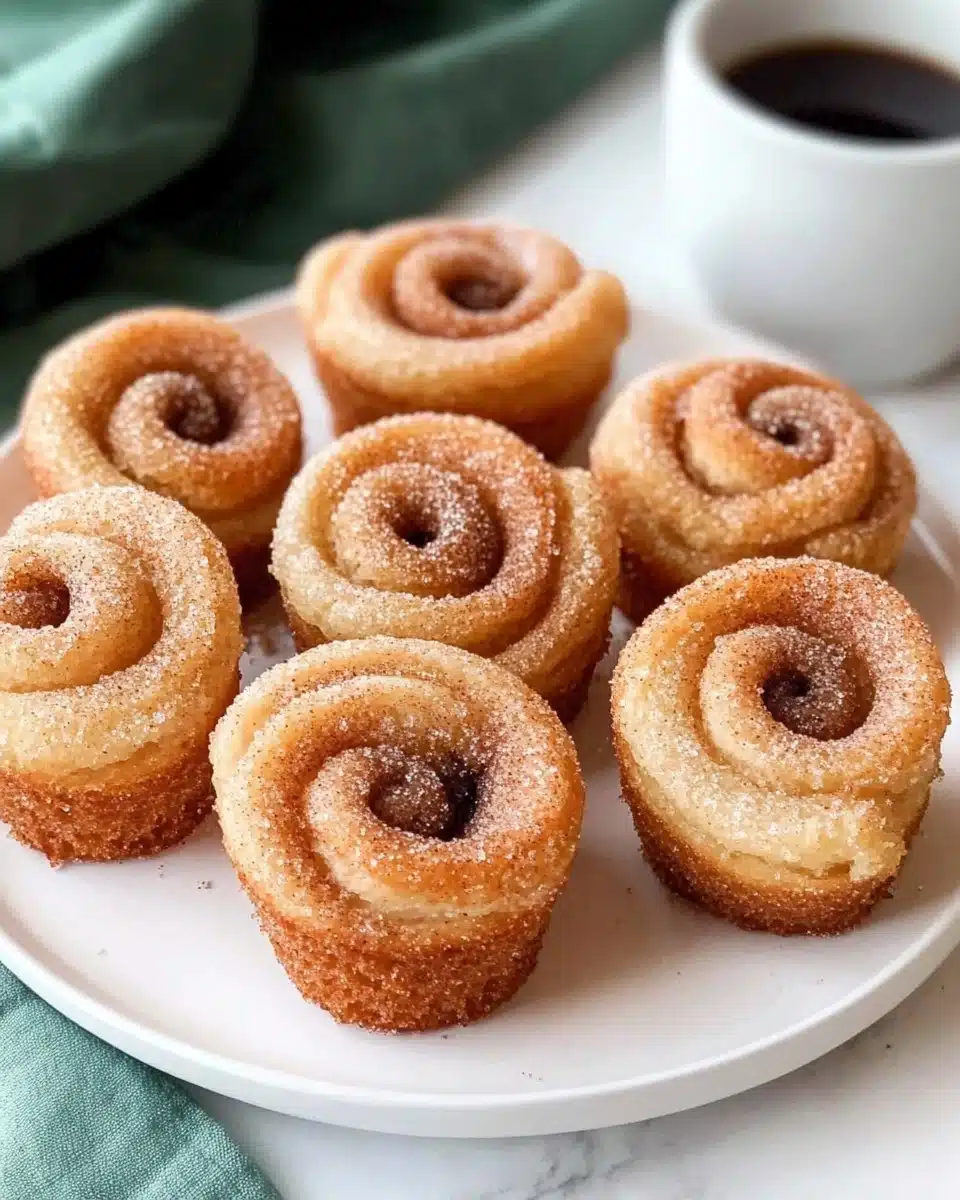
Oh, Homemade Cruffins—the enchanting mashup of a croissant and a muffin! Imagine biting through layers of silky, buttery pastry that peel back like the petals of a rose, dusted in cinnamon sugar, with the chance to discover a hidden swirl of Nutella or jam inside. These treats look like something from a fancy Parisian bakery, but you can absolutely make them at home—and I promise, the joy is in every bite (and every swirl).
Why You’ll Love This Recipe
- Bakery-Worthy at Home: Dazzle your loved ones (and yourself!) with cruffins that look and taste just as glorious as any you’ve seen behind a pastry case.
- Layers on Layers: Enjoy shatteringly crisp, buttery, golden layers that practically melt on your tongue—thanks to thoughtfully laminated dough.
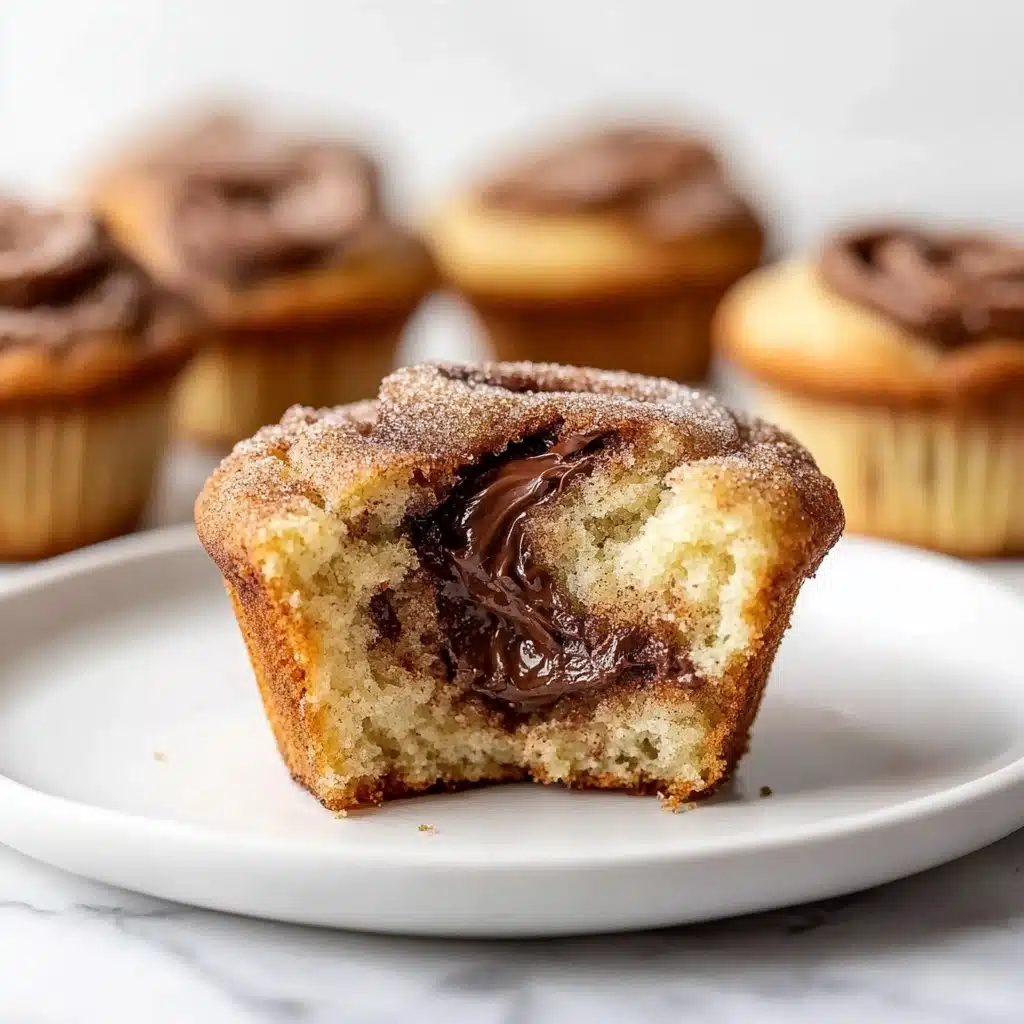
- Flexible Flavors: Fill and coat your Homemade Cruffins however you please, from classic cinnamon-sugar to decadent Nutella or bright lemon curd.
- A Baking Adventure: The process is just involved enough to feel like a kitchen triumph, but approachable even for home bakers who love a weekend project.

Ingredients You’ll Need
You don’t need fancy equipment or exotic ingredients to make Homemade Cruffins—the magic is in how you use each element! Every ingredient plays a part in building flavor, texture, and those gorgeous flaky layers, so let’s do a quick run-through of the key players before you get started.
- Whole Milk: Warms everything up and gives your dough extra richness—room temperature is key for activating the yeast.
- Instant or Active Dry Yeast: The leavening force—guarantees a beautiful rise and airy structure to every cruffin.
- Granulated Sugar: Both sweetens the dough and helps with that tender crumb; plus, you’ll need more for the cinnamon-sugar coating!
- Unsalted or Salted Butter: Used in both the dough and for lamination; European-style butter really shines here and gives those rich, luscious layers.
- All-Purpose Flour: This everyday staple forms the structure—be sure to spoon and level it for accuracy!
- Salt: Rounds out the flavors and keeps the cruffins from tasting flat.
- Ground Cinnamon: For the classic sweet, spicy coating and that irresistible aroma as they bake.
- Optional Fillings: Nutella, jam, lemon curd, or pastry cream—your choice, so you can surprise everyone with something different!
Variations
The best part about Homemade Cruffins is how easily you can make them your own. Whether you want to switch up the sweetness, sneak in a little extra spice, or go dairy-free, the options are almost endless—and always delicious!
- Chocolate Hazelnut Cruffins: Swirl a spoonful of Nutella inside before rolling up, then dust with cocoa powder for a double-chocolate finish.
- Lemon-Lover’s Cruffins: Fill the center with zesty lemon curd and dust the outside with lemon-sugar for a tangy twist.
- Berry Jam Cruffins: A dollop of your favorite jam makes every bite burst with fruity flavor—try raspberry or apricot for a beautiful color too.
- Dairy-Free Version: Use plant-based milk and a vegan butter substitute—the layers will still be lusciously flaky.
How to Make Homemade Cruffins
Step 1: Prepare the Dough
Start by gently warming your milk to about 110°F—it should feel comfortably warm, not hot. In your stand mixer bowl, whisk together the warm milk, yeast, and a little sugar. Let it sit until frothy, about 5 minutes; this step ensures your yeast is awake and ready to work its magic, giving your Homemade Cruffins the best possible rise.
Step 2: Mix & Knead
Add the softened butter, a portion of the flour, and salt into the yeast mixture. Mix for several minutes until it starts to come together, then slowly add the remaining flour until a soft, slightly tacky dough forms. Continue kneading for five more minutes—by hand or with your mixer—until it passes the “windowpane test” and springs back when poked. A well-kneaded dough is the secret to those delicate cruffin layers!
Step 3: First Rise
Lightly oil a bowl and set your dough in, turning it to coat. Cover and let it rise in a warm spot for about two hours. You’ll know it’s ready when it’s nearly doubled in size—it should look pillowy and smell rich with yeast and butter. This first rise gives Homemade Cruffins their irresistible, tender crumb.
Step 4: Flatten, Rest & Chill
Punch down the dough to release excess air, then gently stretch or roll it out into a rectangle. Pop the whole thing, lightly covered, into your fridge to rest for 20 minutes. This short chill firms up the butter, making it easier to laminate the layers ahead (think: less mess, more magic).
Step 5: Laminate the Dough
This is where Homemade Cruffins get their croissant-like layers! Beat your slightly softened butter with a bit of flour, then spread it over the center of the chilled dough. Fold, roll, and chill as directed, repeating the lamination steps a total of three times with rests in between. Don’t rush—each fold traps more buttery goodness.
Step 6: Shape and Fill
Divide the chilled dough into three parts and roll each into a rectangle again. Sprinkle generously with cinnamon-sugar, then cut into strips, stack, and roll those strips into dramatic swirls that fit perfectly into your muffin pan. If you’re feeling fancy, now’s the time to add a layer of Nutella, berry jam, or lemon curd before rolling—surprise!
Step 7: Final Rise & Bake
Once all your cruffins are shaped and nestled in the pan, cover loosely and let them rise for about an hour, until puffy and nearly doubled. Bake at 350°F for 25–28 minutes, until gloriously golden and crisp on top. The kitchen will smell like a sugar-dusted bakery by now!
Step 8: Sugarcoat and Fill
When the Homemade Cruffins are cool enough to handle, roll them one by one in the remaining cinnamon-sugar. For an extra touch, use a piping bag to squeeze your favorite filling into the center. Every bite is soft, flaky, and full of surprises.
Pro Tips for Making Homemade Cruffins
- Choose the Right Butter Texture: For perfect layers, make sure your lamination butter is soft enough to spread but still cool—ideally between 60–64°F; this matches the dough texture and keeps things pliable, not greasy.
- Chill, but Don’t Overchill: Stick closely to the chilling times between folds—too much time and your dough gets tough, too little and the butter will ooze out before it can form delicate layers.
- Work with Light Hands: When rolling and shaping, use a gentle touch to avoid tearing the dough or squishing the layers—you want to keep all that puffiness intact for a showstopping cruffin!
- Customize Your Swirls: Don’t stress if every cruffin isn’t identical; the little knots and twists just mean each one has its own unique, craggy crispness.
How to Serve Homemade Cruffins
Garnishes
Give your Homemade Cruffins a playful finish by rolling them in extra cinnamon-sugar while still warm. A gentle dusting of powdered sugar or a delicate drizzle of simple glaze adds bakery glam—especially pretty if you’re serving them for a special brunch.
Side Dishes
These cruffins are the centerpiece, but they absolutely shine alongside fresh fruit, creamy Greek yogurt, or a good cup of coffee. For a full brunch, add a platter of crisp bacon or a bright salad of citrus segments and mint.
Creative Ways to Present
For a truly unforgettable display, stack your cruffins on a tiered cake stand or arrange them in a woven basket lined with a pretty napkin. Offer a few different fillings and let guests pick their favorite surprise—it turns breakfast into a party!
Make Ahead and Storage
Storing Leftovers
Let your cruffins cool completely before storing. Pop them into an airtight container and keep at room temperature for up to 3 days—they’ll stay wonderfully soft inside and crisp on the edges, especially if you avoid the fridge.
Freezing
Freeze fully baked and sugar-coated Homemade Cruffins by wrapping each one individually in plastic wrap, then tucking them into a freezer-safe container. They’ll keep beautifully for up to 3 months. Thaw on the counter when a cruffin craving strikes!
Reheating
For maximum cruffin joy, reheat in a 300°F oven for 5–8 minutes until warmed through; they’ll regain that delightful crispness on the outside. If you filled them, let the cruffins cool a bit so you don’t melt your filling completely.
FAQs
-
Can I use store-bought dough for Homemade Cruffins?
You can use high-quality frozen croissant or puff pastry dough in a pinch, but nothing compares to making the dough from scratch—the homemade version is flakier, richer, and gives you better control over the layers and flavor!
-
What’s the best way to know if my dough is ready after kneading?
Try the “windowpane” test: stretch a small piece of dough until thin—if light shines through without tearing, your gluten structure is perfect. The dough should also bounce back slowly when poked with your finger.
-
How do I keep the butter from leaking during baking?
Be sure to keep the butter and dough at similar temperatures before laminating (not too warm or cold), and don’t skip the chilling times between folds. Light dustings of flour on any exposed butter will also help.
-
Can I prepare Homemade Cruffins ahead of time?
Absolutely! Prepare the shaped cruffins and refrigerate overnight, then let them come to room temperature and rise for an hour before baking the next day. This makes fresh, warm cruffins for brunch extra easy.
Final Thoughts
If you’ve ever wanted to transform your kitchen into a swoon-worthy patisserie, Homemade Cruffins are your golden ticket. Give them a whirl, share them with friends, or savor every splendid swirl yourself—these are the kind of home-baked treats that make mornings special. Enjoy every flaky, sugar-kissed bite!
Print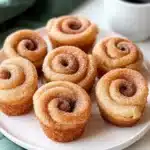
Homemade Cruffins Recipe
- Prep Time: 4 hours, 45 minutes
- Cook Time: 25 minutes
- Total Time: 5 hours, 45 minutes
- Yield: 12 cruffins
- Category: Dessert
- Method: Baking
- Cuisine: French
- Diet: Vegetarian
Description
Learn how to make delicious Homemade Cruffins from scratch with this detailed recipe. These flaky, buttery pastries are a delightful treat for any occasion.
Ingredients
Dough
- 1 cup (240ml) whole milk, warmed to about 110°F (43°C)
- 2 and 1/4 teaspoons (7g) instant or active dry yeast (1 standard packet)
- 3 Tablespoons (38g) granulated sugar
- 3 Tablespoons (43g) unsalted or salted butter, softened to room temperature and cut into 3 pieces
- 3 cups (375g) all-purpose flour (spooned & leveled), plus more as needed
- 1 and 1/4 teaspoons salt
Lamination
- 1 cup (16 Tbsp; 226g) salted butter, slightly softened (see Note)
- 1 Tablespoon all-purpose flour
Filling & Coating
- 3/4 cup (150g) granulated sugar
- 1 Tablespoon ground cinnamon
- optional fillings: 6 Tablespoons Nutella, jam, lemon curd, or pastry cream
Instructions
- Prepare the dough: Whisk warm milk, yeast, and sugar together in a bowl. Add butter, flour, and salt. Mix until a soft dough forms.
- Knead the dough: Beat or knead the dough for 5 minutes until soft. Allow the dough to rise for 2 hours.
- Flatten dough: Shape the dough into a rectangle and chill for 20 minutes.
- Prepare for lamination: Beat butter and flour together.
- 1st lamination: Spread butter on dough, fold, roll out, and chill.
- 2nd and 3rd laminations: Repeat folding and rolling steps.
- Shape & fill: Cut dough, roll out, sprinkle with cinnamon-sugar, cut into strips, roll up, and place in muffin pan.
- Rise & bake: Let cruffins rise, then bake at 350°F for 25-28 minutes.
- Coat & fill: Roll cruffins in cinnamon-sugar, fill if desired.
- Store: Keep leftovers at room temperature for up to 3 days.
Notes
- For overnight dough, refrigerate after shaping and let rise before baking.
- Freeze coated cruffins for up to 3 months.
- Special tools: Stand Mixer, Silicone Baking Mat, Rolling Pin, etc.
Nutrition
- Serving Size: 1 cruffin
- Calories: Approx. 320
- Sugar: 17g
- Sodium: 250mg
- Fat: 15g
- Saturated Fat: 9g
- Unsaturated Fat: 5g
- Trans Fat: 0g
- Carbohydrates: 40g
- Fiber: 2g
- Protein: 5g
- Cholesterol: 35mg


