

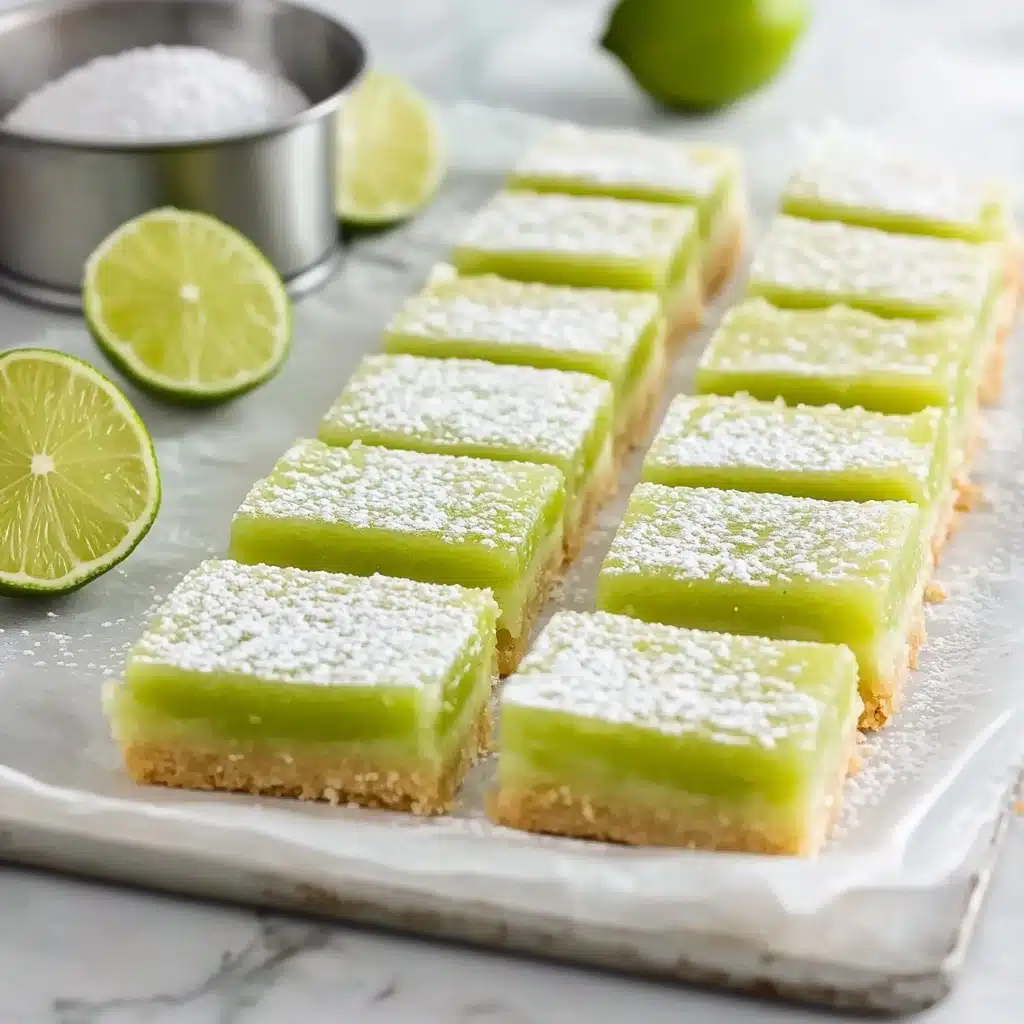
If you’re a lover of all things citrus—especially when it comes wrapped in sweet, buttery bliss—these Lime Bars are your new dessert obsession. With a tender, shortbread crust and an ultra-silky, tart-sweet lime filling, every bite is a bright, creamy celebration. They’re the perfect treat for those sunny afternoons (or whenever you’re craving a taste of summer).
Why You’ll Love This Recipe
- Unbeatable Flavor: The combination of tangy fresh lime and just the right amount of sweetness makes these bars taste like sunshine on a plate.
- Dreamy Texture: These Lime Bars boast a buttery, tender shortbread crust that holds a smooth, creamy citrus filling—irresistibly soft with a gentle, satisfying bite.
- No Fancy Equipment Needed: All you need is a bowl, a whisk, and a baking pan—these are simple enough for both beginner bakers and seasoned pros.
- Perfect for Any Occasion: Whether you need a picnic treat, a holiday potluck dessert, or just a pick-me-up with your afternoon tea, these bars always deliver.

Ingredients You’ll Need
One of my favorite parts about making Lime Bars is their straightforward list of classic ingredients—each one playing a starring role in creating that signature balance of bright citrus and buttery goodness. Here’s why you need every single component:
- All-purpose flour: Provides structure for both the tender crust and the set, creamy filling.
- Powdered sugar: This gives the crust that melt-in-your-mouth texture and a gentle sweetness without graininess.
- Salt: Just a pinch sharpens and intensifies every flavor, keeping things from tipping into overly sweet territory.
- Unsalted butter: Cold and cut into cubes, it makes your crust extra flaky and flavorful.
- Granulated sugar: Sweetens the zippy lime filling, making those tart notes beautifully balanced.
- Large eggs: The real hero of the filling—eggs give it structure while keeping things silky and rich.
- Lime zest: Don’t skip this! The zest infuses the filling with unforgettable aroma and color.
- Fresh lime juice: The key to a tangy, authentic citrus flavor—bottled juice simply won’t compare.
- Green (and yellow) food coloring (optional): Just a drop or two if you want to enhance that cheerful, limey look—totally optional but fun!
Variations
Lime Bars are endlessly customizable—perfect for letting your creativity shine or meeting whatever is in your pantry. Try these ideas to put your own twist on this classic, or adapt it to fit just about any need or craving:
- Lemon-Lime Bars: Replace half the lime juice and zest with lemon for a subtly different citrus zing (it’s like sunshine times two!).
- Gluten-Free Lime Bars: Swap the all-purpose flour for your favorite 1:1 gluten-free baking blend—just make sure it contains xanthan gum to mimic the texture.
- Coconut Crust: Add ¼ cup of sweetened shredded coconut to the crust mixture for a tropical flair that pairs beautifully with the lime.
- Vegan Twist: Use a plant-based butter for the crust and try an egg substitute designed for baking in the filling—results will be a tad softer but still delicious!
How to Make Lime Bars
Step 1: Prep the Pan & Oven
Start by preheating your oven to 350°F (175°C)—a crucial step since the crust needs to begin baking right away. Lightly grease your 11×7-inch baking dish or line it with parchment paper, making sure you leave a 2-inch overhang on both sides. This little trick will make lifting and slicing your Lime Bars a total breeze later!
Step 2: Make the Buttery Shortbread Crust
Combine the flour, powdered sugar, salt, and cold butter in a food processor. Pulse until the mixture looks like fine, soft sand—no big butter lumps remain. Dump it into your prepared pan and press it down evenly and firmly. Bake the crust for 18 to 20 minutes, until it’s just golden (don’t overbake; you want it gently crisp, not hard).
Step 3: Whip Up the Lime Filling
While the crust is in the oven, whisk together the granulated sugar and flour in a medium bowl to avoid any lumps. Add the eggs one by one, whisking thoroughly after each. Stir in the lime zest, fresh lime juice, and a drop of green (and/or yellow) food coloring, if you’re using them. The filling should be smooth, citrusy, and fragrant!
Step 4: Bake Until Just Set
Pour the filling over the hot crust (don’t let the crust cool—it helps the layers fuse together). Bake for another 18 to 20 minutes; you’ll know they’re ready once the filling is set and doesn’t jiggle in the center. Overbaking will make the filling tough, so keep a close eye as it nears the end!
Step 5: Cool, Chill, and Slice
Allow the bars to cool completely in the pan at room temperature—about 1 hour. Then move them to the fridge for an additional 1–2 hours. This step is magical for getting those perfectly neat, clean slices. When you’re ready to serve, lift the Lime Bars out by their parchment ‘handles,’ slice, and dust with more powdered sugar if you like!
Pro Tips for Making Lime Bars
- Super Zesty Flavor: Roll your limes firmly on the counter before zesting and juicing—it releases more oils for extra aroma and boldness in your Lime Bars.
- No-Crack Fillings: Don’t skip the chilling time; it gives the custard layer time to set gracefully, leading to a creamy, crack-free finish.
- Effortless Lifting: Use a parchment paper sling to ensure the bars don’t stick and you can slice them beautifully with minimal mess.
- Picture-Perfect Slices: For those sharp, bakery-style edges, wipe your knife clean between cuts and use a slightly damp blade if needed!
How to Serve Lime Bars
Garnishes
A simple dusting of powdered sugar is a classic touch, but don’t be afraid to get creative! Try scattering a little extra lime zest on top, add a few delicate curls of lime peel for a sophisticated look, or even place a tiny mint leaf on each bar. These little extras make every Lime Bar feel bakery-worthy (and extra special to serve!).
Side Dishes
Lime Bars shine on their own, but you can really elevate dessert hour by pairing them with fresh seasonal fruit—think berries, pineapple, or even a fruity salsa. For sipping, a cold glass of iced tea or a creamy vanilla latte is pure bliss next to the zippy citrus flavor.
Creative Ways to Present
Serve Lime Bars stacked on a pretty cake stand, nestled in festive cupcake liners for parties, or even sliced into bite-sized squares as a finger-friendly treat at gatherings. You can also layer pieces with whipped cream in small jars for adorable, portable parfaits that impress every time!
Make Ahead and Storage
Storing Leftovers
These bars keep beautifully in the fridge. Arrange leftover Lime Bars in a container with parchment or wax paper between layers to prevent sticking. They’ll stay delicious and fresh for up to 5 days, perfect for snacking or last-minute treats.
Freezing
You can definitely freeze Lime Bars—just wait until they’re completely cooled and set. Place them in a single layer on a tray to freeze, then stack in an airtight container with parchment between layers. They’ll last in the freezer for up to 2 months; let thaw in the fridge overnight before serving.
Reheating
Lime Bars are best enjoyed chilled or at room temperature, so there’s no need for traditional reheating. If serving from frozen, simply allow them to thaw in the refrigerator for a few hours and they’ll be perfectly creamy and flavorful once again.
FAQs
-
Can I use bottled lime juice instead of fresh?
Using fresh lime juice is highly recommended because it gives the filling a brighter, more natural flavor. Bottled juice can taste a bit dull or bitter, so stick with freshly squeezed for the absolute best Lime Bars.
-
How do I know when the filling is set?
After baking, give the pan a gentle shake—the Lime Bars are done when the filling is no longer wobbly in the center. It may still look slightly moist, but will firm up as it cools and chills in the fridge.
-
Why did my crust turn out hard or crumbly?
If your crust baked a little too long, it may become tough; aim for just golden. If it’s crumbly, double-check your butter was fully integrated and pressed down firmly into the pan. The texture should be tender and hold together when cut.
-
Can I double the recipe for a crowd?
Absolutely! Double all the ingredients and bake in a 9×13-inch pan. The bake times might be just a minute or two longer, so keep a close eye. These Lime Bars are always a hit at parties and gatherings!
Final Thoughts
If you’re searching for a dessert that brings pure happiness and a burst of citrusy nostalgia, Lime Bars are it. I just know these will brighten your table and your mood, so grab a handful of limes and get baking—you’re in for a sweet, zesty treat everyone will adore!
Print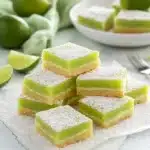
Lime Bars Recipe
- Prep Time: 10 minutes
- Cook Time: 40 minutes
- Total Time: 2 hours 50 minutes
- Category: Dessert
- Method: Baking
- Cuisine: American
- Diet: Vegetarian
Description
These tangy and sweet Lime Bars are the perfect treat for citrus lovers. A buttery crust pairs with a zesty lime filling to create a refreshing dessert that is sure to brighten up any occasion.
Ingredients
Crust:
- 1 cup (120 g) all-purpose flour
- 1/4 cup (30 g) powdered sugar
- 1/4 tsp salt
- 1/2 cup (113 g) butter, (cut into 8 pieces)
Filling:
- 1 1/4 cup (250 g) granulated sugar
- 1/4 cup (30 g) all-purpose flour
- 4 large eggs
- 2 tsp lime zest
- 2/3 cup (159 ml) fresh lime juice
- drop of green (+ yellow) food coloring, optional
Instructions
- Preheat oven to 350 degrees Fahrenheit. Lightly grease or line an 11×7-inch baking dish with parchment paper that overhangs 2-inches on both sides.
- To make the crust: Combine the flour, powdered sugar, salt, and butter in a food processor. Pulse until the mixture resembles fine crumbs. Press into the prepared pan and bake for 18 to 20 minutes, or until golden brown.
- Meanwhile make the filling: Whisk together the sugar and flour in a bowl. Add the eggs, one at a time, whisking well after each addition. Add the zest, lime juice, and a drop of green (+ yellow) food coloring, if desired. Mix until smooth and combined.
- Pour filling over hot crust and return to the oven to bake for an additional 18 to 20 minutes or until set. When done, the filling will no longer jiggle.
- Let cool completely in the pan, about 1 hour. Then refrigerate for 1-2 hours and serve cold. Lift bars out of the pan with parchment paper for easy cutting and serving. Store leftovers in the refrigerator.
Nutrition
- Serving Size: 1 bar
- Calories: 220
- Sugar: 18g
- Sodium: 115mg
- Fat: 9g
- Saturated Fat: 5g
- Unsaturated Fat: 3g
- Trans Fat: 0g
- Carbohydrates: 32g
- Fiber: 0.5g
- Protein: 3g
- Cholesterol: 85mg


