
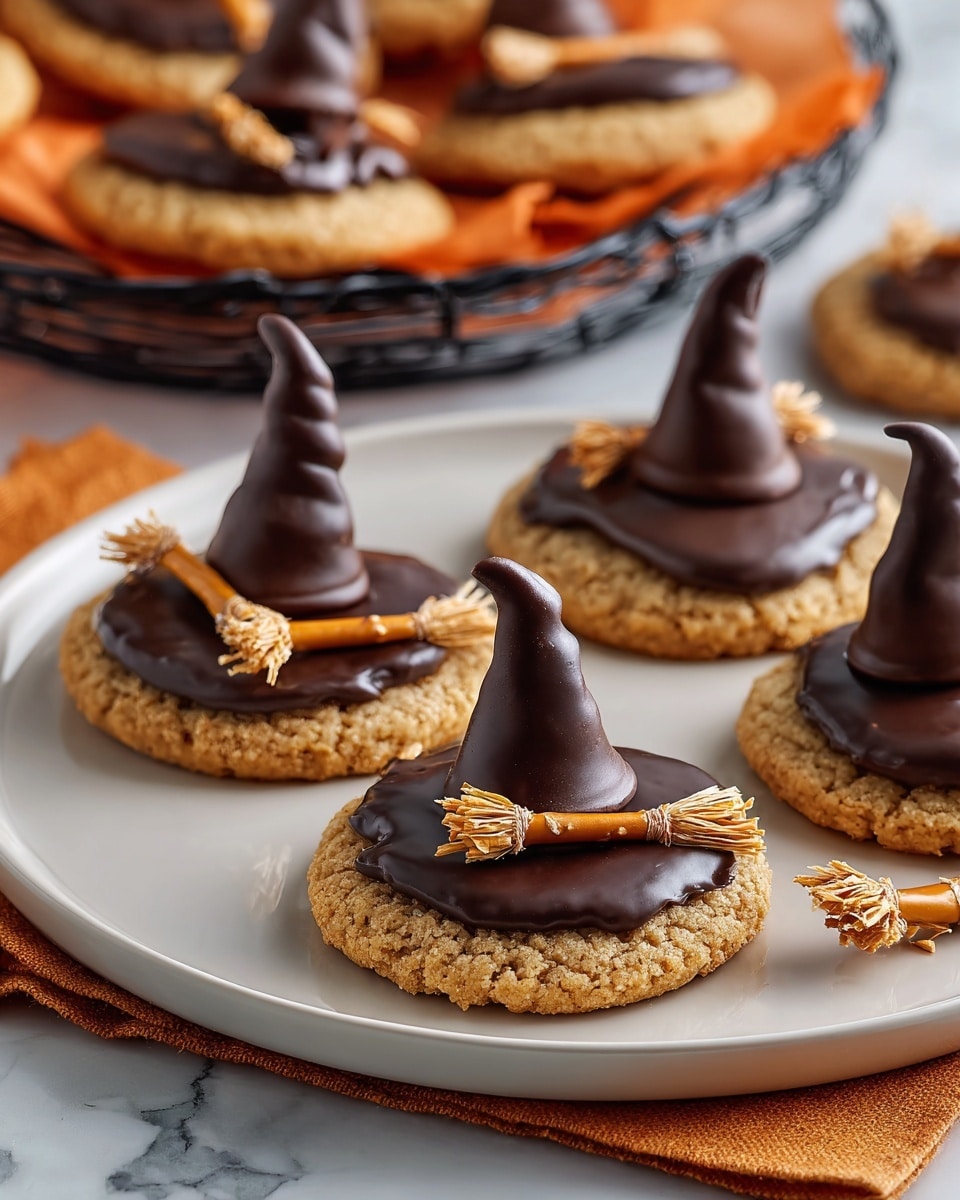
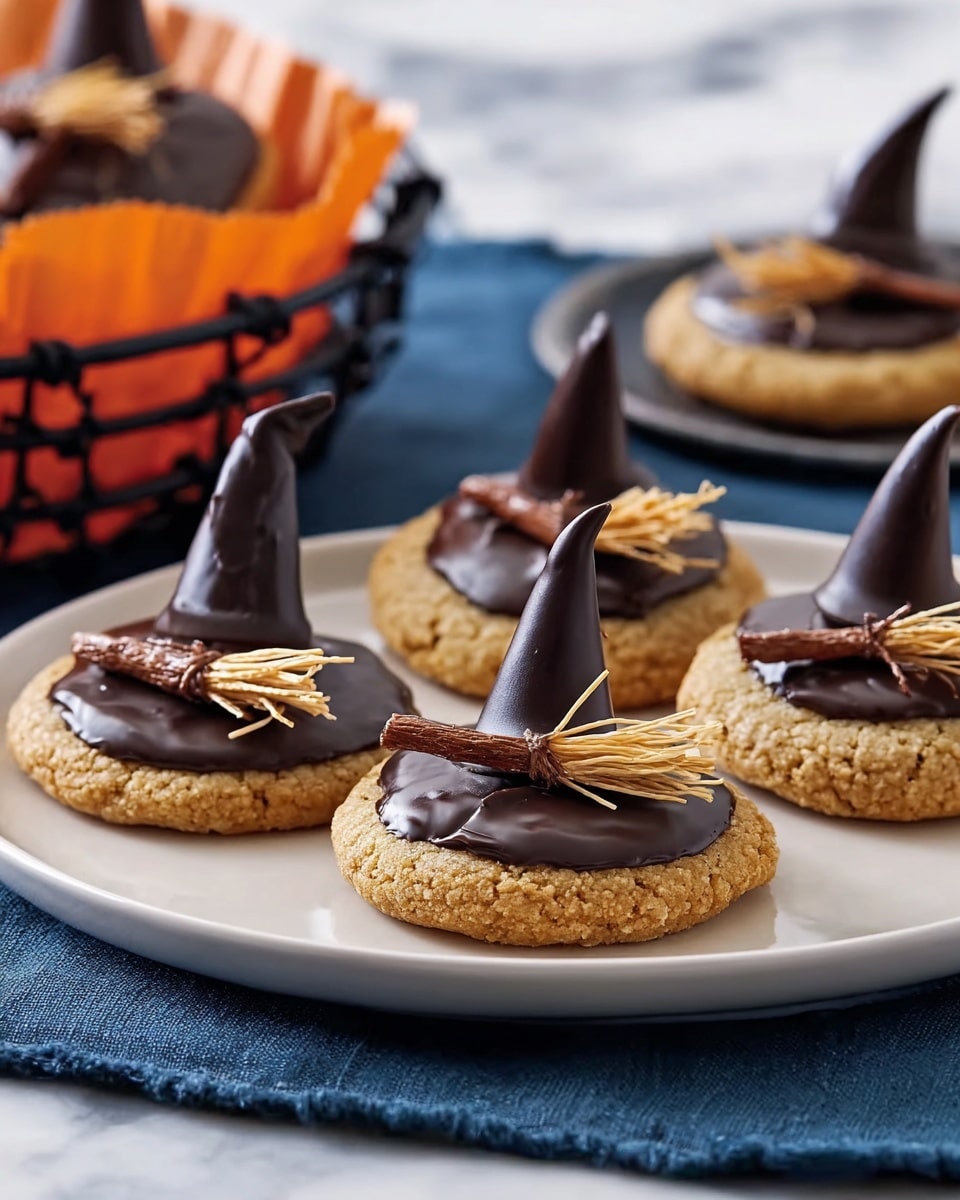
If you’re on the hunt for a recipe that’s whimsically fun, unexpectedly delicious, and perfect for any Halloween or cozy fall gathering, you’ve got to try this Melted Witch Cookies Recipe. I absolutely love how these quirky little treats come together—they’re like edible witches straight from a storybook, with all their charming details and incredible peanut butter flavor. Stick around because I’m going to share all my tips and tricks so you nail this recipe perfectly, even if it’s your first go!
Why You’ll Love This Recipe
- Super Simple Ingredients: You probably already have most of these in your pantry, and the rest are easy to find.
- Fun and Festive: These cookies don’t just taste great—they double as delightful little Halloween decorations.
- Kid-Friendly Activity: I love how this recipe invites creativity—you can involve your kids or friends in decorating the witches’ hats and brooms!
- Perfect Texture: The peanut butter cookie base is soft and chewy, balanced by crunchy pretzel sticks and cereal bristles for the broomsticks.

Ingredients You’ll Need
These ingredients work together to create magic—you’ve got a classic peanut butter cookie mix that’s easy to shape and soft enough to mimic a “puddle,” then the fun candy melts and snacks give this recipe its unique witchy flair. When shopping, pick a quality peanut butter cookie mix for the best base flavor and make sure to grab your Bugles® snacks fresh.
- Betty Crocker™ peanut butter cookie mix: This is the heart of the cookie—ready-made mix saves time and consistently turns out chewy, nutty cookies.
- Vegetable oil: Helps keep the cookie dough moist and tender.
- Water: Just enough to bring the dough together nicely.
- Egg: Acts as a binder and adds richness.
- Bugles® snacks: These quirky cone-shaped snacks become mini witches’ hats—freshness is key to keep the shape crisp!
- Light cocoa candy melts: Quite a game-changer—these melt smooth and set quickly, perfect for frosting and dipping.
- Pretzel sticks: Broken in half, these make perfect broom handles with a satisfying crunch.
- Whole wheat cereal biscuit: Crushed into flakes, these form the “bristles” of the witch brooms and add a lovely texture contrast.
Variations
I love making this Melted Witch Cookies Recipe my own by switching up the decorations based on the season or dietary needs—it’s super versatile. You can easily swap the light cocoa candy melts for white chocolate or colored melts if you want a brighter look, and you can even go gluten-free by choosing an alternative cookie mix.
- Chocolate Variation: Once, I used white chocolate candy melts and paired the broom bristles with crushed toasted coconut—it was a hit!
- Nut-Free Option: Try an allergy-friendly cookie mix and swap peanut butter cookie mix for a classic sugar cookie mix, keeping everything else the same.
- Spicy Twist: For friends who like a little unexpected heat, I added a pinch of cayenne to the dough—it gave it a subtle warmth without overpowering.
How to Make Melted Witch Cookies Recipe
Step 1: Mix That Perfect Dough
Preheat your oven to 375°F—that’s crucial so the oven’s hot as soon as your dough is ready. In a large bowl, stir together the peanut butter cookie mix, vegetable oil, water, and egg until you have a soft dough. I like to use a sturdy spoon first, then finish with my hands if needed—just watch out for sticky fingers! When the dough is ready, drop it by rounded tablespoons onto ungreased cookie sheets, spacing each about 2 inches apart so they have room to puff and spread perfectly.
Step 2: Bake and Cool Your Cookies
Bake the cookies for about 9 to 11 minutes. You want them set but still soft in the middle—they’ll firm up as they cool. Don’t skip that 1-minute resting on the cookie sheet before transferring them to a wire rack to cool completely. Trust me, this step keeps them from breaking apart when you frost them later.
Step 3: Dip, Frost, and Decorate the Witches
Line a cookie sheet with waxed paper before you start dipping—that’s a serious time-saver for cleanup! Heat your light cocoa candy melts until silky smooth. Dip each Bugles® snack into the melted candy, tapping off any excess. Place them on the wax paper and pop them in the fridge until the chocolate hardens—this is your witches’ hats.
Reheat the candy melts just enough if they start to thicken. Then, frost each cookie with a thick layer of melted candy to create a “puddle” effect. Immediately stick half a pretzel stick into the frosting as the broomstick handle. Sprinkle crushed whole wheat cereal onto the broom’s bristle end of the pretzel for that rustic charm. Finally, dip the wide end of each chocolate-coated Bugle into melted candy once more and plant it upright in the center of the cookie, making the witch’s hat stand tall. Let them set until firm—you’ll love how detailed and adorable these turn out!
Pro Tips for Making Melted Witch Cookies Recipe
- Timing Your Candy Melts: I always melt the candy in short bursts in the microwave, stirring every 15 seconds to avoid burning and get that perfect pourable texture.
- Spacing Is Key: Give your cookie dough plenty of space on the baking sheet to prevent them from running together and losing that cute “puddle” shape.
- Cooling Before Decorating: Make sure your cookies are completely cool before frosting, or the candy won’t set properly and the pretzels may get soggy.
- Use Waxed Paper for Dipping: Lining with waxed paper keeps your workspace neat and makes it super easy to remove hats and cookies once the chocolate hardens.
How to Serve Melted Witch Cookies Recipe
Garnishes
I personally enjoy a light dusting of edible glitter or a tiny sprinkle of colored sugar on the melted candy parts to add some sparkle, especially if I’m serving these at a party. It makes these cookies pop visually and amps up the festive vibe!
Side Dishes
Since these cookies are quite rich and sweet, I like pairing them with something simple like a cold glass of milk or a cup of lightly spiced chai tea. For Halloween parties, apple slices or caramel dip also complement them beautifully.
Creative Ways to Present
One year, I arranged these Melted Witch Cookies on a rustic black slate platter with little “witch hats” made from folded paper nearby—that really set the scene! You could also serve them stacked on tiered trays or nestled in mini cauldrons for an extra playful touch that guests will adore.
Make Ahead and Storage
Storing Leftovers
After baking and decorating, I keep leftover Melted Witch Cookies in an airtight container at room temperature for up to 3 days. The cookies stay soft and the candy decorations hold up well—just avoid stacking too many on top of each other to keep those hats intact!
Freezing
If you want to freeze these, I suggest doing it before decorating. Freeze the baked cookies solid on a tray, then transfer them to a ziplock bag. When ready to serve, thaw at room temperature and decorate fresh. I’ve found that freezing after decoration sometimes damages the delicate candy parts.
Reheating
Personally, I don’t recommend reheating these cookies since the melted candy decorations might soften or melt completely. Instead, I enjoy them at room temperature or slightly warmed for just a few seconds in the microwave to enhance that fresh-baked feel without spoiling the look.
FAQs
-
Can I make Melted Witch Cookies Recipe without peanut butter?
Absolutely! If peanut butter isn’t your thing or you have allergies, swap the peanut butter cookie mix for your favorite sugar cookie or chocolate chip cookie mix. The decorating steps remain the same, so you still get that fun witch look.
-
How do you keep the Bugles snacks from getting soggy?
Dipping the Bugles in candy melts and refrigerating them immediately helps harden the coating and keeps them crisp. Also, only dip just before assembling to avoid moisture buildup.
-
Can I use different candy melts colors?
Yes! You can get creative with candy melts colors to match any holiday or party theme. Just make sure the melts are compatible with your decorating plans and set evenly.
-
What if my cookies spread too much?
If your cookies spread beyond their rounded tablespoon shape, chill your dough for 30 minutes before baking or reduce the vegetable oil slightly. Also, make sure your baking sheets aren’t too warm from previous batches.
-
Is there a way to make these gluten-free?
Definitely! Look for a gluten-free peanut butter cookie mix, and use gluten-free cereal alternatives for the broom bristles. This recipe adapts well as long as you choose compatible substitutes for each ingredient.
Final Thoughts
This Melted Witch Cookies Recipe holds a special place in my heart because it combines the joy of baking with playful creativity. Every time I make them, they bring smiles to faces young and old, turning ordinary cookie time into a magical moment. If you’re looking for a recipe that’s fun to make, irresistibly tasty, and festive enough to wow your guests, I can’t recommend these highly enough—give them a try, and I bet they’ll become a seasonal favorite in your home, too!
Print
Melted Witch Cookies Recipe
- Prep Time: 20 min
- Cook Time: 11 min
- Total Time: 1 hr 45 min
- Yield: 30 cookies
- Category: Dessert, Cookies
- Method: Baking
- Cuisine: American
Description
Delightfully spooky and fun Melted Witch Cookies that combine crunchy Bugles snacks, pretzel sticks, and whole wheat cereal to create an imaginative Halloween treat. These peanut butter-flavored cookies are decorated with rich cocoa candy melts to form whimsical witch hats and brooms, perfect for festive gatherings.
Ingredients
Cookie Dough
- 1 pouch Betty Crocker™ peanut butter cookie mix
- 3 tablespoons vegetable oil
- 1 tablespoon water
- 1 egg
Decorations
- 30 Bugles® snacks
- 1 bag (12 oz) light cocoa candy melts, melted
- 15 pretzel sticks, broken in half
- 1 large shredded whole wheat cereal biscuit, crushed
Instructions
- Prepare Cookie Dough: Heat oven to 375°F. In a large bowl, stir together cookie mix, vegetable oil, water, and egg until a soft dough forms. Drop rounded tablespoonfuls of dough onto ungreased cookie sheets, spacing 2 inches apart.
- Bake Cookies: Bake for 9 to 11 minutes or until cookies are set. Remove from oven and cool for 1 minute on sheets, then transfer to cooling racks to cool completely.
- Prepare Candy Coated Snacks: Line a cookie sheet with waxed paper. Dip each Bugles snack into the melted candy melts, tapping off excess, and place them on the cookie sheet. Refrigerate until firm.
- Decorate Cookies: Reheat any remaining candy melts if necessary. Frost each cooled cookie with melted candy to create a puddle-like base. Immediately attach one half-pretzel piece to each cookie as a broomstick handle; sprinkle crushed shredded cereal on the bottom of the pretzel piece to simulate broom bristles. Dip the wide end of each chocolate-coated Bugles snack into melted candy and stand upright in the center of each cookie to form the witch’s hat. Let stand until set.
Notes
- Ensure the candy melts are smooth and not too thick for easy dipping and frosting.
- Use a large shredded whole wheat cereal biscuit like Shredded Wheat for authentic broom bristles texture.
- Work quickly when attaching pretzels and cereal to ensure the candy melt frosting is still tacky.
- Store decorated cookies in an airtight container at room temperature for up to 3 days.
- To speed up setting, refrigerate cookies after decorating, but bring back to room temperature before serving for best flavor.
Nutrition
- Serving Size: 1 cookie
- Calories: 150
- Sugar: 10g
- Sodium: 130mg
- Fat: 7g
- Saturated Fat: 3g
- Unsaturated Fat: 4g
- Trans Fat: 0g
- Carbohydrates: 20g
- Fiber: 1g
- Protein: 2g
- Cholesterol: 20mg


