If you want to prep ahead, you can freeze these pies before baking. Arrange them on a tray in the freezer until solid, then transfer to a zip-top bag. When ready, bake them straight from frozen, adding a few extra minutes to the bake time—I discovered this saves me on busy days and still yields fantastic results.
Reheating
To warm up leftover pies, I pop them in a 350°F oven for about 10 minutes or until heated through to maintain that crisp crust. The microwave works in a pinch, but you might lose a little flakiness, so I only use it when I’m in a real hurry.
FAQs
-
Can I use store-bought pie crust for this Mini Apple Pies Recipe?
Absolutely! If you’re short on time, store-bought pie dough works just fine, though the homemade crust gives you that unbeatable flaky texture and buttery flavor that makes these mini pies extra special.
-
What types of apples are best for mini apple pies?
I recommend using firm, baking apples like Granny Smith or Honeycrisp because they hold their shape and have a nice balance of tartness and sweetness, but feel free to experiment with your favorite varieties!
-
How can I prevent soggy bottoms?
Chilling the dough and not overfilling the pies are key to avoiding soggy bottoms. Also, baking on parchment paper and letting the pies cool on a wire rack helps keep the crust crisp.
-
Can I make this recipe gluten-free?
Definitely! Use a trusted gluten-free all-purpose flour blend in place of regular flour and follow the same process. The crust might be a bit more delicate but still delicious.
-
How long do mini apple pies keep fresh?
Stored properly in the fridge, these mini pies will last up to 4 days. For longer storage, freezing is your best bet.
Final Thoughts
This Mini Apple Pies Recipe holds a special place in my heart because it’s proof that homemade treats don’t have to be complicated to be incredible. I hope when you try making these, you’ll enjoy the same sense of cozy comfort and pride I feel every time I pull them from the oven. Trust me, once you master these mini pies, they’ll be a go-to recipe for holidays, gatherings, or just an everyday sweet bite that makes life a little sweeter.
I always store leftover mini apple pies in an airtight container in the refrigerator, where they stay fresh for up to four days. I’ve found that reheating them slightly in the microwave or oven revives their freshly baked magic without drying them out.
Freezing
If you want to prep ahead, you can freeze these pies before baking. Arrange them on a tray in the freezer until solid, then transfer to a zip-top bag. When ready, bake them straight from frozen, adding a few extra minutes to the bake time—I discovered this saves me on busy days and still yields fantastic results.
Reheating
To warm up leftover pies, I pop them in a 350°F oven for about 10 minutes or until heated through to maintain that crisp crust. The microwave works in a pinch, but you might lose a little flakiness, so I only use it when I’m in a real hurry.
FAQs
-
Can I use store-bought pie crust for this Mini Apple Pies Recipe?
Absolutely! If you’re short on time, store-bought pie dough works just fine, though the homemade crust gives you that unbeatable flaky texture and buttery flavor that makes these mini pies extra special.
-
What types of apples are best for mini apple pies?
I recommend using firm, baking apples like Granny Smith or Honeycrisp because they hold their shape and have a nice balance of tartness and sweetness, but feel free to experiment with your favorite varieties!
-
How can I prevent soggy bottoms?
Chilling the dough and not overfilling the pies are key to avoiding soggy bottoms. Also, baking on parchment paper and letting the pies cool on a wire rack helps keep the crust crisp.
-
Can I make this recipe gluten-free?
Definitely! Use a trusted gluten-free all-purpose flour blend in place of regular flour and follow the same process. The crust might be a bit more delicate but still delicious.
-
How long do mini apple pies keep fresh?
Stored properly in the fridge, these mini pies will last up to 4 days. For longer storage, freezing is your best bet.
Final Thoughts
This Mini Apple Pies Recipe holds a special place in my heart because it’s proof that homemade treats don’t have to be complicated to be incredible. I hope when you try making these, you’ll enjoy the same sense of cozy comfort and pride I feel every time I pull them from the oven. Trust me, once you master these mini pies, they’ll be a go-to recipe for holidays, gatherings, or just an everyday sweet bite that makes life a little sweeter.
For special occasions, I’ve arranged the pies on a rustic wooden board with a handful of fresh apple slices and sprigs of rosemary or thyme for a charming autumn vibe. Sometimes I sprinkle some chopped nuts or drizzle caramel sauce over the tops just before serving for a decadent flair.
Make Ahead and Storage
Storing Leftovers
I always store leftover mini apple pies in an airtight container in the refrigerator, where they stay fresh for up to four days. I’ve found that reheating them slightly in the microwave or oven revives their freshly baked magic without drying them out.
Freezing
If you want to prep ahead, you can freeze these pies before baking. Arrange them on a tray in the freezer until solid, then transfer to a zip-top bag. When ready, bake them straight from frozen, adding a few extra minutes to the bake time—I discovered this saves me on busy days and still yields fantastic results.
Reheating
To warm up leftover pies, I pop them in a 350°F oven for about 10 minutes or until heated through to maintain that crisp crust. The microwave works in a pinch, but you might lose a little flakiness, so I only use it when I’m in a real hurry.
FAQs
-
Can I use store-bought pie crust for this Mini Apple Pies Recipe?
Absolutely! If you’re short on time, store-bought pie dough works just fine, though the homemade crust gives you that unbeatable flaky texture and buttery flavor that makes these mini pies extra special.
-
What types of apples are best for mini apple pies?
I recommend using firm, baking apples like Granny Smith or Honeycrisp because they hold their shape and have a nice balance of tartness and sweetness, but feel free to experiment with your favorite varieties!
-
How can I prevent soggy bottoms?
Chilling the dough and not overfilling the pies are key to avoiding soggy bottoms. Also, baking on parchment paper and letting the pies cool on a wire rack helps keep the crust crisp.
-
Can I make this recipe gluten-free?
Definitely! Use a trusted gluten-free all-purpose flour blend in place of regular flour and follow the same process. The crust might be a bit more delicate but still delicious.
-
How long do mini apple pies keep fresh?
Stored properly in the fridge, these mini pies will last up to 4 days. For longer storage, freezing is your best bet.
Final Thoughts
This Mini Apple Pies Recipe holds a special place in my heart because it’s proof that homemade treats don’t have to be complicated to be incredible. I hope when you try making these, you’ll enjoy the same sense of cozy comfort and pride I feel every time I pull them from the oven. Trust me, once you master these mini pies, they’ll be a go-to recipe for holidays, gatherings, or just an everyday sweet bite that makes life a little sweeter.
These mini pies pair beautifully with a hot cup of coffee or tea for a cozy afternoon treat. I also enjoy serving them alongside a cheese platter when guests come over—the sweet and savory combo always impresses.
Creative Ways to Present
For special occasions, I’ve arranged the pies on a rustic wooden board with a handful of fresh apple slices and sprigs of rosemary or thyme for a charming autumn vibe. Sometimes I sprinkle some chopped nuts or drizzle caramel sauce over the tops just before serving for a decadent flair.
Make Ahead and Storage
Storing Leftovers
I always store leftover mini apple pies in an airtight container in the refrigerator, where they stay fresh for up to four days. I’ve found that reheating them slightly in the microwave or oven revives their freshly baked magic without drying them out.
Freezing
If you want to prep ahead, you can freeze these pies before baking. Arrange them on a tray in the freezer until solid, then transfer to a zip-top bag. When ready, bake them straight from frozen, adding a few extra minutes to the bake time—I discovered this saves me on busy days and still yields fantastic results.
Reheating
To warm up leftover pies, I pop them in a 350°F oven for about 10 minutes or until heated through to maintain that crisp crust. The microwave works in a pinch, but you might lose a little flakiness, so I only use it when I’m in a real hurry.
FAQs
-
Can I use store-bought pie crust for this Mini Apple Pies Recipe?
Absolutely! If you’re short on time, store-bought pie dough works just fine, though the homemade crust gives you that unbeatable flaky texture and buttery flavor that makes these mini pies extra special.
-
What types of apples are best for mini apple pies?
I recommend using firm, baking apples like Granny Smith or Honeycrisp because they hold their shape and have a nice balance of tartness and sweetness, but feel free to experiment with your favorite varieties!
-
How can I prevent soggy bottoms?
Chilling the dough and not overfilling the pies are key to avoiding soggy bottoms. Also, baking on parchment paper and letting the pies cool on a wire rack helps keep the crust crisp.
-
Can I make this recipe gluten-free?
Definitely! Use a trusted gluten-free all-purpose flour blend in place of regular flour and follow the same process. The crust might be a bit more delicate but still delicious.
-
How long do mini apple pies keep fresh?
Stored properly in the fridge, these mini pies will last up to 4 days. For longer storage, freezing is your best bet.
Final Thoughts
This Mini Apple Pies Recipe holds a special place in my heart because it’s proof that homemade treats don’t have to be complicated to be incredible. I hope when you try making these, you’ll enjoy the same sense of cozy comfort and pride I feel every time I pull them from the oven. Trust me, once you master these mini pies, they’ll be a go-to recipe for holidays, gatherings, or just an everyday sweet bite that makes life a little sweeter.
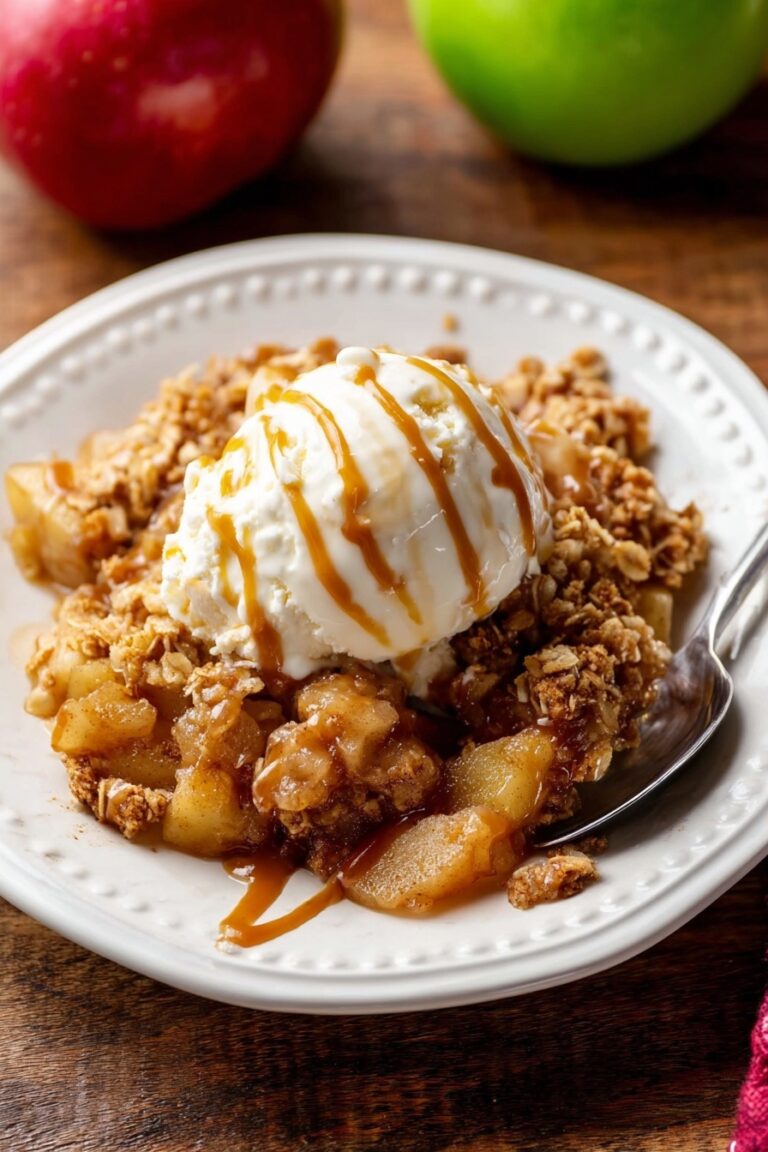
I love dusting these mini apple pies lightly with powdered sugar just before serving—it’s such a simple touch that makes them feel extra special. A dollop of whipped cream or a small scoop of vanilla ice cream on the side takes these from tasty snack to full-on dessert in no time.
Side Dishes
These mini pies pair beautifully with a hot cup of coffee or tea for a cozy afternoon treat. I also enjoy serving them alongside a cheese platter when guests come over—the sweet and savory combo always impresses.
Creative Ways to Present
For special occasions, I’ve arranged the pies on a rustic wooden board with a handful of fresh apple slices and sprigs of rosemary or thyme for a charming autumn vibe. Sometimes I sprinkle some chopped nuts or drizzle caramel sauce over the tops just before serving for a decadent flair.
Make Ahead and Storage
Storing Leftovers
I always store leftover mini apple pies in an airtight container in the refrigerator, where they stay fresh for up to four days. I’ve found that reheating them slightly in the microwave or oven revives their freshly baked magic without drying them out.
Freezing
If you want to prep ahead, you can freeze these pies before baking. Arrange them on a tray in the freezer until solid, then transfer to a zip-top bag. When ready, bake them straight from frozen, adding a few extra minutes to the bake time—I discovered this saves me on busy days and still yields fantastic results.
Reheating
To warm up leftover pies, I pop them in a 350°F oven for about 10 minutes or until heated through to maintain that crisp crust. The microwave works in a pinch, but you might lose a little flakiness, so I only use it when I’m in a real hurry.
FAQs
-
Can I use store-bought pie crust for this Mini Apple Pies Recipe?
Absolutely! If you’re short on time, store-bought pie dough works just fine, though the homemade crust gives you that unbeatable flaky texture and buttery flavor that makes these mini pies extra special.
-
What types of apples are best for mini apple pies?
I recommend using firm, baking apples like Granny Smith or Honeycrisp because they hold their shape and have a nice balance of tartness and sweetness, but feel free to experiment with your favorite varieties!
-
How can I prevent soggy bottoms?
Chilling the dough and not overfilling the pies are key to avoiding soggy bottoms. Also, baking on parchment paper and letting the pies cool on a wire rack helps keep the crust crisp.
-
Can I make this recipe gluten-free?
Definitely! Use a trusted gluten-free all-purpose flour blend in place of regular flour and follow the same process. The crust might be a bit more delicate but still delicious.
-
How long do mini apple pies keep fresh?
Stored properly in the fridge, these mini pies will last up to 4 days. For longer storage, freezing is your best bet.
Final Thoughts
This Mini Apple Pies Recipe holds a special place in my heart because it’s proof that homemade treats don’t have to be complicated to be incredible. I hope when you try making these, you’ll enjoy the same sense of cozy comfort and pride I feel every time I pull them from the oven. Trust me, once you master these mini pies, they’ll be a go-to recipe for holidays, gatherings, or just an everyday sweet bite that makes life a little sweeter.
Bake your pies in a 425°F oven for 18 to 20 minutes. You’ll want to watch for that golden-brown color and a hint of bubbling from the filling slits. After baking, let them cool on the sheet for a few minutes before transferring to a wire rack—it helps keep the bottoms crisp and perfect. I’ve found letting them cool a bit is key so the filling isn’t too hot, yet still deliciously warm.
Pro Tips for Making Mini Apple Pies Recipe
- Keep Butter Ice-Cold: I’ve learned that using the coldest butter possible creates those flaky layers everyone loves—no softened butter here!
- Don’t Overfill: When I first made these, I overstuffed the pies and had filling oozing everywhere—stick to the tablespoon per pie for clean sealing.
- Double Chill the Dough: After assembling, pop the pies in the fridge for 10 minutes before baking to help keep their shape.
- Use Parchment Paper: It prevents sticking and means easier cleanup—definitely my go-to for baking mini pies.
How to Serve Mini Apple Pies Recipe

Garnishes
I love dusting these mini apple pies lightly with powdered sugar just before serving—it’s such a simple touch that makes them feel extra special. A dollop of whipped cream or a small scoop of vanilla ice cream on the side takes these from tasty snack to full-on dessert in no time.
Side Dishes
These mini pies pair beautifully with a hot cup of coffee or tea for a cozy afternoon treat. I also enjoy serving them alongside a cheese platter when guests come over—the sweet and savory combo always impresses.
Creative Ways to Present
For special occasions, I’ve arranged the pies on a rustic wooden board with a handful of fresh apple slices and sprigs of rosemary or thyme for a charming autumn vibe. Sometimes I sprinkle some chopped nuts or drizzle caramel sauce over the tops just before serving for a decadent flair.
Make Ahead and Storage
Storing Leftovers
I always store leftover mini apple pies in an airtight container in the refrigerator, where they stay fresh for up to four days. I’ve found that reheating them slightly in the microwave or oven revives their freshly baked magic without drying them out.
Freezing
If you want to prep ahead, you can freeze these pies before baking. Arrange them on a tray in the freezer until solid, then transfer to a zip-top bag. When ready, bake them straight from frozen, adding a few extra minutes to the bake time—I discovered this saves me on busy days and still yields fantastic results.
Reheating
To warm up leftover pies, I pop them in a 350°F oven for about 10 minutes or until heated through to maintain that crisp crust. The microwave works in a pinch, but you might lose a little flakiness, so I only use it when I’m in a real hurry.
FAQs
-
Can I use store-bought pie crust for this Mini Apple Pies Recipe?
Absolutely! If you’re short on time, store-bought pie dough works just fine, though the homemade crust gives you that unbeatable flaky texture and buttery flavor that makes these mini pies extra special.
-
What types of apples are best for mini apple pies?
I recommend using firm, baking apples like Granny Smith or Honeycrisp because they hold their shape and have a nice balance of tartness and sweetness, but feel free to experiment with your favorite varieties!
-
How can I prevent soggy bottoms?
Chilling the dough and not overfilling the pies are key to avoiding soggy bottoms. Also, baking on parchment paper and letting the pies cool on a wire rack helps keep the crust crisp.
-
Can I make this recipe gluten-free?
Definitely! Use a trusted gluten-free all-purpose flour blend in place of regular flour and follow the same process. The crust might be a bit more delicate but still delicious.
-
How long do mini apple pies keep fresh?
Stored properly in the fridge, these mini pies will last up to 4 days. For longer storage, freezing is your best bet.
Final Thoughts
This Mini Apple Pies Recipe holds a special place in my heart because it’s proof that homemade treats don’t have to be complicated to be incredible. I hope when you try making these, you’ll enjoy the same sense of cozy comfort and pride I feel every time I pull them from the oven. Trust me, once you master these mini pies, they’ll be a go-to recipe for holidays, gatherings, or just an everyday sweet bite that makes life a little sweeter.
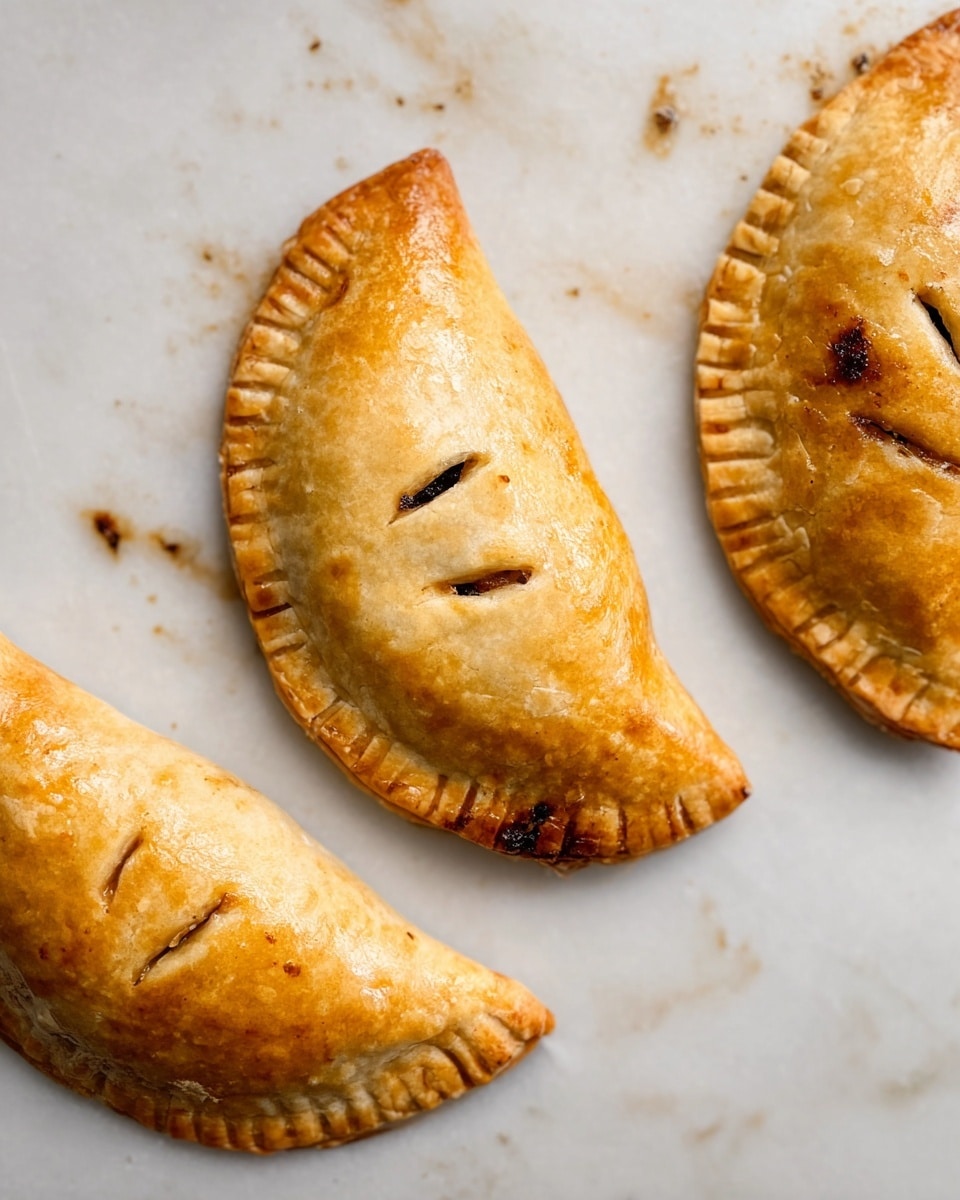
Place a tablespoon of filling on half of each dough circle. Then whisk the egg with a tablespoon of water to make an egg wash—brush it around the edges so the dough seals nicely without gaps. Fold the dough over and press the edges with a fork for a classic crimped look. Place pies about 2 inches apart on parchment-lined baking sheets. Don’t forget to brush the tops with remaining egg wash and cut small slits to vent steam. This step ensures beautifully golden, crisp crusts!
Step 5: Bake Until Golden and Delicious
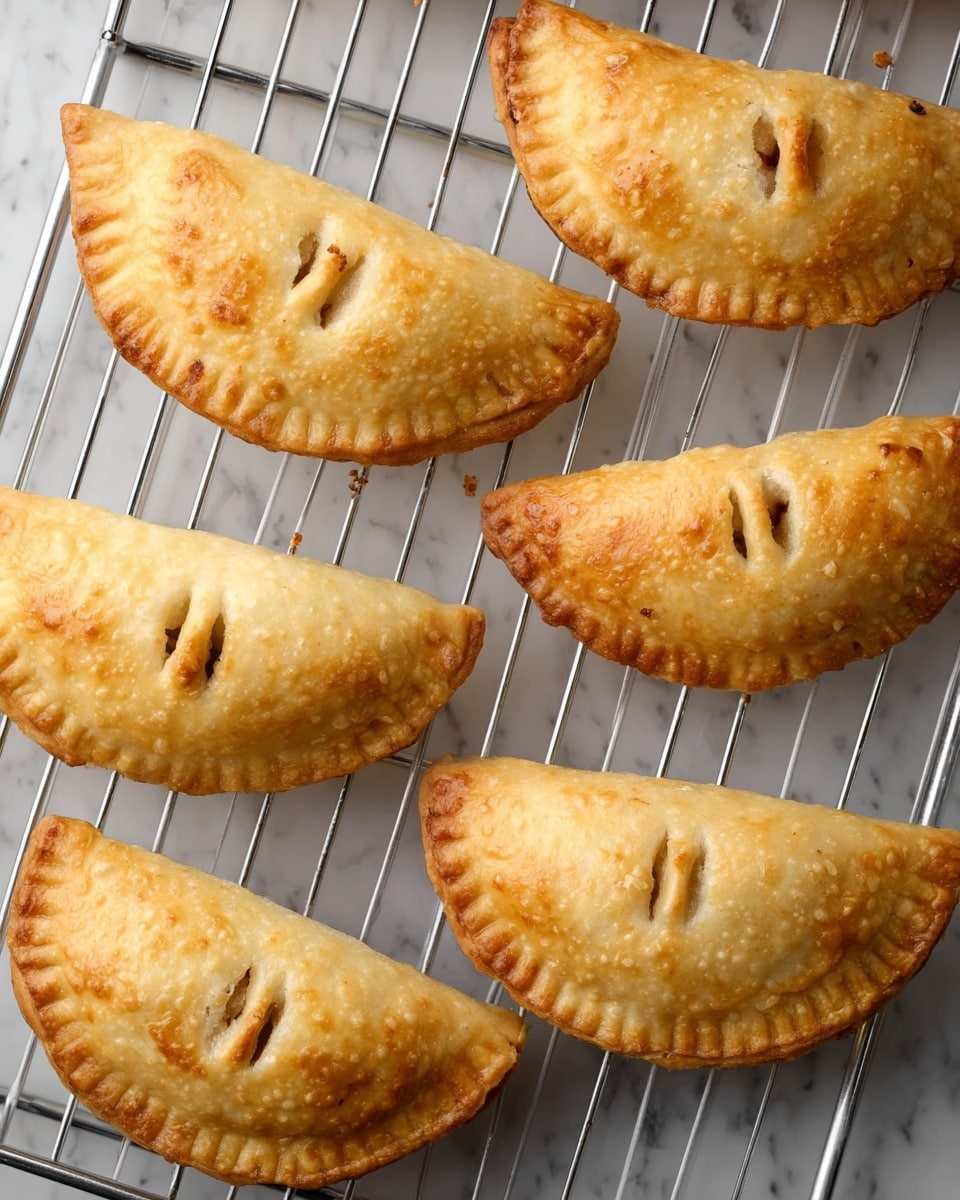
Bake your pies in a 425°F oven for 18 to 20 minutes. You’ll want to watch for that golden-brown color and a hint of bubbling from the filling slits. After baking, let them cool on the sheet for a few minutes before transferring to a wire rack—it helps keep the bottoms crisp and perfect. I’ve found letting them cool a bit is key so the filling isn’t too hot, yet still deliciously warm.
Pro Tips for Making Mini Apple Pies Recipe
- Keep Butter Ice-Cold: I’ve learned that using the coldest butter possible creates those flaky layers everyone loves—no softened butter here!
- Don’t Overfill: When I first made these, I overstuffed the pies and had filling oozing everywhere—stick to the tablespoon per pie for clean sealing.
- Double Chill the Dough: After assembling, pop the pies in the fridge for 10 minutes before baking to help keep their shape.
- Use Parchment Paper: It prevents sticking and means easier cleanup—definitely my go-to for baking mini pies.
How to Serve Mini Apple Pies Recipe

Garnishes
I love dusting these mini apple pies lightly with powdered sugar just before serving—it’s such a simple touch that makes them feel extra special. A dollop of whipped cream or a small scoop of vanilla ice cream on the side takes these from tasty snack to full-on dessert in no time.
Side Dishes
These mini pies pair beautifully with a hot cup of coffee or tea for a cozy afternoon treat. I also enjoy serving them alongside a cheese platter when guests come over—the sweet and savory combo always impresses.
Creative Ways to Present
For special occasions, I’ve arranged the pies on a rustic wooden board with a handful of fresh apple slices and sprigs of rosemary or thyme for a charming autumn vibe. Sometimes I sprinkle some chopped nuts or drizzle caramel sauce over the tops just before serving for a decadent flair.
Make Ahead and Storage
Storing Leftovers
I always store leftover mini apple pies in an airtight container in the refrigerator, where they stay fresh for up to four days. I’ve found that reheating them slightly in the microwave or oven revives their freshly baked magic without drying them out.
Freezing
If you want to prep ahead, you can freeze these pies before baking. Arrange them on a tray in the freezer until solid, then transfer to a zip-top bag. When ready, bake them straight from frozen, adding a few extra minutes to the bake time—I discovered this saves me on busy days and still yields fantastic results.
Reheating
To warm up leftover pies, I pop them in a 350°F oven for about 10 minutes or until heated through to maintain that crisp crust. The microwave works in a pinch, but you might lose a little flakiness, so I only use it when I’m in a real hurry.
FAQs
-
Can I use store-bought pie crust for this Mini Apple Pies Recipe?
Absolutely! If you’re short on time, store-bought pie dough works just fine, though the homemade crust gives you that unbeatable flaky texture and buttery flavor that makes these mini pies extra special.
-
What types of apples are best for mini apple pies?
I recommend using firm, baking apples like Granny Smith or Honeycrisp because they hold their shape and have a nice balance of tartness and sweetness, but feel free to experiment with your favorite varieties!
-
How can I prevent soggy bottoms?
Chilling the dough and not overfilling the pies are key to avoiding soggy bottoms. Also, baking on parchment paper and letting the pies cool on a wire rack helps keep the crust crisp.
-
Can I make this recipe gluten-free?
Definitely! Use a trusted gluten-free all-purpose flour blend in place of regular flour and follow the same process. The crust might be a bit more delicate but still delicious.
-
How long do mini apple pies keep fresh?
Stored properly in the fridge, these mini pies will last up to 4 days. For longer storage, freezing is your best bet.
Final Thoughts
This Mini Apple Pies Recipe holds a special place in my heart because it’s proof that homemade treats don’t have to be complicated to be incredible. I hope when you try making these, you’ll enjoy the same sense of cozy comfort and pride I feel every time I pull them from the oven. Trust me, once you master these mini pies, they’ll be a go-to recipe for holidays, gatherings, or just an everyday sweet bite that makes life a little sweeter.
Once chilled, roll out the dough on a lightly floured surface to about 1/6-inch thickness. Don’t worry if you need to roll it twice to get all 12 circles—just keep your rolling pin moving gently so you don’t overwork the dough. Use a 4-inch round cutter to make your mini pie bases. Keeping the dough circles cold until you fill them helps prevent shrinking while baking.
Step 4: Assemble and Seal the Mini Pies
Place a tablespoon of filling on half of each dough circle. Then whisk the egg with a tablespoon of water to make an egg wash—brush it around the edges so the dough seals nicely without gaps. Fold the dough over and press the edges with a fork for a classic crimped look. Place pies about 2 inches apart on parchment-lined baking sheets. Don’t forget to brush the tops with remaining egg wash and cut small slits to vent steam. This step ensures beautifully golden, crisp crusts!
Step 5: Bake Until Golden and Delicious
Bake your pies in a 425°F oven for 18 to 20 minutes. You’ll want to watch for that golden-brown color and a hint of bubbling from the filling slits. After baking, let them cool on the sheet for a few minutes before transferring to a wire rack—it helps keep the bottoms crisp and perfect. I’ve found letting them cool a bit is key so the filling isn’t too hot, yet still deliciously warm.
Pro Tips for Making Mini Apple Pies Recipe
- Keep Butter Ice-Cold: I’ve learned that using the coldest butter possible creates those flaky layers everyone loves—no softened butter here!
- Don’t Overfill: When I first made these, I overstuffed the pies and had filling oozing everywhere—stick to the tablespoon per pie for clean sealing.
- Double Chill the Dough: After assembling, pop the pies in the fridge for 10 minutes before baking to help keep their shape.
- Use Parchment Paper: It prevents sticking and means easier cleanup—definitely my go-to for baking mini pies.
How to Serve Mini Apple Pies Recipe
Garnishes
I love dusting these mini apple pies lightly with powdered sugar just before serving—it’s such a simple touch that makes them feel extra special. A dollop of whipped cream or a small scoop of vanilla ice cream on the side takes these from tasty snack to full-on dessert in no time.
Side Dishes
These mini pies pair beautifully with a hot cup of coffee or tea for a cozy afternoon treat. I also enjoy serving them alongside a cheese platter when guests come over—the sweet and savory combo always impresses.
Creative Ways to Present
For special occasions, I’ve arranged the pies on a rustic wooden board with a handful of fresh apple slices and sprigs of rosemary or thyme for a charming autumn vibe. Sometimes I sprinkle some chopped nuts or drizzle caramel sauce over the tops just before serving for a decadent flair.
Make Ahead and Storage
Storing Leftovers
I always store leftover mini apple pies in an airtight container in the refrigerator, where they stay fresh for up to four days. I’ve found that reheating them slightly in the microwave or oven revives their freshly baked magic without drying them out.
Freezing
If you want to prep ahead, you can freeze these pies before baking. Arrange them on a tray in the freezer until solid, then transfer to a zip-top bag. When ready, bake them straight from frozen, adding a few extra minutes to the bake time—I discovered this saves me on busy days and still yields fantastic results.
Reheating
To warm up leftover pies, I pop them in a 350°F oven for about 10 minutes or until heated through to maintain that crisp crust. The microwave works in a pinch, but you might lose a little flakiness, so I only use it when I’m in a real hurry.
FAQs
-
Can I use store-bought pie crust for this Mini Apple Pies Recipe?
Absolutely! If you’re short on time, store-bought pie dough works just fine, though the homemade crust gives you that unbeatable flaky texture and buttery flavor that makes these mini pies extra special.
-
What types of apples are best for mini apple pies?
I recommend using firm, baking apples like Granny Smith or Honeycrisp because they hold their shape and have a nice balance of tartness and sweetness, but feel free to experiment with your favorite varieties!
-
How can I prevent soggy bottoms?
Chilling the dough and not overfilling the pies are key to avoiding soggy bottoms. Also, baking on parchment paper and letting the pies cool on a wire rack helps keep the crust crisp.
-
Can I make this recipe gluten-free?
Definitely! Use a trusted gluten-free all-purpose flour blend in place of regular flour and follow the same process. The crust might be a bit more delicate but still delicious.
-
How long do mini apple pies keep fresh?
Stored properly in the fridge, these mini pies will last up to 4 days. For longer storage, freezing is your best bet.
Final Thoughts
This Mini Apple Pies Recipe holds a special place in my heart because it’s proof that homemade treats don’t have to be complicated to be incredible. I hope when you try making these, you’ll enjoy the same sense of cozy comfort and pride I feel every time I pull them from the oven. Trust me, once you master these mini pies, they’ll be a go-to recipe for holidays, gatherings, or just an everyday sweet bite that makes life a little sweeter.
While your dough chills, finely chop your peeled apples and toss them with sugar, cinnamon, and allspice in a small bowl. This simple mixture is what gives the pies their lovely warm-and-spiced flavor. I find chopping the apples fine but not mushy keeps a nice texture after baking, so be sure to slice them evenly.
Step 3: Roll Out and Cut the Dough Circles
Once chilled, roll out the dough on a lightly floured surface to about 1/6-inch thickness. Don’t worry if you need to roll it twice to get all 12 circles—just keep your rolling pin moving gently so you don’t overwork the dough. Use a 4-inch round cutter to make your mini pie bases. Keeping the dough circles cold until you fill them helps prevent shrinking while baking.
Step 4: Assemble and Seal the Mini Pies
Place a tablespoon of filling on half of each dough circle. Then whisk the egg with a tablespoon of water to make an egg wash—brush it around the edges so the dough seals nicely without gaps. Fold the dough over and press the edges with a fork for a classic crimped look. Place pies about 2 inches apart on parchment-lined baking sheets. Don’t forget to brush the tops with remaining egg wash and cut small slits to vent steam. This step ensures beautifully golden, crisp crusts!
Step 5: Bake Until Golden and Delicious
Bake your pies in a 425°F oven for 18 to 20 minutes. You’ll want to watch for that golden-brown color and a hint of bubbling from the filling slits. After baking, let them cool on the sheet for a few minutes before transferring to a wire rack—it helps keep the bottoms crisp and perfect. I’ve found letting them cool a bit is key so the filling isn’t too hot, yet still deliciously warm.
Pro Tips for Making Mini Apple Pies Recipe
- Keep Butter Ice-Cold: I’ve learned that using the coldest butter possible creates those flaky layers everyone loves—no softened butter here!
- Don’t Overfill: When I first made these, I overstuffed the pies and had filling oozing everywhere—stick to the tablespoon per pie for clean sealing.
- Double Chill the Dough: After assembling, pop the pies in the fridge for 10 minutes before baking to help keep their shape.
- Use Parchment Paper: It prevents sticking and means easier cleanup—definitely my go-to for baking mini pies.
How to Serve Mini Apple Pies Recipe
Garnishes
I love dusting these mini apple pies lightly with powdered sugar just before serving—it’s such a simple touch that makes them feel extra special. A dollop of whipped cream or a small scoop of vanilla ice cream on the side takes these from tasty snack to full-on dessert in no time.
Side Dishes
These mini pies pair beautifully with a hot cup of coffee or tea for a cozy afternoon treat. I also enjoy serving them alongside a cheese platter when guests come over—the sweet and savory combo always impresses.
Creative Ways to Present
For special occasions, I’ve arranged the pies on a rustic wooden board with a handful of fresh apple slices and sprigs of rosemary or thyme for a charming autumn vibe. Sometimes I sprinkle some chopped nuts or drizzle caramel sauce over the tops just before serving for a decadent flair.
Make Ahead and Storage
Storing Leftovers
I always store leftover mini apple pies in an airtight container in the refrigerator, where they stay fresh for up to four days. I’ve found that reheating them slightly in the microwave or oven revives their freshly baked magic without drying them out.
Freezing
If you want to prep ahead, you can freeze these pies before baking. Arrange them on a tray in the freezer until solid, then transfer to a zip-top bag. When ready, bake them straight from frozen, adding a few extra minutes to the bake time—I discovered this saves me on busy days and still yields fantastic results.
Reheating
To warm up leftover pies, I pop them in a 350°F oven for about 10 minutes or until heated through to maintain that crisp crust. The microwave works in a pinch, but you might lose a little flakiness, so I only use it when I’m in a real hurry.
FAQs
-
Can I use store-bought pie crust for this Mini Apple Pies Recipe?
Absolutely! If you’re short on time, store-bought pie dough works just fine, though the homemade crust gives you that unbeatable flaky texture and buttery flavor that makes these mini pies extra special.
-
What types of apples are best for mini apple pies?
I recommend using firm, baking apples like Granny Smith or Honeycrisp because they hold their shape and have a nice balance of tartness and sweetness, but feel free to experiment with your favorite varieties!
-
How can I prevent soggy bottoms?
Chilling the dough and not overfilling the pies are key to avoiding soggy bottoms. Also, baking on parchment paper and letting the pies cool on a wire rack helps keep the crust crisp.
-
Can I make this recipe gluten-free?
Definitely! Use a trusted gluten-free all-purpose flour blend in place of regular flour and follow the same process. The crust might be a bit more delicate but still delicious.
-
How long do mini apple pies keep fresh?
Stored properly in the fridge, these mini pies will last up to 4 days. For longer storage, freezing is your best bet.
Final Thoughts
This Mini Apple Pies Recipe holds a special place in my heart because it’s proof that homemade treats don’t have to be complicated to be incredible. I hope when you try making these, you’ll enjoy the same sense of cozy comfort and pride I feel every time I pull them from the oven. Trust me, once you master these mini pies, they’ll be a go-to recipe for holidays, gatherings, or just an everyday sweet bite that makes life a little sweeter.
Start by whisking the flour and salt together in a medium bowl, so everything’s evenly distributed. The trick here is to keep your butter cold—cut it into small pieces, then use a pastry cutter or two knives to mix it into the flour until you get pea-sized crumbs. When you drizzle the ice water, add just enough so the dough holds together when you press it—it shouldn’t be sticky or wet. Gently knead on a floured surface, then form into a disk, wrap in plastic, and chill for at least 30 minutes. This chilling step is my saving grace—it helps the butter stay cold so your crust stays flaky!
Step 2: Prepare the Apple Filling
While your dough chills, finely chop your peeled apples and toss them with sugar, cinnamon, and allspice in a small bowl. This simple mixture is what gives the pies their lovely warm-and-spiced flavor. I find chopping the apples fine but not mushy keeps a nice texture after baking, so be sure to slice them evenly.
Step 3: Roll Out and Cut the Dough Circles
Once chilled, roll out the dough on a lightly floured surface to about 1/6-inch thickness. Don’t worry if you need to roll it twice to get all 12 circles—just keep your rolling pin moving gently so you don’t overwork the dough. Use a 4-inch round cutter to make your mini pie bases. Keeping the dough circles cold until you fill them helps prevent shrinking while baking.
Step 4: Assemble and Seal the Mini Pies
Place a tablespoon of filling on half of each dough circle. Then whisk the egg with a tablespoon of water to make an egg wash—brush it around the edges so the dough seals nicely without gaps. Fold the dough over and press the edges with a fork for a classic crimped look. Place pies about 2 inches apart on parchment-lined baking sheets. Don’t forget to brush the tops with remaining egg wash and cut small slits to vent steam. This step ensures beautifully golden, crisp crusts!
Step 5: Bake Until Golden and Delicious
Bake your pies in a 425°F oven for 18 to 20 minutes. You’ll want to watch for that golden-brown color and a hint of bubbling from the filling slits. After baking, let them cool on the sheet for a few minutes before transferring to a wire rack—it helps keep the bottoms crisp and perfect. I’ve found letting them cool a bit is key so the filling isn’t too hot, yet still deliciously warm.
Pro Tips for Making Mini Apple Pies Recipe
- Keep Butter Ice-Cold: I’ve learned that using the coldest butter possible creates those flaky layers everyone loves—no softened butter here!
- Don’t Overfill: When I first made these, I overstuffed the pies and had filling oozing everywhere—stick to the tablespoon per pie for clean sealing.
- Double Chill the Dough: After assembling, pop the pies in the fridge for 10 minutes before baking to help keep their shape.
- Use Parchment Paper: It prevents sticking and means easier cleanup—definitely my go-to for baking mini pies.
How to Serve Mini Apple Pies Recipe
Garnishes
I love dusting these mini apple pies lightly with powdered sugar just before serving—it’s such a simple touch that makes them feel extra special. A dollop of whipped cream or a small scoop of vanilla ice cream on the side takes these from tasty snack to full-on dessert in no time.
Side Dishes
These mini pies pair beautifully with a hot cup of coffee or tea for a cozy afternoon treat. I also enjoy serving them alongside a cheese platter when guests come over—the sweet and savory combo always impresses.
Creative Ways to Present
For special occasions, I’ve arranged the pies on a rustic wooden board with a handful of fresh apple slices and sprigs of rosemary or thyme for a charming autumn vibe. Sometimes I sprinkle some chopped nuts or drizzle caramel sauce over the tops just before serving for a decadent flair.
Make Ahead and Storage
Storing Leftovers
I always store leftover mini apple pies in an airtight container in the refrigerator, where they stay fresh for up to four days. I’ve found that reheating them slightly in the microwave or oven revives their freshly baked magic without drying them out.
Freezing
If you want to prep ahead, you can freeze these pies before baking. Arrange them on a tray in the freezer until solid, then transfer to a zip-top bag. When ready, bake them straight from frozen, adding a few extra minutes to the bake time—I discovered this saves me on busy days and still yields fantastic results.
Reheating
To warm up leftover pies, I pop them in a 350°F oven for about 10 minutes or until heated through to maintain that crisp crust. The microwave works in a pinch, but you might lose a little flakiness, so I only use it when I’m in a real hurry.
FAQs
-
Can I use store-bought pie crust for this Mini Apple Pies Recipe?
Absolutely! If you’re short on time, store-bought pie dough works just fine, though the homemade crust gives you that unbeatable flaky texture and buttery flavor that makes these mini pies extra special.
-
What types of apples are best for mini apple pies?
I recommend using firm, baking apples like Granny Smith or Honeycrisp because they hold their shape and have a nice balance of tartness and sweetness, but feel free to experiment with your favorite varieties!
-
How can I prevent soggy bottoms?
Chilling the dough and not overfilling the pies are key to avoiding soggy bottoms. Also, baking on parchment paper and letting the pies cool on a wire rack helps keep the crust crisp.
-
Can I make this recipe gluten-free?
Definitely! Use a trusted gluten-free all-purpose flour blend in place of regular flour and follow the same process. The crust might be a bit more delicate but still delicious.
-
How long do mini apple pies keep fresh?
Stored properly in the fridge, these mini pies will last up to 4 days. For longer storage, freezing is your best bet.
Final Thoughts
This Mini Apple Pies Recipe holds a special place in my heart because it’s proof that homemade treats don’t have to be complicated to be incredible. I hope when you try making these, you’ll enjoy the same sense of cozy comfort and pride I feel every time I pull them from the oven. Trust me, once you master these mini pies, they’ll be a go-to recipe for holidays, gatherings, or just an everyday sweet bite that makes life a little sweeter.
I absolutely love how these mini apple pies turn out—each bite is a perfect little package of warm, cinnamon-spiced apples wrapped in a flaky, buttery crust. Whenever I make these, the house instantly fills with that cozy, comforting aroma that just feels like fall all year round. This Mini Apple Pies Recipe is perfect for when you want a treat that’s indulgent but still hand-held and fun to share with family or friends.
What makes this Mini Apple Pies Recipe so worth trying is how approachable it is, even if you’re not a seasoned baker. I used to struggle with making pie crusts until I found a simple method that works every time, giving me those beautifully crisp edges and tender crumb that everyone raves about. Plus, this recipe works great for special occasions or just a sweet weekend project—you can whip them up ahead and keep a stash in the fridge or freezer for whenever the craving hits!
Why You’ll Love This Recipe
- Perfectly Portable: These mini pies are easy to hold and share, making them ideal for parties or packed lunches.
- Flaky, Buttery Crust: The crust uses cold butter and minimal water for that amazing, tender flakiness.
- Simple Filling: Only a handful of spices and fresh apples make the filling, keeping flavors authentic and fresh.
- Make-Ahead Friendly: You can prep ahead and freeze the pies, so delicious warm apple pie is always within reach.
Ingredients You’ll Need
For a recipe as classic as this Mini Apple Pies Recipe, quality ingredients make all the difference. I always recommend a firm baking apple to keep the filling just the right balance of tender and slightly crisp.
- All-purpose flour: This is our base for the crust, giving it structure without toughness.
- Salt: Just a pinch to enhance all those wonderful flavors.
- Unsalted butter: Cold and cubed, the key to that flaky pie crust everyone loves.
- Cold water: Helps the dough come together without warming the butter.
- Baking apples: I like to use a mix of Granny Smith and Honeycrisp for tartness and sweetness.
- Granulated sugar: Sweetens the tart apples for a balanced filling.
- Ground cinnamon: Adds warm spice that’s essential for any apple pie.
- Ground allspice: Just a hint to boost the depth of flavor.
- Large egg: Used for brushing the crust so it browns to a lovely golden finish.
- Water: Mixed with the egg to make the perfect egg wash.
Variations
One of the things I love about this Mini Apple Pies Recipe is how easy it is to tailor it to your taste or dietary needs. Here are a few of my favorite tweaks I’ve enjoyed over the years.
- Vegan Version: Swap the butter for vegan margarine and use a flaxseed “egg” wash to keep everything plant-based without sacrificing flakiness.
- Spice it Up: Try adding a pinch of nutmeg or ginger to the filling for a little extra warmth during the colder months.
- Fruit Mix: Mix chopped pears or cranberries with the apples for a seasonal twist I tried last Thanksgiving—super festive and delicious.
- Mini Tartlets: Rather than sealing the pies fully, create lattice tops or leave them open for a rustic look that’s perfect for showcasing the juicy filling.
How to Make Mini Apple Pies Recipe
Step 1: Make the Flaky Pie Crust
Start by whisking the flour and salt together in a medium bowl, so everything’s evenly distributed. The trick here is to keep your butter cold—cut it into small pieces, then use a pastry cutter or two knives to mix it into the flour until you get pea-sized crumbs. When you drizzle the ice water, add just enough so the dough holds together when you press it—it shouldn’t be sticky or wet. Gently knead on a floured surface, then form into a disk, wrap in plastic, and chill for at least 30 minutes. This chilling step is my saving grace—it helps the butter stay cold so your crust stays flaky!
Step 2: Prepare the Apple Filling
While your dough chills, finely chop your peeled apples and toss them with sugar, cinnamon, and allspice in a small bowl. This simple mixture is what gives the pies their lovely warm-and-spiced flavor. I find chopping the apples fine but not mushy keeps a nice texture after baking, so be sure to slice them evenly.
Step 3: Roll Out and Cut the Dough Circles
Once chilled, roll out the dough on a lightly floured surface to about 1/6-inch thickness. Don’t worry if you need to roll it twice to get all 12 circles—just keep your rolling pin moving gently so you don’t overwork the dough. Use a 4-inch round cutter to make your mini pie bases. Keeping the dough circles cold until you fill them helps prevent shrinking while baking.
Step 4: Assemble and Seal the Mini Pies
Place a tablespoon of filling on half of each dough circle. Then whisk the egg with a tablespoon of water to make an egg wash—brush it around the edges so the dough seals nicely without gaps. Fold the dough over and press the edges with a fork for a classic crimped look. Place pies about 2 inches apart on parchment-lined baking sheets. Don’t forget to brush the tops with remaining egg wash and cut small slits to vent steam. This step ensures beautifully golden, crisp crusts!
Step 5: Bake Until Golden and Delicious
Bake your pies in a 425°F oven for 18 to 20 minutes. You’ll want to watch for that golden-brown color and a hint of bubbling from the filling slits. After baking, let them cool on the sheet for a few minutes before transferring to a wire rack—it helps keep the bottoms crisp and perfect. I’ve found letting them cool a bit is key so the filling isn’t too hot, yet still deliciously warm.
Pro Tips for Making Mini Apple Pies Recipe
- Keep Butter Ice-Cold: I’ve learned that using the coldest butter possible creates those flaky layers everyone loves—no softened butter here!
- Don’t Overfill: When I first made these, I overstuffed the pies and had filling oozing everywhere—stick to the tablespoon per pie for clean sealing.
- Double Chill the Dough: After assembling, pop the pies in the fridge for 10 minutes before baking to help keep their shape.
- Use Parchment Paper: It prevents sticking and means easier cleanup—definitely my go-to for baking mini pies.
How to Serve Mini Apple Pies Recipe
Garnishes
I love dusting these mini apple pies lightly with powdered sugar just before serving—it’s such a simple touch that makes them feel extra special. A dollop of whipped cream or a small scoop of vanilla ice cream on the side takes these from tasty snack to full-on dessert in no time.
Side Dishes
These mini pies pair beautifully with a hot cup of coffee or tea for a cozy afternoon treat. I also enjoy serving them alongside a cheese platter when guests come over—the sweet and savory combo always impresses.
Creative Ways to Present
For special occasions, I’ve arranged the pies on a rustic wooden board with a handful of fresh apple slices and sprigs of rosemary or thyme for a charming autumn vibe. Sometimes I sprinkle some chopped nuts or drizzle caramel sauce over the tops just before serving for a decadent flair.
Make Ahead and Storage
Storing Leftovers
I always store leftover mini apple pies in an airtight container in the refrigerator, where they stay fresh for up to four days. I’ve found that reheating them slightly in the microwave or oven revives their freshly baked magic without drying them out.
Freezing
If you want to prep ahead, you can freeze these pies before baking. Arrange them on a tray in the freezer until solid, then transfer to a zip-top bag. When ready, bake them straight from frozen, adding a few extra minutes to the bake time—I discovered this saves me on busy days and still yields fantastic results.
Reheating
To warm up leftover pies, I pop them in a 350°F oven for about 10 minutes or until heated through to maintain that crisp crust. The microwave works in a pinch, but you might lose a little flakiness, so I only use it when I’m in a real hurry.
FAQs
-
Can I use store-bought pie crust for this Mini Apple Pies Recipe?
Absolutely! If you’re short on time, store-bought pie dough works just fine, though the homemade crust gives you that unbeatable flaky texture and buttery flavor that makes these mini pies extra special.
-
What types of apples are best for mini apple pies?
I recommend using firm, baking apples like Granny Smith or Honeycrisp because they hold their shape and have a nice balance of tartness and sweetness, but feel free to experiment with your favorite varieties!
-
How can I prevent soggy bottoms?
Chilling the dough and not overfilling the pies are key to avoiding soggy bottoms. Also, baking on parchment paper and letting the pies cool on a wire rack helps keep the crust crisp.
-
Can I make this recipe gluten-free?
Definitely! Use a trusted gluten-free all-purpose flour blend in place of regular flour and follow the same process. The crust might be a bit more delicate but still delicious.
-
How long do mini apple pies keep fresh?
Stored properly in the fridge, these mini pies will last up to 4 days. For longer storage, freezing is your best bet.
Final Thoughts
This Mini Apple Pies Recipe holds a special place in my heart because it’s proof that homemade treats don’t have to be complicated to be incredible. I hope when you try making these, you’ll enjoy the same sense of cozy comfort and pride I feel every time I pull them from the oven. Trust me, once you master these mini pies, they’ll be a go-to recipe for holidays, gatherings, or just an everyday sweet bite that makes life a little sweeter.