
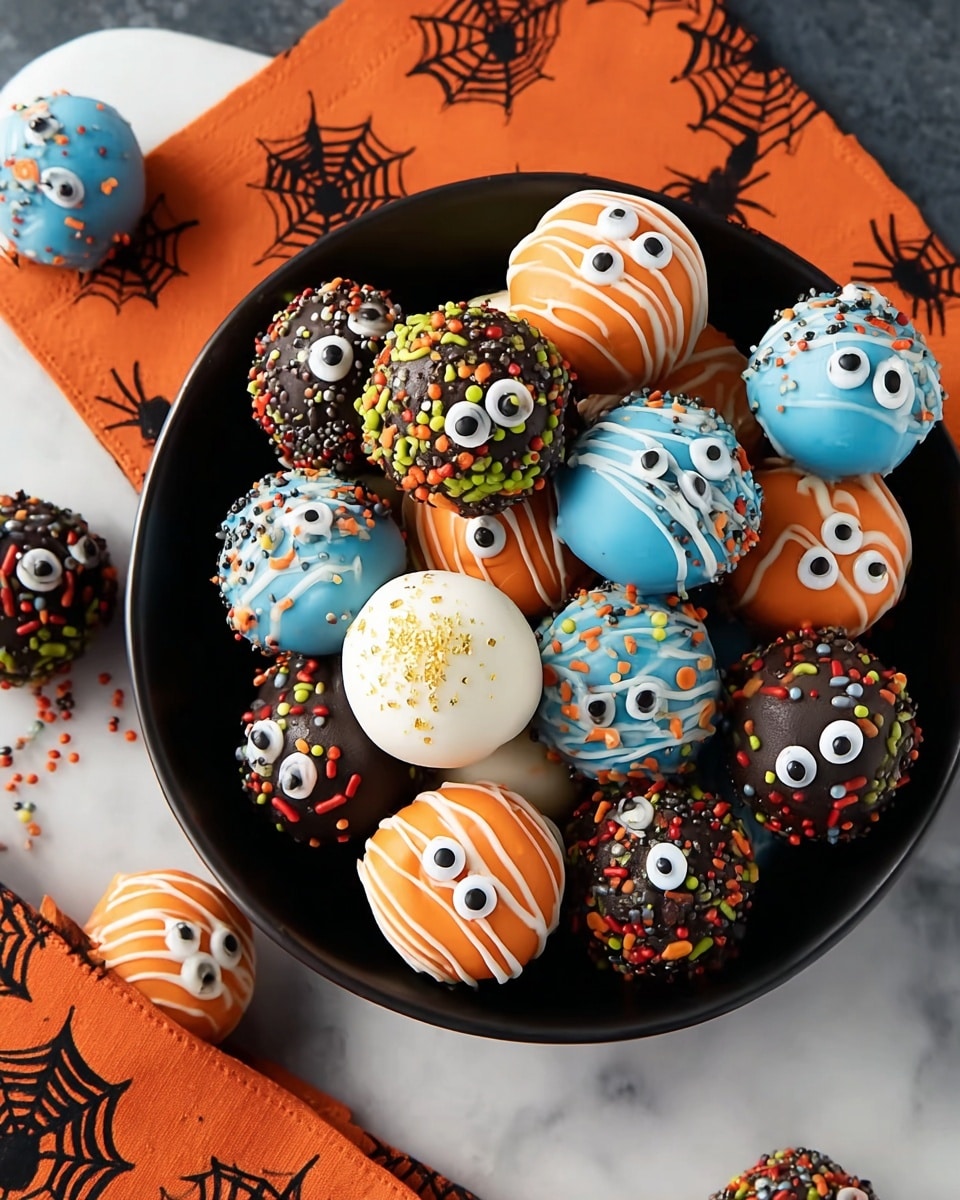
If you’re searching for a fun and festive treat that’ll impress everyone at your next party or just satisfy your sweet tooth cravings, you’re going to flip for this Monster Cake Balls Recipe. I absolutely love how these little bite-sized goodies combine the moistness of cake with the smoothness of frosting, all dipped in vibrant candy melts and topped with adorable decorations. Trust me, once you try this recipe, you’ll want to make them again and again — they’re that good and ridiculously fun to make!
Why You’ll Love This Recipe
- Super Easy to Make: With a box cake mix and store-bought frosting, you can have fun in the kitchen with minimal fuss.
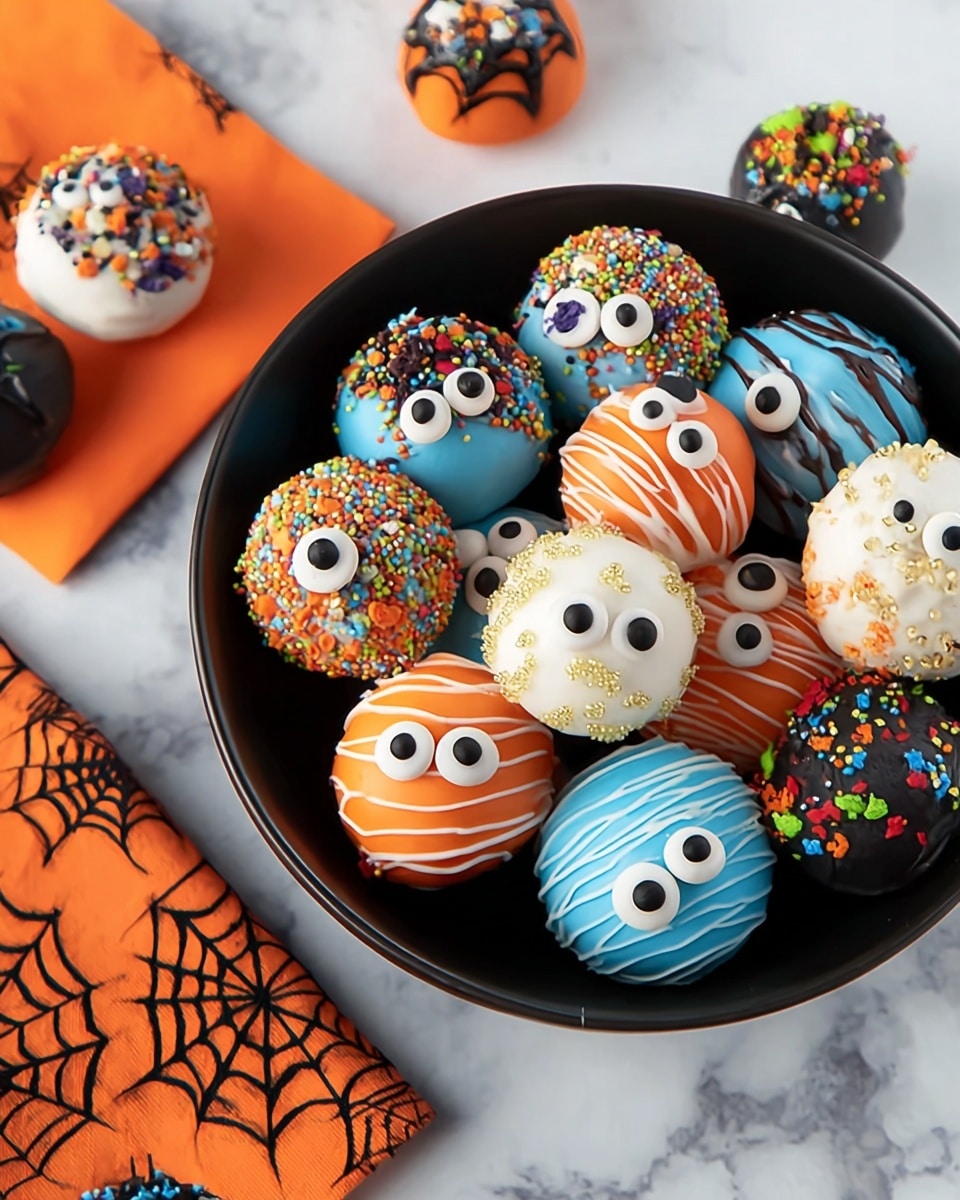
- Eye-Catching and Colorful: The colored candy melts and candy eyes make these cake balls perfect for Halloween, birthdays, or any festive celebration.
- Kid-Friendly Fun: My family goes crazy for these, and kids love the decorating part — a perfect bonding activity!
- Great Make-Ahead Treat: You can freeze them and store in the fridge, making party prep a breeze.

Ingredients You’ll Need
This Monster Cake Balls Recipe combines a few pantry staples with some fun decorative touches that really make these treats pop. I’d recommend grabbing the candy melts in three colors—they’re what bring these balls to life!
- Yellow Cake Mix: I like Betty Crocker™ because it turns out super moist and bakes evenly every time.
- Water, Vegetable Oil, and Eggs: Follow the cake mix box instructions exactly—this keeps your cake moist and fluffy.
- Vanilla Frosting: Using a creamy frosting mix helps bind the crumbled cake together perfectly.
- Light Blue Candy Melts: For dipping and decorating, these give a cool, fun monster vibe.
- Orange Candy Melts: A great contrasting color that makes the cake balls really pop.
- White Candy Melts: Perfect for a classic touch or spooky eyeball look!
- Candy Eyeballs and Decorating Sprinkles: These Halloween-themed decorations add personality and charm—trust me, they make all the difference.
Variations
I love how flexible this Monster Cake Balls Recipe is—you can easily swap colors, flavors, and decorations to suit your occasion or mood. Don’t hesitate to make it your own!
- Chocolate Option: I once used a chocolate cake mix with chocolate frosting and dipped the balls in dark chocolate candy melts for a richer flavor that was a huge hit.
- Seasonal Colors: For Christmas, I swapped out the candy melts for red and green, which immediately made these festive and perfect for holiday parties.
- Dietary Modifications: You can use gluten-free cake mix and frosting to accommodate dietary needs without sacrificing taste or texture.
- Decorations: Play around with different candy toppings like mini M&Ms or edible glitter for a fun twist.
How to Make Monster Cake Balls Recipe
Step 1: Bake the Cake and Let It Cool
Start by heating your oven to 350° F—if you’re using a dark or nonstick pan, go for 325° F to prevent overbaking. Follow the instructions on the cake mix box to bake the cake in a 13×9-inch pan. One thing I always recommend is really letting the cake cool completely, at least an hour, before moving on. This cooling step is crucial because warm cake can make your cake balls mushy and hard to shape.
Step 2: Mix Cake and Frosting, Then Shape
Once the cake is cool, crumble it into a large bowl. This is a fun (and slightly therapeutic) part—I like breaking it down into small crumbs with my hands. Mix in the frosting until everything is combined and you’ve got a moldable dough-like consistency. You’ll want to aim for a mix that holds its shape when rolled into balls without being too sticky. Roll the mixture into about 42 balls, roughly 1 ½ inches in diameter. Pop them onto a cookie sheet lined with waxed paper, then freeze for about an hour until they’re firm enough to dip.
Step 3: Melt the Candy Coating
While the cake balls are chilling, melt your candy melts. I microwave mine uncovered at 50% power for 1 minute 30 seconds, then stir. Keep heating in 30-second bursts, stirring in between, until smooth and fully melted. This gentle heating prevents the candy melts from burning or becoming grainy. If the melts cool while you’re dipping, just pop them back in for a short reheat.
Step 4: Dip, Decorate, and Chill
Take about a third of your cake balls out of the fridge and place them on a second waxed paper-lined cookie sheet. Using two forks, dip each cake ball into the melted candy coating, roll it to coat evenly, then gently shake off excess. This technique helps keep the coating nice and smooth without too much mess. Immediately press a candy eyeball on top and add sprinkles or other decorations while the coating is still wet. Pop them back into the fridge to set—about 10 minutes works great. Repeat this process with the remaining cake balls and your other candy melt colors.
Step 5: Store and Enjoy
Once all your monster cake balls are coated and decorated, store them covered in the refrigerator. I learned the hard way that leaving them uncovered leads to a dry texture and less vibrant colors—it’s all about keeping them fresh and festive!
Pro Tips for Making Monster Cake Balls Recipe
- Don’t Skip the Freezing: Freezing the cake balls before dipping makes them much easier to handle—you’ll avoid crumbling and cracking.
- Use Two Forks When Dipping: This trick helps the excess candy coating drip off evenly so your balls have a smooth, clean finish.
- Work Quickly When Adding Decorations: Candy melts set fast, so have your decorations ready to add right after dipping for the best stick.
- Store in a Covered Container: Keeping them covered prevents drying out and keeps the candy coating glossy and fresh.
How to Serve Monster Cake Balls Recipe
Garnishes
I’m a sucker for the classic candy eyeballs— they give these cake balls such character! But I also love adding colorful sprinkles or a drizzle of contrasting candy melt colors for extra flair. When I made these for a Halloween party, my kids had a blast choosing their favorite spooky decorations to customize them.
Side Dishes
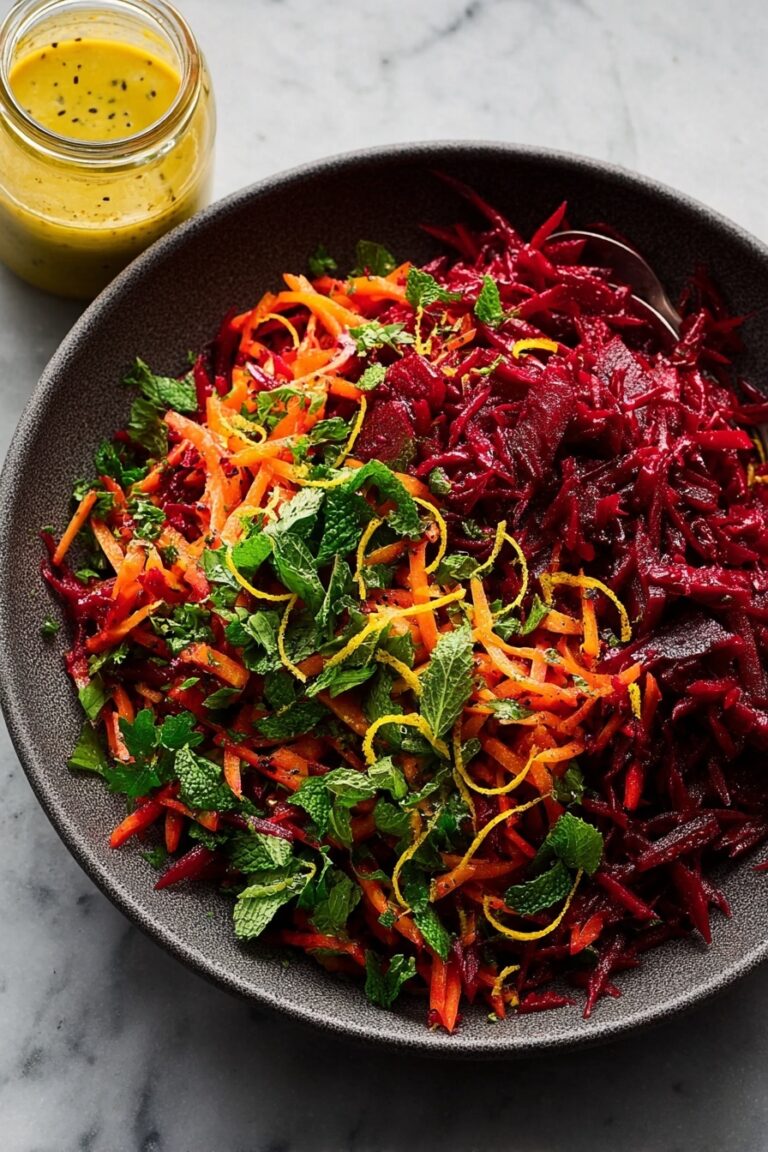
These cake balls are sweet and rich, so I usually pair them with fresh fruit or a light salad if they’re part of a larger spread. For my last party, I served them alongside a plate of salty pretzels and cheese cubes—it was a perfect balance of flavors!
Creative Ways to Present
I’ve found that serving these on a themed platter or in a cute cupcake liner makes a huge difference. For Halloween, I arranged mine on black plates with fake spider webs and tiny plastic spiders scattered around—it was a huge hit. You can even poke a toothpick into each cake ball to create cake pops and display them standing up in a foam block decorated to match your party theme.
Make Ahead and Storage
Storing Leftovers
Once decorated, I keep leftover monster cake balls in an airtight container in the refrigerator. I’ve noticed they stay moist and fresh for up to a week, which makes it easy to prepare them ahead of time for parties or gatherings.
Freezing
If you want to make a big batch and save some for later, freezing works like a charm. After the initial freeze and coating, I wrap the cake balls individually in plastic wrap and store them in a sealed freezer bag. When thawed in the fridge overnight, they taste just like freshly made.
Reheating
Since these treats are best enjoyed chilled, I don’t recommend reheating. Instead, just let frozen or refrigerated cake balls come to room temperature for about 15-20 minutes before serving—this helps bring out the cake’s softness without melting the candy coating.
FAQs
-
Can I use homemade cake instead of box mix in this Monster Cake Balls Recipe?
Absolutely! Homemade cake works wonderfully. Just make sure your cake is fully cooled and not too dense so it crumbles easily. The key is to achieve a mixable texture once combined with the frosting.
-
What if my candy melts harden too quickly while dipping?
No worries—just microwave the candy melts in 20-30 second intervals and stir until smooth again. Keeping the melts warm makes dipping easier and gives you a beautiful coating.
-
How long do Monster Cake Balls last?
Stored covered in the fridge, they keep fresh for about 5-7 days. If frozen properly, they last up to 3 months without losing their taste or texture.
-
Can I use other types of frosting for this recipe?
You can experiment with different frosting flavors, but stick to creamy types that help bind the cake crumbs together. Thicker or whipped frostings might make the mixture too soft or too dry.
Final Thoughts
Making this Monster Cake Balls Recipe always brings back fun memories of baking with my family, especially around Halloween when creativity runs wild. It’s a simple, no-fail recipe that anyone can enjoy making, and the smiles you get when showing off those playful monster faces? Priceless. So grab your favorite cake mix, some candy melts, and dive in—you won’t regret it. Remember, the best part is making these your own and having fun with every step!
Print
Monster Cake Balls Recipe
- Prep Time: 1 hr
- Cook Time: 25 min
- Total Time: 3 hr 45 min
- Yield: 42 cake balls
- Category: Dessert
- Method: No-Cook
- Cuisine: American
Description
Delight in these fun and festive Monster Cake Balls made with moist yellow cake, creamy vanilla frosting, and colorful candy melts. Perfectly bite-sized and decorated with candy eyeballs and sprinkles, these treats are sure to be a hit at any party or Halloween celebration.
Ingredients
Cake Balls
- 1 box Betty Crocker™ Super Moist™ Yellow Cake Mix
- Water, vegetable oil, and eggs called for on cake mix box
- 1 cup from 1 tub (16 oz) Betty Crocker™ Rich & Creamy Vanilla Frosting
Candy Coating and Decorations
- 1 3/4 cups light blue candy melts (from 12-oz bag)
- 1 3/4 cups orange candy melts (from 12-oz bag)
- 1 3/4 cups white candy melts (from 12-oz bag)
- Betty Crocker™ Dessert Decorations Candy Eyeballs
- Betty Crocker™ Decorating Sprinkles and Sugars (assorted colors)
Instructions
- Prepare and bake cake: Heat oven to 350°F (325°F for dark or nonstick pan). Prepare and bake the yellow cake mix according to the box directions using a 13×9-inch pan. Bake until done and cool completely, about 1 hour.
- Make cake balls: Line a large cookie sheet with waxed paper. Crumble cooled cake into a large bowl. Add 1 cup of vanilla frosting and mix well until combined. Shape mixture into 42 balls, each approximately 1 1/2 inches. Place on cookie sheet and freeze about 1 hour or until firm, then transfer to refrigerator.
- Melt blue candy melts: In a 2-quart microwavable bowl, microwave blue candy melts uncovered on Medium (50%) for 1 minute 30 seconds; stir. Continue microwaving and stirring in 30-second intervals until melted and smooth.
- Dip and decorate blue cake balls: Remove one-third (14) of the cake balls from refrigerator. Place on a second waxed paper-lined cookie sheet. Using two forks, dip and roll each cake ball one at a time in the melted blue candy coating, gently shaking off excess coating. Place dipped cake balls on lined cookie sheet. Immediately apply candy eyeballs and decorate with sprinkles. Reheat candy melts if they cool too much. Refrigerate coated cake balls for 10 minutes.
- Repeat for orange and white coatings: Repeat the melting, dipping, and decorating process with the next 14 cake balls using orange candy melts. Then repeat once more with the remaining 14 cake balls using white candy melts.
- Store the cake balls: Once decorated and chilled, store the cake balls covered in the refrigerator until ready to serve.
Notes
- Ensure cake is completely cooled before crumbling to prevent frosting from melting.
- Use waxed paper-lined sheets to avoid sticking when letting cake balls set and after dipping.
- If candy melts harden during dipping, reheat gently in 30-second intervals to maintain a smooth coating.
- Decorate promptly after dipping so decorations adhere properly before coating hardens.
- Store cake balls refrigerated and covered to keep fresh up to 3 days.
Nutrition
- Serving Size: 1 cake ball
- Calories: 120
- Sugar: 18g
- Sodium: 90mg
- Fat: 4g
- Saturated Fat: 2.5g
- Unsaturated Fat: 1g
- Trans Fat: 0g
- Carbohydrates: 20g
- Fiber: 0.3g
- Protein: 1g
- Cholesterol: 10mg


