
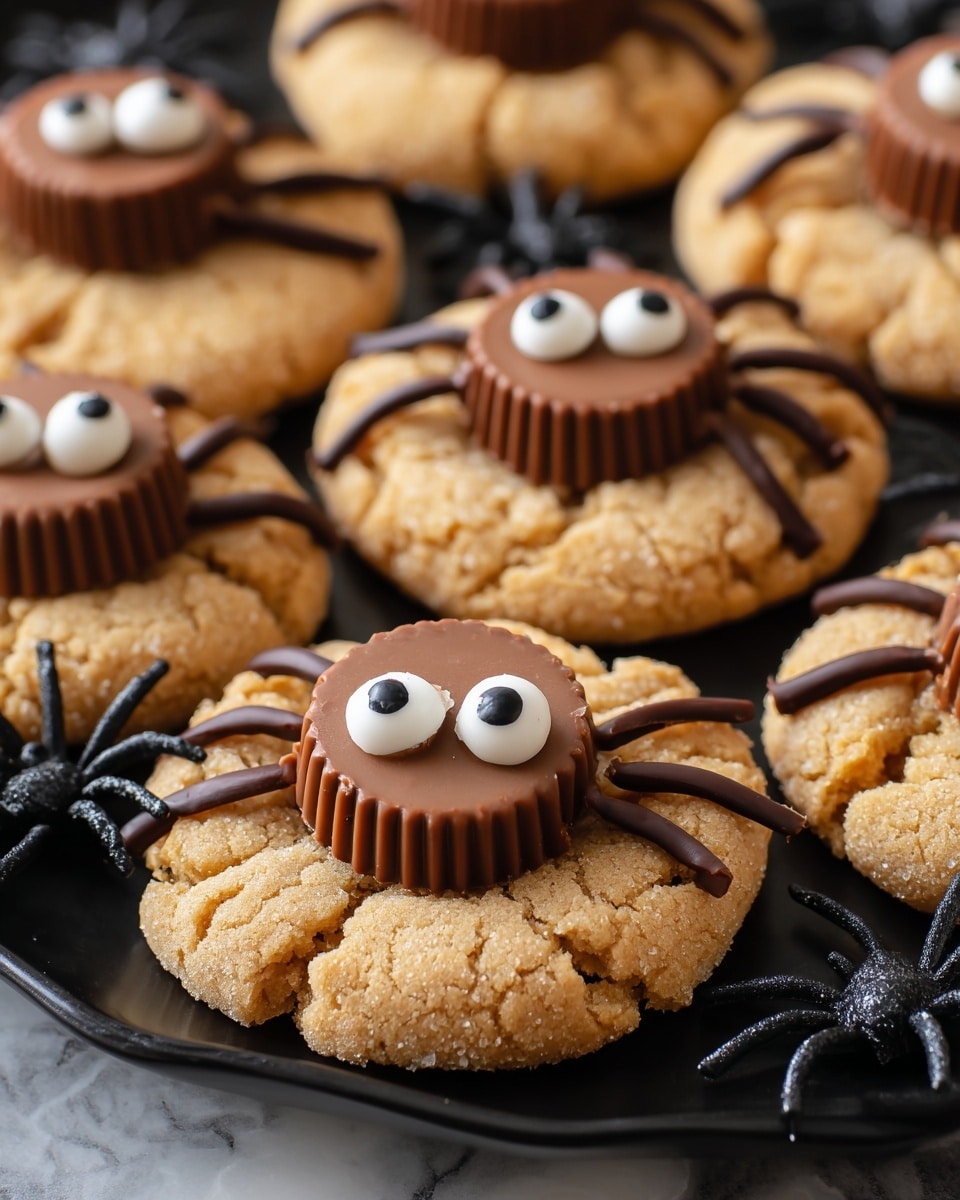
If you’re looking for a Halloween treat that’s both cute and utterly delicious, you’re gonna love this one. I’m talking about my Peanut Butter Spider Cookies for Halloween Recipe — these little critters are surprisingly easy to make and absolutely irresistible. They have that perfect combo of soft peanut butter cookie dough, melty chocolate, and a festive twist with candy eyeballs and mini Reese’s Peanut Butter Cups. Trust me, once you try these, they’ll become a yearly tradition in your house.
Why You’ll Love This Recipe
- Festive and Fun: These spider cookies are a playful way to celebrate Halloween that kids and adults adore.
- Easy to Make: The recipe uses simple pantry ingredients and is beginner-friendly.
- Perfect Texture: Soft, chewy peanut butter cookies with melty chocolate legs–just the right balance.
- Great for Parties: You can make the dough ahead of time, and these cookies hold up beautifully on a Halloween platter.

Ingredients You’ll Need
These ingredients come together to create a cookie that’s simultaneously soft, sweet, and delightfully peanut buttery. I love using creamy peanut butter here because it blends seamlessly into the dough and makes the texture beautifully tender.
- Unsalted butter: Room temperature butter helps create that tender crumb without greasiness.
- Brown sugar: Adds moisture and a slight caramel note that plays perfectly with the peanut butter.
- Granulated sugar: Rolling the cookie dough balls in extra sugar gives a subtle crunch and sparkle on the outside.
- Creamy peanut butter: I don’t recommend natural peanut butter here because it’s too runny; creamy is key for structure.
- Egg: Binds everything together and adds richness.
- Vanilla extract: Enhances the overall flavor without overpowering the peanut butter.
- All-purpose flour: The backbone of the cookies; make sure to measure it properly for the best texture.
- Baking soda: Gives the cookies a nice lift without being too cakey.
- Baking powder: Works with the soda to add gentle rise and tenderness.
- Salt: Balances the sweetness and enhances the peanut butter flavor.
- Mini Reese’s Peanut Butter Cups: These are the “bodies” of the spider—freezing them beforehand helps them keep their shape.
- Semi-sweet chocolate chips: For melting and piping the spider legs and attaching candy eyes.
- Candy eyeballs: The spooky finishing touch that really brings the spiders to life.
Variations
One of the things I love most about this Peanut Butter Spider Cookies for Halloween Recipe is how easy it is to make it your own. Whether you want to add an extra peanut butter punch or switch up the chocolate, there’s a variation here for everyone.
- Use chunky peanut butter: If you’re a fan of extra texture, chunky peanut butter gives a fun nutty crunch inside the cookies.
- Swap the chocolate: Dark chocolate chips or even white chocolate can lend a different flavor vibe, depending on your mood.
- Nut-free option: Try sunflower seed butter instead of peanut butter and use allergen-friendly candy eyes for a safe twist.
How to Make Peanut Butter Spider Cookies for Halloween Recipe
Step 1: Freeze Those Mini Reese’s Cups
Start by unwrapping about 24 mini Reese’s Peanut Butter Cups and placing them in a bowl in the freezer. I discovered this trick when my first batch ended up with melted and misshapen cups; freezing them helps them hold their shape when pressed into hot cookies later.
Step 2: Whip Up the Cookie Dough
In a large bowl, beat the room temperature butter with the brown sugar and granulated sugar for about a minute until smooth and fluffy. Then add in the peanut butter, egg, and vanilla extract, mixing again just until combined. This step makes the dough rich and perfectly creamy.
Step 3: Add Dry Ingredients Gently
Mix together the flour, baking soda, baking powder, and salt separately, then slowly add them into the wet ingredients. Stir just until everything comes together—over-mixing can make the cookies tough, and you want them soft and tender. Using a spatula here is perfect.
Step 4: Shape the Cookies and Bake
Use a tablespoon or a small cookie scoop to portion out dough balls. Roll them nicely between your hands, then roll each ball in granulated sugar for a slight crunch and sparkle. Place them on a lined baking sheet about 2-3 inches apart. Bake at 350ºF for 8-11 minutes—you’ll know they’re done when the edges start to crack and turn a pretty golden color.
Step 5: Add the Spider Bodies
Right out of the oven, gently press one frozen mini Reese’s Cup into the center of each cookie. Resist the urge to move them immediately; it’s best to let the cookies cool on the baking sheet for about 15-20 minutes so those peanut butter cups can set without sinking in.
Step 6: Melt Chocolate and Draw Legs
Melt the semi-sweet chocolate chips in the microwave at 50% power in one-minute intervals, stirring each time until smooth. Transfer the melted chocolate into a squeeze bottle or sandwich bag with a tiny snip at the corner. Now have fun drawing four spider legs on each side of the cookie. It’s easier than it looks, and kids especially love this part.
Step 7: Stick on the Eyes
Use just a dab of the melted chocolate on the back of the candy eyeballs to attach them to the Reese’s Cup. Let everything set before moving the cookies to a serving plate. You’ll feel really proud of these little creepy crawlers once they’re done!
Pro Tips for Making Peanut Butter Spider Cookies for Halloween Recipe
- Freeze the Reese’s Cups: This prevents the peanut butter from melting into the cookie and keeps your spider bodies looking perfect.
- Don’t overmix the dough: Overworking the dough makes cookies dense and tough—stir just until ingredients combine.
- Roll dough in sugar: This adds a beautiful sparkle and slight crunch on the outside.
- Wait to add Reese’s until out of oven: Press the cups in immediately after baking while warm for the best “stick,” but let cookies cool before moving to avoid sinking.
How to Serve Peanut Butter Spider Cookies for Halloween Recipe
Garnishes
I usually keep it simple with the candy eyeballs and chocolate legs because they add just the right spooky factor without overwhelming the flavor. If you want to get extra festive, sprinkle tiny edible glitter or colored sugar around the edges after baking for an extra pop.
Side Dishes
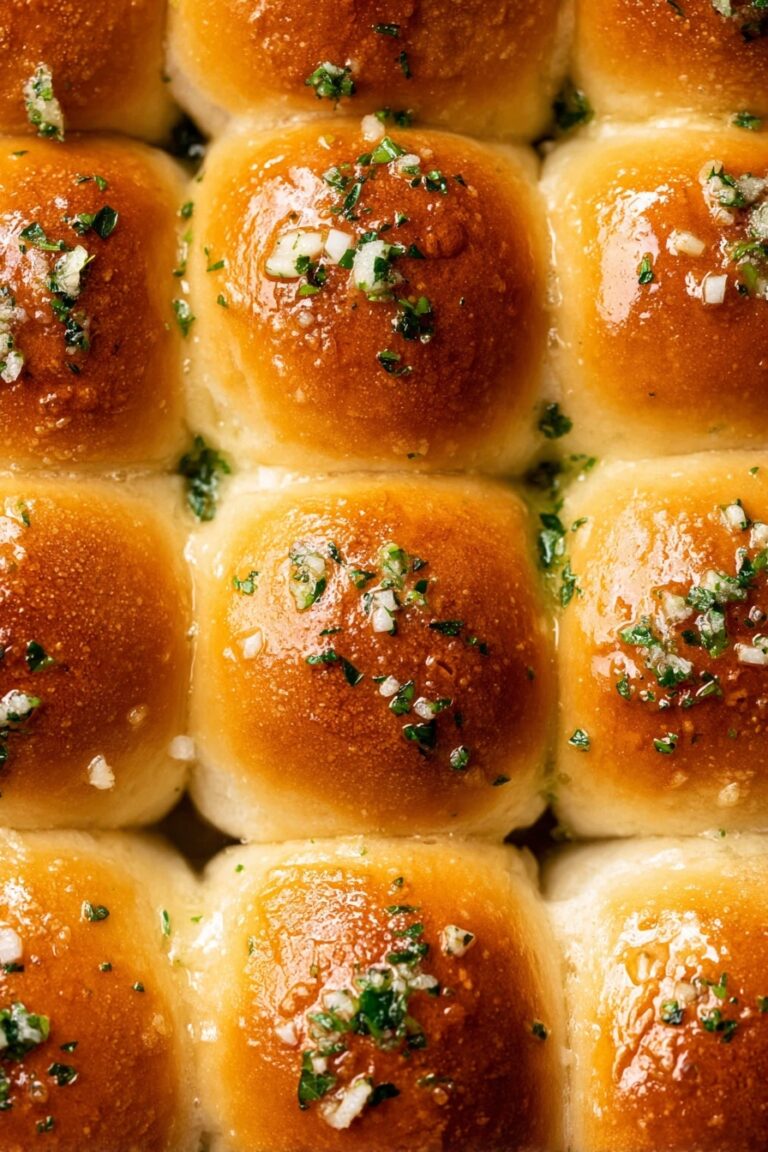
These cookies pair wonderfully with a cold glass of milk or a mug of hot cocoa—perfect for chilly October nights. For a party, I sometimes serve them alongside pumpkin-shaped sugar cookies or caramel apples for a fun Halloween dessert spread.
Creative Ways to Present
For a spooky display, arrange the cookies on a black platter lined with orange tissue paper or fake spider webs. You can also place them around a carved pumpkin centerpiece to wow your guests. Kids love helping decorate a “spider web” made from spun sugar or licorice strings around the cookies too.
Make Ahead and Storage
Storing Leftovers
I find that storing leftover Peanut Butter Spider Cookies for Halloween Recipe in an airtight container at room temperature keeps them fresh for up to 4 days. Just make sure they’re fully cooled before sealing to avoid sogginess. If your house is humid, a cool spot or fridge is better.
Freezing
Freezing the baked cookies is also an option if you want to prep early. Layer the cookies between parchment paper in a freezer-safe container and freeze for up to 2 months. When you’re ready, thaw at room temperature for a couple of hours—perfect for busy Halloween mornings.
Reheating
If you like your cookies warm, popping one in the microwave for about 10 seconds brings back that freshly baked softness. Just be careful not to overheat or the chocolate legs might get too melty. Warm cookies with gooey Reese’s cups? Heaven!
FAQs
-
Can I use natural peanut butter in this Peanut Butter Spider Cookies for Halloween Recipe?
While natural peanut butter might seem like a healthier option, I don’t recommend it for this recipe because it’s runnier and affects the texture and structure of the cookies. Creamy, processed peanut butter keeps the dough cohesive and tender, giving you the best spider cookie results.
-
What if I can’t find mini Reese’s Peanut Butter Cups?
If mini Reese’s aren’t available, you can cut regular-sized cups into small chunks and freeze those. Just be mindful they might be a little larger or irregular in shape, but they’ll still work beautifully as spider bodies.
-
How long can I store these cookies?
Stored in an airtight container at room temperature, these cookies stay fresh for about 4 days. For longer storage, freezing is your best bet, lasting up to 2 months with proper packaging.
-
Can kids help make these Peanut Butter Spider Cookies for Halloween Recipe?
Absolutely! The steps are simple enough for older kids, especially pressing on the Reese’s and piping chocolate legs. Just be sure to handle the oven and melted chocolate yourself to keep things safe.
Final Thoughts
I absolutely love how these Peanut Butter Spider Cookies for Halloween Recipe turn out every time. They’re not just adorable—they’re downright delicious with the perfect peanut butter flavor and festive details that get everyone chatting. When I first made them, my kids couldn’t stop asking for “more creepy spiders,” which was a win in my book! If you want a fun and yummy Halloween treat that’s easy to whip up and guaranteed to impress, this recipe is your new best friend. I hope you enjoy making (and eating!) these as much as I do.
Print
Peanut Butter Spider Cookies for Halloween Recipe
- Prep Time: 15 minutes
- Cook Time: 11 minutes
- Total Time: 26 minutes
- Yield: 24 cookies
- Category: Dessert
- Method: Baking
- Cuisine: American
Description
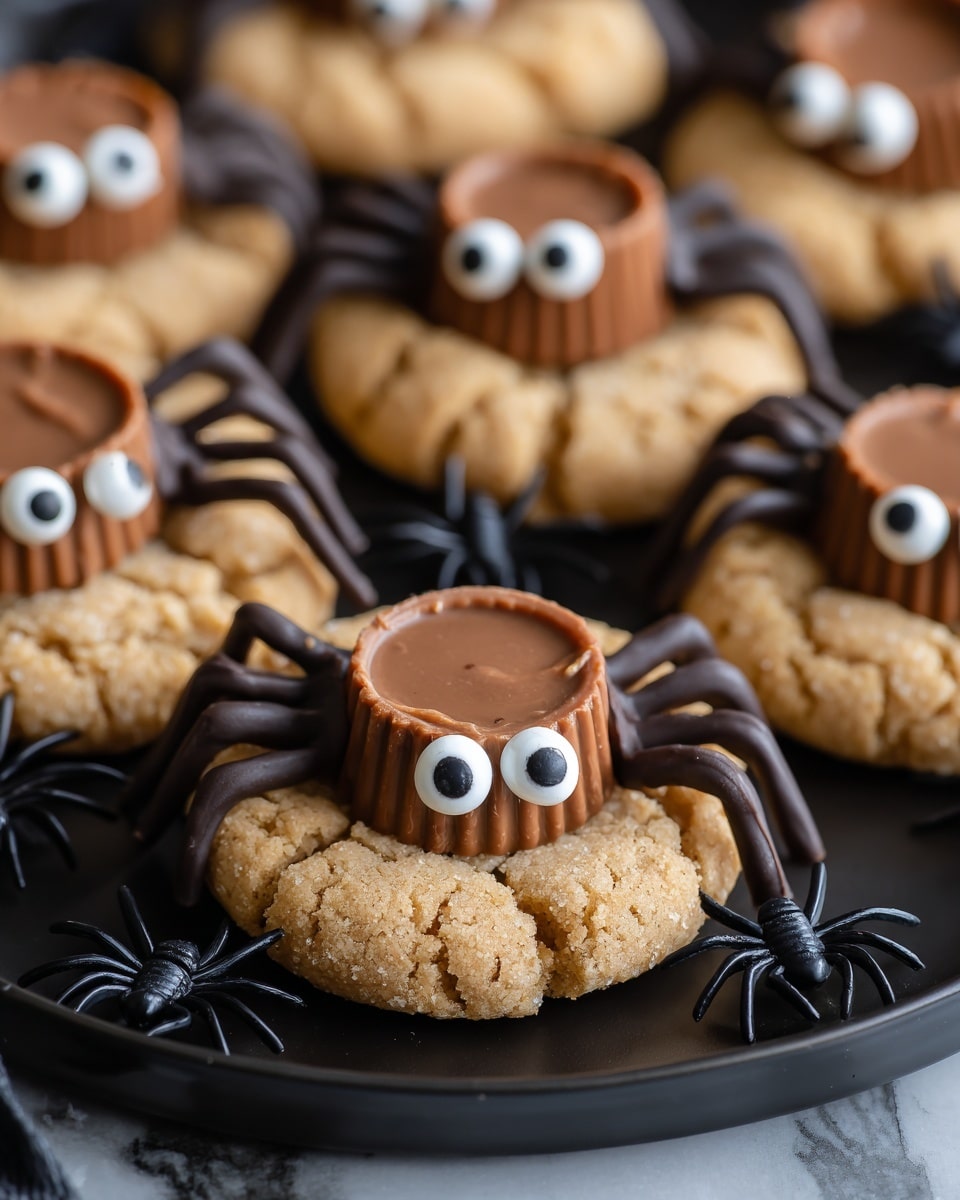
These Peanut Butter Spider Cookies are a fun and festive treat perfect for Halloween. Soft, chewy peanut butter cookies are topped with mini Reese’s Peanut Butter Cups and decorated with melted chocolate legs and candy eyeballs to create a spooky spider effect. Easy to make and irresistible, they’re great for parties or a seasonal snack.
Ingredients
Cookie Dough
- ½ cup (113g) unsalted butter, 1 stick, room temperature
- ½ cup (107g) brown sugar
- ⅓ cup (66g) granulated sugar
- ¾ cup (201g) creamy peanut butter, not natural
- 1 large egg
- 1 tsp vanilla extract
- 1 ½ cups (180g) all purpose flour
- 1 tsp baking soda
- ½ tsp baking powder
- ½ tsp salt
Coating and Decorations
- Granulated sugar, for rolling the cookies
- 24 mini Reese’s Peanut Butter Cups
- ½ cup (85g) semi-sweet chocolate chips, for melting
- Candy eyeballs
Instructions
- Freeze Reese’s Cups: Unwrap about 24 mini Reese’s cups and place them in a bowl. Put the bowl in the freezer to help the candies maintain their shape when added to the hot cookies later.
- Preheat Oven: Preheat your oven to 350ºF (175ºC) and line a baking sheet with a silicone mat or parchment paper.
- Mix Butter and Sugars: In a mixing bowl, combine the unsalted butter, brown sugar, and granulated sugar. Beat with an electric mixer for 1 minute until the mixture is smooth and fluffy.
- Add Peanut Butter, Egg, and Vanilla: Add the creamy peanut butter, the large egg, and vanilla extract to the butter and sugar mixture. Beat again for less than 1 minute until fully combined.
- Incorporate Dry Ingredients: Add the all-purpose flour, baking soda, baking powder, and salt to the wet ingredients. Mix on low speed or fold with a spatula just until combined to avoid overmixing.
- Form and Roll Dough Balls: Using a small cookie scoop or tablespoon, form tablespoon-sized balls of dough. Roll them between your hands to create uniform balls, then roll each ball in granulated sugar.
- Bake Cookies: Place the dough balls 2-3 inches apart on the prepared baking sheet. Bake in the preheated oven for 8-11 minutes or until the edges begin to crack and turn golden.
- Add Reese’s Cups: Remove cookies from the oven and immediately press one frozen mini Reese’s Peanut Butter Cup into the center of each cookie. Let cookies cool for 15-20 minutes to set before moving to a cooling rack, ensuring the cup maintains its shape.
- Melt Chocolate Chips: Place the semi-sweet chocolate chips in a microwave-safe bowl. Microwave at 50% power for 3 minutes, stirring after each minute until fully melted. Transfer the melted chocolate to a squeeze bottle or sandwich bag with a small corner cut off.
- Decorate Spiders: Use the melted chocolate to draw four legs on each side of the Reese’s cup on the cookies.
- Attach Candy Eyes: Use a small dab of melted chocolate on the back of each candy eyeball to stick them onto the Reese’s cups. Allow the chocolate to set completely before serving.
Notes
- Freezing the mini Reese’s cups before adding them to the hot cookies prevents melting and helps them keep their shape.
- Be careful not to overmix the dough once flour is added to keep the cookies tender.
- Rolling the cookie dough in granulated sugar adds a nice crunchy texture on the outside.
- You can substitute candy eyeballs with small chocolate chips or drawn eyes with melted chocolate if unavailable.
- Store cookies in an airtight container at room temperature for up to 3 days.
Nutrition
- Serving Size: 1 cookie
- Calories: 180
- Sugar: 12g
- Sodium: 140mg
- Fat: 11g
- Saturated Fat: 4g
- Unsaturated Fat: 6g
- Trans Fat: 0g
- Carbohydrates: 18g
- Fiber: 1g
- Protein: 4g
- Cholesterol: 25mg


