

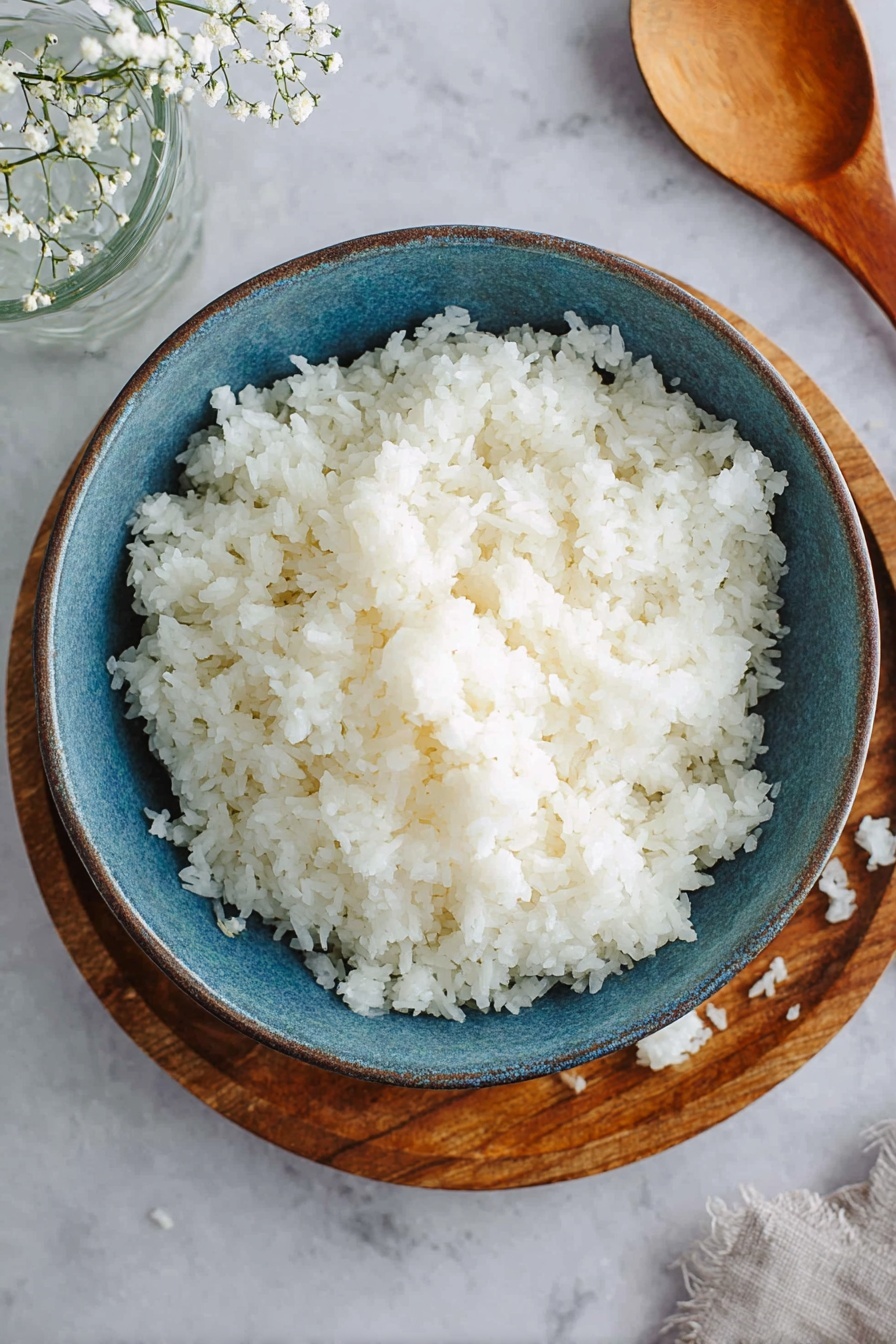
Hey there! If you’ve ever found yourself wondering how to get that sticky, flavorful rice just right, you’re in the perfect place. I’m about to share my Perfect Sushi Rice Recipe that will turn you into a sushi rice pro in no time. Trust me, this recipe is fan-freaking-tastic, and once you nail it, you’ll be making sushi nights at home that rival your favorite restaurant.
Why You’ll Love This Recipe
- Unbeatable Texture: You’ll get rice that’s perfectly sticky but not mushy—a sushi rice dream come true.
- Simple Ingredients: Just sushi rice, water, rice vinegar, sugar, and salt—easy pantry staples make magic.
- Flexible Cooking Methods: Whether you have a rice cooker or just a pot, this recipe works beautifully.
- Great for All Skill Levels: I’ll guide you through each step, so even sushi newbies can shine.

Ingredients You’ll Need
These ingredients are simple but essential. I’ve found that buying quality sushi rice makes all the difference, so look for “short-grain” or “sushi” rice for the best results. The sushi vinegar mix gives you that classic tangy, slightly sweet seasoning, so don’t skip it!
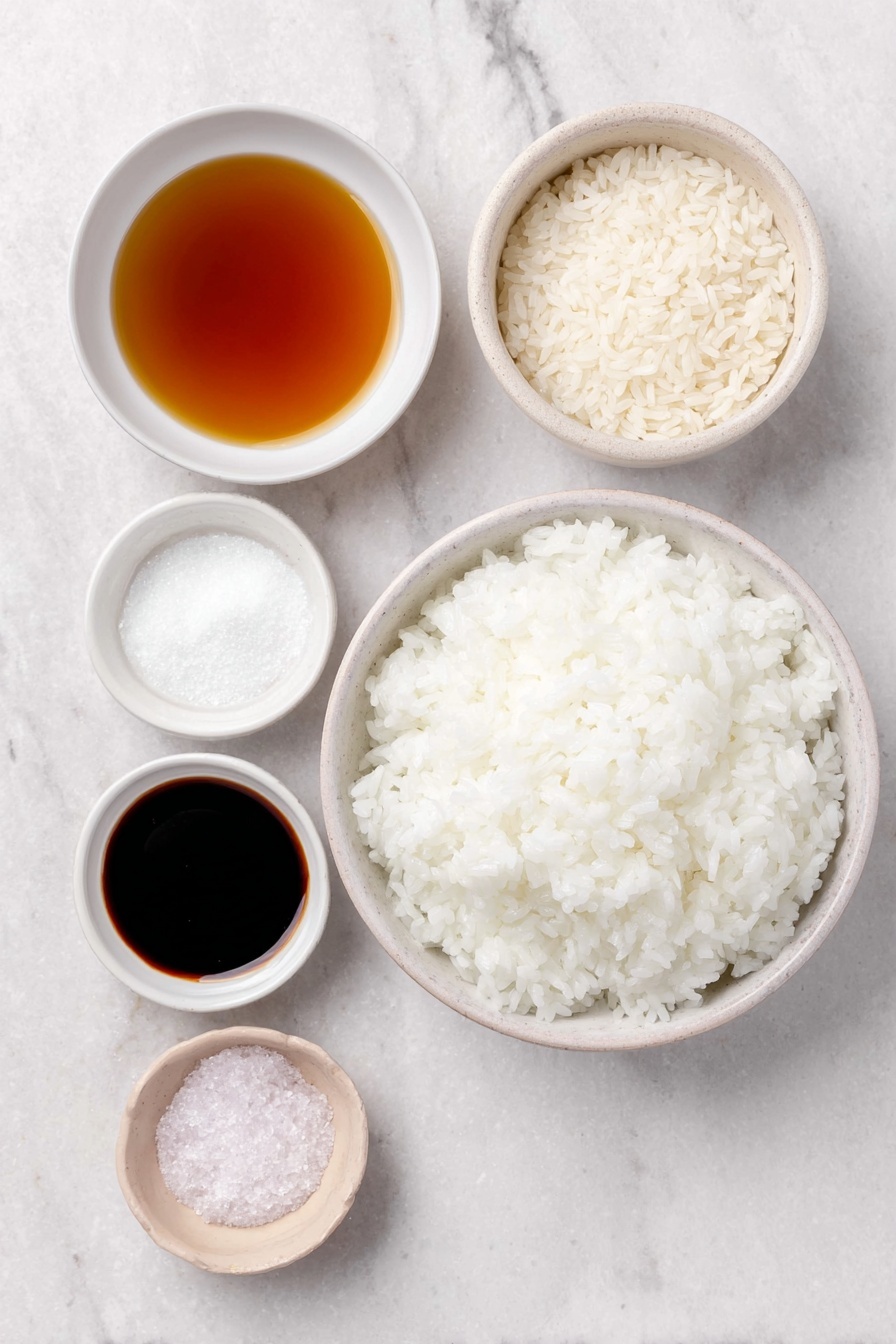
- Sushi Rice: Go for short-grain rice specifically labeled for sushi—it sticks well and has the right texture.
- Water: Use fresh, clean water measured carefully according to your cooking method for perfect fluffiness.
- Rice Vinegar: This is the heart of the sushi seasoning; a mild vinegar works best to balance flavor.
- Sugar: Adds just the right touch of sweetness that balances the vinegar’s acidity.
- Salt: Enhances and rounds out the overall flavor of your seasoned rice.
Variations
I love how adaptable this Perfect Sushi Rice Recipe is. Sometimes I like to tweak it just a bit to suit what I’m making or the season, and you can play around with it too.
- Brown Sushi Rice: I tried swapping white for brown rice once and while it’s healthier, it doesn’t get quite sticky enough for traditional sushi rolls—but it’s a fun experiment!
- Less Sugar: If you prefer a tangier flavor, reduce the sugar in your vinegar mix and adjust to taste—it still tastes fantastic.
- Using Mirin: Sometimes, I add a splash of mirin along with vinegar for a slightly sweeter, more complex flavor.
- Cooker vs. Pot: Try both cooking methods to find which one fits your kitchen vibe better.
How to Make Perfect Sushi Rice Recipe
Step 1: Rinse the Rice Until the Water Runs Clear
This step makes a huge difference! Place your sushi rice in a large bowl and rinse it under cold running water. Use your hand to gently move the rice in a circular motion—this helps wash away the excess starch that would otherwise make the rice gluey. Keep rinsing until the water is clear; trust me, your patience here pays off.
Step 2: Soak the Rice
After draining, soak the rice in fresh water—whether in your rice cooker or pot—for about 30 minutes. This hydrates the grains evenly, so the texture comes out tender throughout. I usually set a timer for this because it’s easy to get busy and forget!
Step 3: Cook Your Rice (Cooker or Pot Method)
If you have a rice cooker, add the rinsed rice and the exact amount of water I recommend (1 ½ cups plus 1 tbsp water), then set it to the sushi rice setting if you have one. When it finishes, keep the lid closed and let the rice sit for 10-15 minutes—no peeking! This rest is crucial to perfect texture.
For stovetop, combine rice and 1 ⅜ cups water in your pot with a tight lid. Bring to a boil, then reduce to very low heat, cooking for 8 minutes without lifting the lid. Then, remove from heat but leave the lid on for another 10-15 minutes. The “no lid lifting” rule applies here, too—trust me, patience is key.
Step 4: Prepare Sushi Vinegar
While the rice is cooking, mix rice vinegar, sugar, and salt in a small saucepan. Heat it just enough to dissolve the sugar and salt and bring it to a gentle boil, then turn off the heat. This seasoning is the secret that makes your sushi rice taste authentic and irresistible.
Step 5: Season and Cool the Rice
Transfer hot rice to a large bowl and gently fold in the vinegar mixture. Use a wooden paddle or spatula to toss the rice—avoid smashing the grains! Cover the bowl with a damp tea towel so your rice doesn’t dry out and let it cool to room temperature. This part always feels like the longest wait, but it’s worth it for amazing texture.
Pro Tips for Making Perfect Sushi Rice Recipe
- Rinse Thoroughly: I discovered this trick early on — washing away the excess starch is critical to avoid gluey rice.
- Don’t Rush the Resting Period: Letting the rice sit after cooking really helps develop that classic sticky yet fluffy texture I love.
- Use a Wooden Spatula: Gently folding the rice prevents it from crushing and getting mushy—trust me, it makes a noticeable difference.
- Avoid Refrigerating Sushi Rice: I used to store leftover sushi rice in the fridge, but it becomes hard and loses that magic texture—it’s best used fresh or repurposed like in poke bowls.
How to Serve Perfect Sushi Rice Recipe
Garnishes
I like to keep it classic with a sprinkle of toasted sesame seeds and finely sliced green onions. Sometimes, a small dab of wasabi right on the rice adds a gentle heat that complements the subtle sweetness. These garnishes bring a little something extra without overpowering the rice itself.
Side Dishes
My family goes crazy for sushi rice paired with miso soup and edamame for a balanced meal. Adding pickled ginger and soy sauce on the side enhances the flavors and freshness. For a fun twist, I’ve served it with homemade tempura or teriyaki chicken, and it was a hit every time.
Creative Ways to Present
For special occasions, I love making sushi rice balls (onigiri) shaped into cute triangles or little rounds. Sometimes, I layer the rice in a clear glass bowl to make colorful sushi parfaits with raw fish, veggies, and avocado—it’s a real showstopper at dinner parties.
Make Ahead and Storage
Storing Leftovers
Leftover sushi rice is best stored in an airtight container in the refrigerator and eaten within three days. Personally, I never use refrigerated sushi rice for rolling sushi again—it turns hard and loses that perfect sticky feel—but it’s excellent for making poke bowls or fried rice the next day.
Freezing
I’ve tried freezing cooked sushi rice in small portions, and while it can be saved, the texture changes slightly after thawing. If you do freeze it, thaw in the fridge and reheat gently with a splash of water to bring back some moisture.
Reheating
To reheat, sprinkle a few drops of water on the rice, cover with a damp cloth, and microwave in short bursts to avoid drying it out. Stir gently after reheating to help fluff it back up. This technique works especially well for leftover rice used in fried dishes.
FAQs
-
Can I use long-grain rice for sushi rice?
While technically possible, long-grain rice lacks the stickiness of short-grain sushi rice, so it won’t hold together well in sushi rolls. For authentic texture, stick with short-grain or sushi rice varieties.
-
How important is the rice vinegar mixture?
The rice vinegar seasoning adds the characteristic tang and slight sweetness that makes sushi rice taste special. Skipping or under-seasoning will result in bland rice, so I always recommend preparing this mixture.
-
Why shouldn’t I open the lid during cooking?
Opening the lid lets out steam and interrupts the cooking process, which affects moisture balance and texture. Keeping the lid closed ensures evenly cooked, fluffy rice.
-
Can I make sushi rice ahead of time?
It’s best to use sushi rice fresh the same day you make it since refrigeration causes hardening. If you need to prepare it earlier, store leftovers for other dishes like poke bowls but avoid using refrigerated rice for sushi rolls.
Final Thoughts
I absolutely love how this Perfect Sushi Rice Recipe turns out every time I make it. When I first learned to make sushi rice, it was a little intimidating, but with these easy-to-follow steps and little tips I’ve shared, you’ll find it much less daunting—and so rewarding. Give this recipe a try, and I promise your homemade sushi will be next-level delicious. Enjoy the process and, of course, the tasty results!
Print
Perfect Sushi Rice Recipe
- Prep Time: 40 minutes
- Cook Time: 10 minutes
- Total Time: 1 hour 50 minutes
- Yield: Serves 4 (makes enough for 4-8 sushi rolls)
- Category: Side Dish
- Method: Stovetop
- Cuisine: Japanese
Description
Learn how to make perfect sushi rice every time with this easy-to-follow recipe. Whether you use a rice cooker or stovetop, this recipe guides you through rinsing, soaking, cooking, and seasoning sushi rice with a classic rice vinegar mixture. Ideal for homemade sushi rolls or poke bowls, this method ensures flavorful and sticky rice with the perfect texture.
Ingredients
Sushi Rice
- 1 1/2 cups sushi rice
- 1 1/2 cups + 1 tbsp water (for rice cooker method)
- 1 3/8 cups (330 ml) water (for stovetop method)
Sushi Vinegar
- 1/4 cup rice vinegar
- 2 tablespoons sugar
- 1 teaspoon salt
Instructions
- Rinse Rice: Place the sushi rice in a large bowl and wash under running cold water, moving the rice in a circular motion with your hand until the water runs clear to remove excess starch.
- Drain Rice: Carefully discard the rinsing water using a sieve or by draining carefully.
- Cook Sushi Rice in a Rice Cooker: Transfer the washed rice to the rice cooker bowl and add 1 ½ cups plus 1 tablespoon (375 ml) of water. Let the rice soak for 30 minutes before starting the cooker. If your rice cooker has a ‘sushi rice’ setting, use it. After cooking, turn off the rice cooker and leave the rice to sit undisturbed for 10-15 minutes with the lid closed.
- Cook Sushi Rice on the Stove: Place the washed rice in a pot and add 1 ⅜ cups (330 ml) water. Let it soak for 30 minutes. Cover the pot and bring to a boil over medium heat. Once boiling, reduce the heat to the lowest setting and cook for 8 minutes without lifting the lid. Remove from heat and let it sit covered for 10-15 minutes to finish steaming.
- Prepare Sushi Vinegar: While the rice cooks, combine rice vinegar, sugar, and salt in a small saucepan. Heat until it just reaches a boil, then remove from the heat and stir until the sugar and salt have completely dissolved.
- Season Rice: Transfer the cooked rice to a large bowl. Pour the hot sushi vinegar mixture evenly over the rice and gently toss with a rice paddle or wooden spoon until well combined, ensuring the rice is seasoned thoroughly.
- Cool Rice: Cover the seasoned rice with a damp tea towel to keep it moist and allow it to cool to room temperature before use.
- Serve: Use the perfectly seasoned sushi rice to make your favorite sushi rolls or poke bowls.
Notes
- The rice cooker method is recommended for beginners as it provides consistent results.
- The water-to-rice ratio for stovetop cooking is approximately 1:1.1 (cups), while for rice cookers it is about 1:1.25, but always check your rice cooker manual for optimal ratios.
- 1 ½ cups (300g) uncooked rice yields enough sushi rice for 4-5 thick California rolls or 7-8 medium Maki rolls—sufficient for 2-4 people depending on appetite.
- Use freshly cooked sushi rice for best sushi results; refrigerated leftover rice becomes hard and is not ideal for sushi but can be repurposed for poke bowls or fried rice within three days if stored airtight.
Nutrition
- Serving Size: ¾ cup cooked sushi rice
- Calories: 180
- Sugar: 3 g
- Sodium: 130 mg
- Fat: 0.3 g
- Saturated Fat: 0 g
- Unsaturated Fat: 0.3 g
- Trans Fat: 0 g
- Carbohydrates: 40 g
- Fiber: 1 g
- Protein: 3 g
- Cholesterol: 0 mg


