
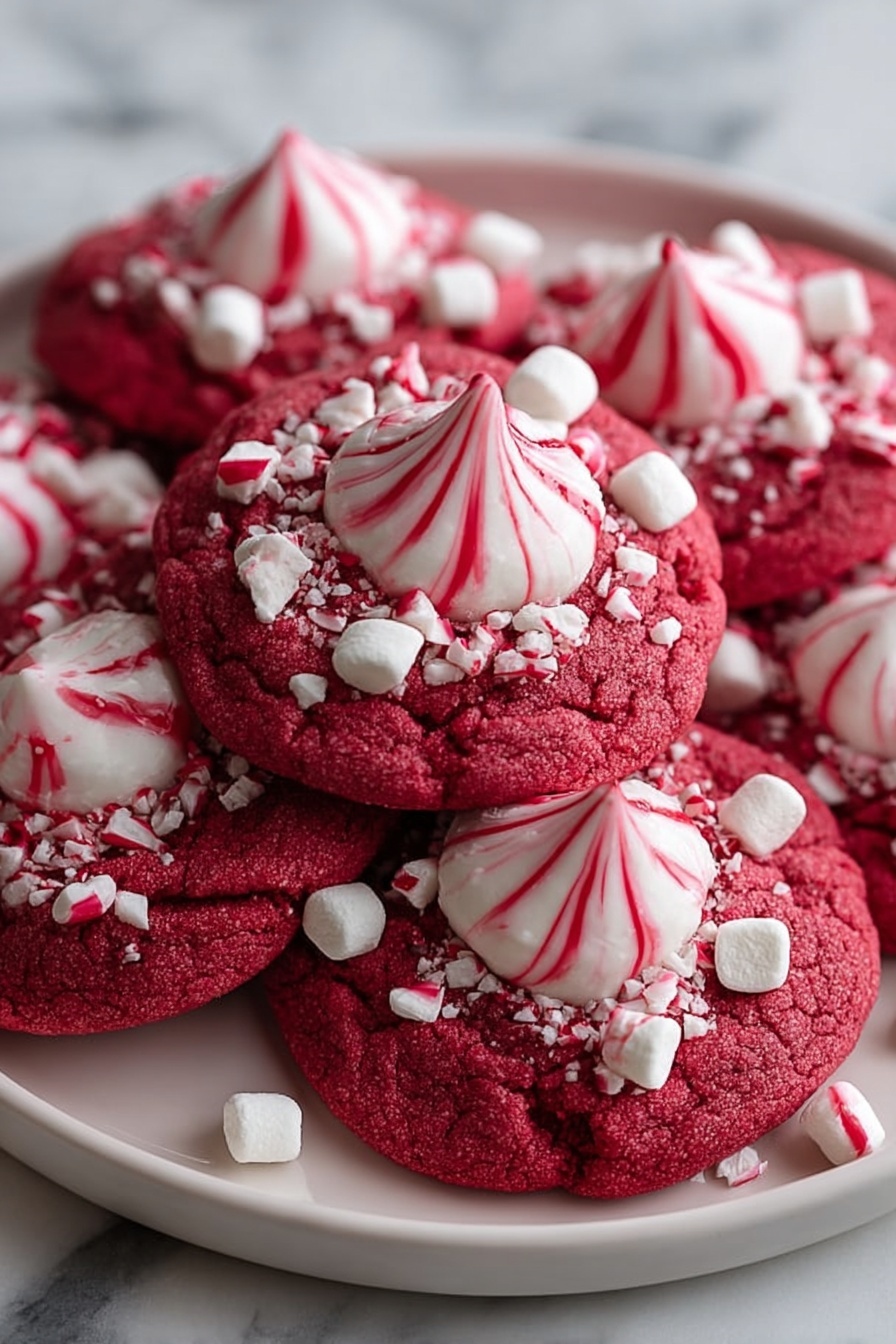
If you’re a fan of festive treats that pack both flavor and charm, then this Red Velvet Peppermint Blossoms Recipe is definitely going to become a holiday favorite. I absolutely love how these cookies come out with that beautiful crimson hue paired with a burst of cool peppermint in the center—it’s like a little winter party in every bite. Stick with me, and I’ll walk you through how to get them just right, ensuring you nail this festive delight every single time.
Why You’ll Love This Recipe
- Festive and Fun: The vibrant red velvet base and peppermint kiss make them visually stunning and deliciously seasonal.
- Easy to Make: You don’t need any complicated techniques—just simple mixing and baking.
- Perfect for Gifting: These cookies stack up beautifully in holiday tins and bring smiles when gifted to friends and family.
- Great Crowd Pleaser: My family goes crazy for these every Christmas, and I’m sure yours will too.

Ingredients You’ll Need
This Red Velvet Peppermint Blossoms Recipe uses classic ingredients that work together in perfect harmony—like the tang of cocoa powder balancing the sweetness, and the peppermint adding that refreshing zing. Here’s a little insider tip: opting for gel food coloring really makes that red velvet color pop without thinning out your dough.
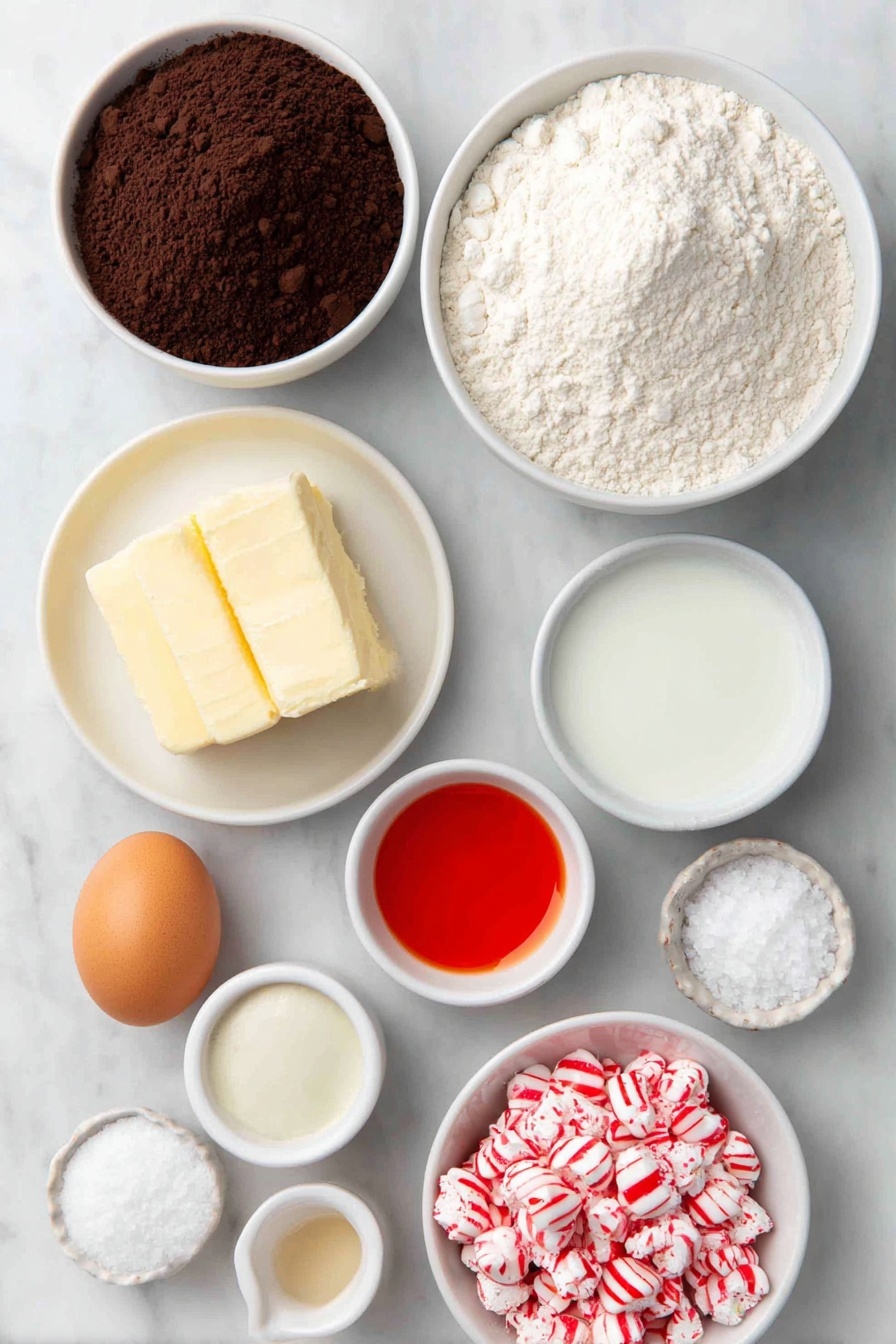
- All-purpose flour: The sturdy base for your cookie that ensures just the right texture.
- Unsweetened cocoa powder: Adds subtle chocolate flavor that complements the peppermint perfectly.
- Baking powder & baking soda: Helps your cookies rise just right so they’re soft but not cakey.
- Salt: Enhances all the other flavors — don’t skip it!
- Unsalted butter: I always recommend room temperature butter for easy creaming and fluffiness.
- Granulated sugar: Sweetens the dough without overwhelming the peppermint.
- Large egg: Binds your ingredients and makes the cookie tender.
- Vanilla extract: Rounds out the flavor with a warm, cozy note you’ll love.
- Red food coloring: Gel type is best for vibrant color without altering dough texture.
- Buttermilk: Adds moisture and a slight tang for depth of flavor.
- Peppermint candy kisses: The signature centerpiece that melts slightly for that signature peppermint surprise.
- Crushed candy canes or peppermint candies: For the perfect festive garnish that sticks to the warm cookies.
Variations
I love how versatile this Red Velvet Peppermint Blossoms Recipe is—it’s easy to tweak depending on what you have on hand or who you’re baking for. Sometimes, I like to get a bit creative and add my own twist.
- Chocolate Peppermint: Double down on the cocoa for a richer chocolate flavor—my kids think this version is straight-up indulgent.
- Dairy-Free Version: Swap butter for coconut oil and use a dairy-free milk alternative with a splash of vinegar instead of buttermilk; the cookies stay moist and delicious.
- Extra Crunch: Mix crushed candy canes right into the dough before chilling for a surprise peppermint crunch in every bite.
How to Make Red Velvet Peppermint Blossoms Recipe
Step 1: Prepare Your Dry Ingredients
Start by whisking together your flour, cocoa powder, baking powder, baking soda, and salt in a medium bowl. This little step is key because it ensures even distribution of those leavening agents and cocoa, so your cookies bake evenly. Set this mixture aside while you work on the wet ingredients.
Step 2: Cream Butter and Sugar Until Fluffy
Using a hand mixer or stand mixer, beat the softened butter and sugar for about 2 to 3 minutes until the mixture becomes light and fluffy—you’ll notice the color lighten and texture become creamy. Then go ahead and add in the egg and vanilla extract, blending until everything is well combined. This step builds the structure of your cookie, so don’t rush it!
Step 3: Add the Red Velvet Magic
Turn your mixer to low and carefully add the red food coloring along with the buttermilk. Keep mixing until the color is vibrant and even throughout. Gradually fold in your dry ingredients, stirring just until the dough comes together. The dough should feel a bit soft and sticky—that’s exactly what you want for these festive cookies.
Step 4: Chill for the Perfect Shape
Cover your dough with plastic wrap and pop it in the fridge for at least 30 minutes. I’ve learned this step is important to prevent the cookies from spreading too much while baking, giving you those pretty thick, chewy centers that make these cookies irresistible.
Step 5: Bake and Add Your Peppermint Kisses
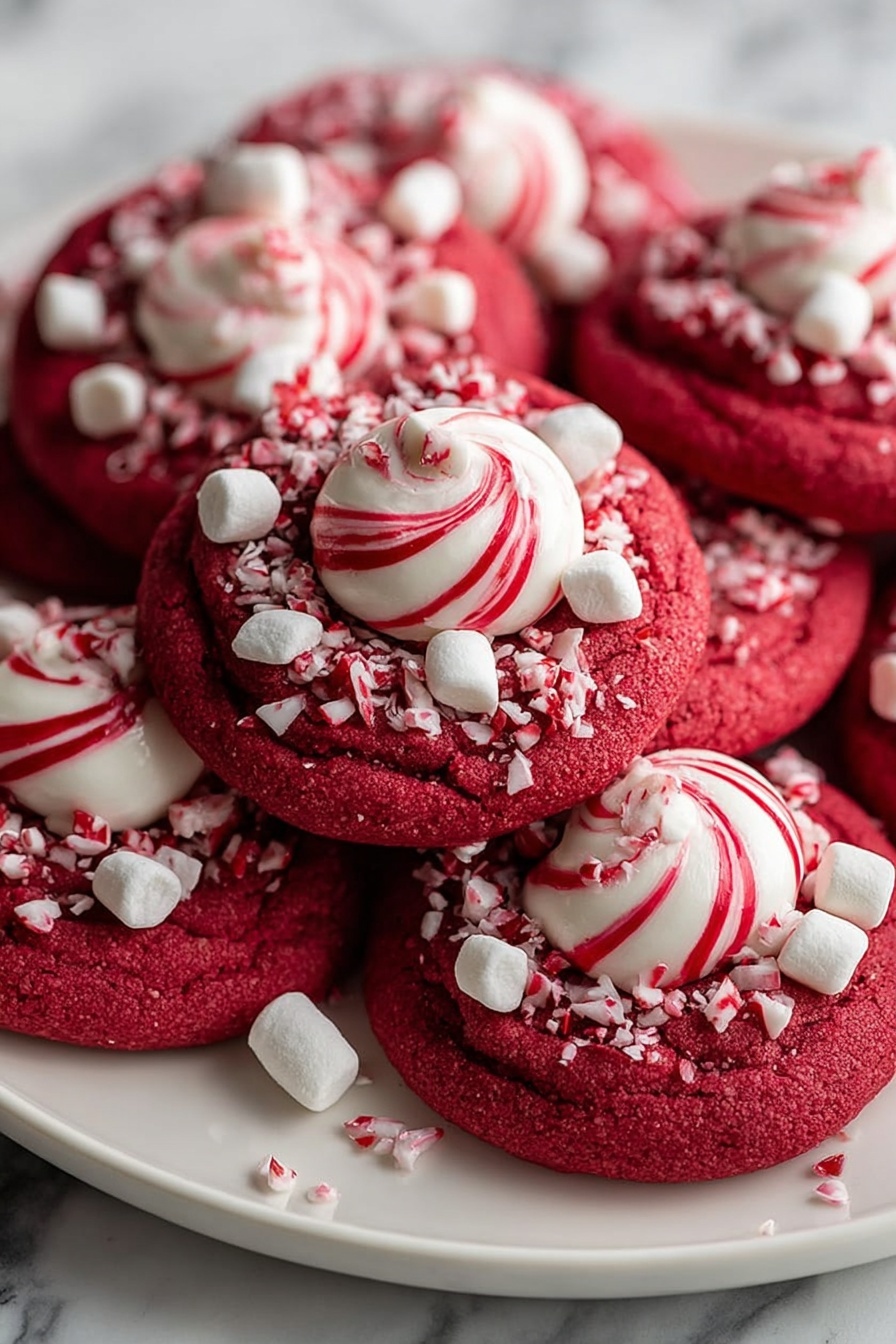
Preheat your oven to 350°F (175°C) and line two baking sheets with parchment paper. Roll the chilled dough into 1-inch balls and space them about 2 inches apart. Lightly flatten each ball with your palm—this helps the kisses nestle perfectly on top later. Bake for 10-12 minutes until the edges look set but the centers still feel soft. Once out of the oven, gently press a peppermint candy kiss into the center of each cookie. Immediately sprinkle crushed peppermint candies around the base—it sticks best when the cookie’s warm.
Step 6: Cool and Enjoy
Let your cookies cool on the baking sheet for about 5 minutes so the kisses soften but don’t completely melt. Then transfer them carefully to a wire rack to cool fully. The peppermint kiss will firm up as it cools, creating that lovely signature peppermint blossom effect you’re going for.
Pro Tips for Making Red Velvet Peppermint Blossoms Recipe
- Choose Gel Food Coloring: I discovered gel coloring keeps the dough thick and vibrant without adding extra liquid that could change the texture.
- Don’t Skip the Chill: Chilling the dough for at least 30 minutes makes shaping easier and keeps your cookies from spreading too thin.
- Add Peppermint Kisses While Warm: Pressing the candies in right when the cookies come out of the oven helps them stick without melting too much.
- Crushing Candy Canes: Use a zip-top bag and rolling pin for quick, mess-free crushing—it’s how I avoid tiny peppermint shards everywhere!
How to Serve Red Velvet Peppermint Blossoms Recipe
Garnishes
I love adding a sprinkle of extra crushed candy canes on top for that beautiful sparkle and crunch—plus it amps up the peppermint flavor. Sometimes I toss in a few festive edible glitter flakes for an extra holiday wow factor. You can also gently dust with powdered sugar for a snowy effect if you’re feeling fancy.
Side Dishes
These cookies are perfect alongside a tall glass of cold milk or a steaming cup of hot cocoa with marshmallows. For a party, I like to serve them with peppermint bark or a tray of assorted holiday candies to keep the minty, chocolaty theme going strong.
Creative Ways to Present
I’ve wrapped stacks of these cookies in clear cellophane tied with a red velvet ribbon for gifts that look as good as they taste. Another fun idea is arranging them on a festive cake stand surrounded by pine sprigs and cinnamon sticks—it makes a stunning centerpiece for holiday parties.
Make Ahead and Storage
Storing Leftovers
I store my leftover Red Velvet Peppermint Blossoms in an airtight container at room temperature. They stay fresh and chewy for about 3-4 days—after that, the peppermint kisses can start to harden too much. If you prefer crisper cookies, just give them a quick toast in the oven before serving.
Freezing
These cookies freeze beautifully! I usually pop the baked and cooled cookies into a freezer-safe container with parchment paper in between layers. When you want them, just thaw at room temperature and press on a peppermint kiss again if needed. This way, you can bake ahead for holiday gifts or gatherings without stress.
Reheating
To bring back that fresh-baked feeling, I heat leftover cookies in a 300°F oven for about 5 minutes. This warms the peppermint kiss and softens the cookie just enough—just watch closely so they don’t overbake. Easy and worth it every time!
FAQs
-
Can I use regular chocolate chips instead of peppermint kisses in this Red Velvet Peppermint Blossoms Recipe?
You totally can! Using chocolate chips will give your cookies a rich, melty chocolate center but you’ll miss out on that cool minty burst. If you love peppermint flavor, you might want to add a drop or two of peppermint extract to the dough to keep the spirit alive.
-
What’s the best way to crush the candy canes for garnish?
I like to place candy canes in a sturdy zip-top bag and crush them gently with a rolling pin or bottom of a heavy pan. This method keeps the mess contained and gives you a nice mix of fine and chunky pieces for sprinkling.
-
Can I make the dough ahead of time before chilling?
Absolutely! In fact, I often make the dough the night before, cover it well, and refrigerate overnight. This actually helps deepen the flavors and makes the dough easier to handle when shaping the next day.
-
What if I don’t have buttermilk—can I substitute something else?
No problem! You can make a quick buttermilk substitute by adding 1 tablespoon of lemon juice or white vinegar to 1 cup of milk and letting it sit for 5 minutes. This will give you that tangy acidity to balance the sweetness perfectly.
-
How do I prevent the peppermint kisses from melting too much?
Press them into the cookies right as they come out of the oven, so the heat is just enough to soften but not fully melt the candy. Then let the cookies cool on the baking sheet before moving them to a rack, which helps the kisses firm back up nicely.
Final Thoughts
This Red Velvet Peppermint Blossoms Recipe has become one of my go-to holiday treats—not just because they taste incredible but because of the joy and sparkle they bring to any gathering. I love sharing this recipe with friends, knowing it’s a surefire way to impress without stress. Give it a try this season, and I promise these vibrant, minty blossoms will make your celebrations even sweeter!
Print
Red Velvet Peppermint Blossoms Recipe
- Prep Time: 15 minutes
- Cook Time: 10-12 minutes
- Total Time: 27 minutes
- Yield: 18-20 servings
- Category: Dessert
- Method: Baking
- Cuisine: American
Description
Celebrate the holidays with these festive Christmas Peppermint Red Velvet Blossoms. Soft, red velvet-flavored cookies are baked to perfection, topped with a melting peppermint kiss and sprinkled with crushed candy canes for a delightful peppermint crunch. Perfect for holiday parties or gifting, these cookies combine classic red velvet flavor with refreshing peppermint in a fun and easy-to-make treat.
Ingredients
For the Cookies:
- 1 ¼ cups all-purpose flour
- ¼ cup unsweetened cocoa powder
- 1 tsp baking powder
- ½ tsp baking soda
- ¼ tsp salt
- ½ cup unsalted butter, softened
- ¾ cup granulated sugar
- 1 large egg
- 1 tsp vanilla extract
- 1 tbsp red food coloring (gel preferred for vibrant color)
- 1 tbsp buttermilk
- 18-20 peppermint candy kisses (unwrapped)
- Crushed candy canes or peppermint candies for garnish
Instructions
- Prepare the dry ingredients: In a medium bowl, whisk together the flour, cocoa powder, baking powder, baking soda, and salt. Set aside.
- Cream the butter and sugar: In a large bowl, using a hand mixer or stand mixer, cream together the softened butter and sugar until light and fluffy, about 2-3 minutes. Beat in the egg and vanilla extract, mixing until combined.
- Add the red velvet magic: With the mixer on low, add the red food coloring and buttermilk to the wet ingredients, and mix until you achieve a vibrant red color. Gradually add the dry ingredients, mixing just until the dough comes together. The dough will be soft but slightly sticky.
- Chill the dough: Cover the dough with plastic wrap and refrigerate for at least 30 minutes to help the cookies maintain their shape while baking.
- Preheat and prep: Preheat the oven to 350°F (175°C). Line two baking sheets with parchment paper.
- Shape and bake the cookies: Roll the chilled dough into 1-inch balls and place them 2 inches apart on the prepared baking sheets. Lightly flatten each ball with the palm of your hand. Bake for 10-12 minutes, or until the cookies have set around the edges but are still soft in the center.
- Top with peppermint kisses: As soon as the cookies come out of the oven, gently press a peppermint kiss into the center of each one. Immediately sprinkle crushed peppermint candies around the base of the kiss while the cookies are still warm so that the pieces stick to the surface.
- Cool completely: Allow the cookies to cool on the baking sheet for 5 minutes, then transfer them to a wire rack to cool completely. The peppermint kisses will soften from the heat of the cookies but will firm up as they cool.
Notes
- Using gel food coloring helps achieve a bright, vibrant red without affecting the dough consistency.
- Chilling the dough is essential to prevent the cookies from spreading too much during baking.
- For best results, use fresh peppermint candy kisses and crushed candy canes for garnish.
- Store cookies in an airtight container at room temperature for up to 5 days.
- These cookies can also be frozen before baking — freeze the dough balls on a tray, then transfer to a freezer bag. Bake directly from frozen, adding a couple of extra minutes to baking time.
Nutrition
- Serving Size: 1 cookie
- Calories: 130
- Sugar: 10g
- Sodium: 90mg
- Fat: 6g
- Saturated Fat: 3.5g
- Unsaturated Fat: 2g
- Trans Fat: 0g
- Carbohydrates: 18g
- Fiber: 1g
- Protein: 1.5g
- Cholesterol: 25mg

