
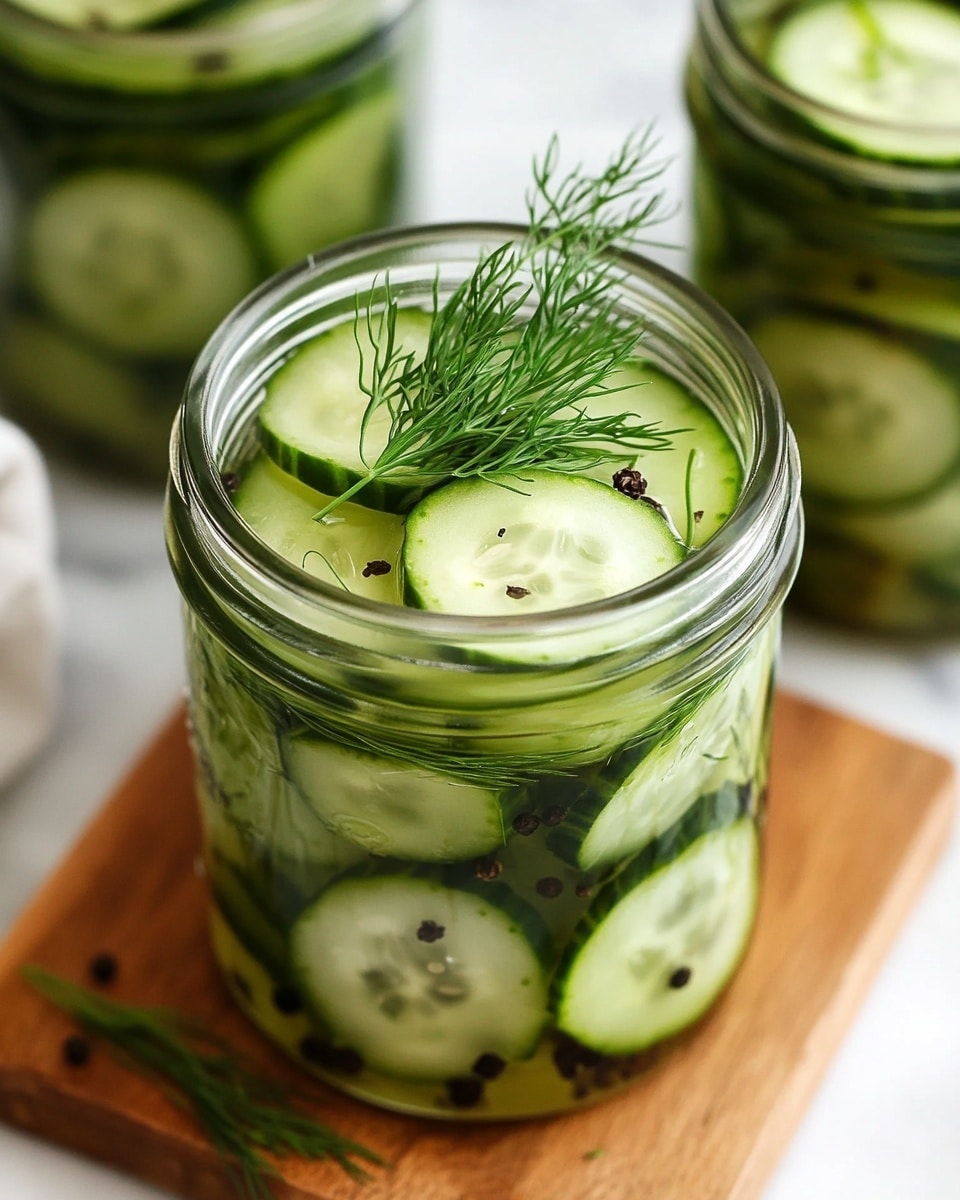
If you love tangy, crunchy pickles but shy away from complicated canning, this Refrigerator Dill Pickles (Super Easy!) Recipe is about to become your new best friend. I absolutely love how these pickles turn out – crisp, full of fresh dill and garlic flavor, and ready to enjoy in just a couple of days. It’s one of those recipes that feels fancy but couldn’t be simpler to whip up in your own kitchen without any special equipment.
Whenever I need a quick batch of pickles to jazz up sandwiches or add a cool crunch to salads, I grab this recipe. It’s perfect for summer when cucumbers are fresh and plentiful, but honestly, you can make it anytime. You’ll find that these homemade pickles not only taste better than store-bought, but you also control the ingredients, making them as mild or spicy as you like.
Why You’ll Love This Recipe
- Super Simple: No canning or heat baths—just mix, jar, and refrigerate.
- Quick Turnaround: Ready to eat in just 24-48 hours, perfect for last-minute cravings.
- Customizable Flavor: Easily tweak garlic, dill, or spice levels to suit your taste buds.
- Crisp and Fresh: Retains that satisfying crunch you want in a great pickle every time.

Ingredients You’ll Need
The magic of this Refrigerator Dill Pickles (Super Easy!) Recipe begins with just a handful of fresh, simple ingredients that come together beautifully. Choosing the right cucumbers and fresh dill really elevates the flavor and texture, so I’ll share a few tips along the way.
- English Cucumbers: Their thin skin and fewer seeds make them ideal for pickling and keep the texture crisp.
- Fresh Dill: Go for fresh dill sprigs with vibrant green fronds; they add that signature fresh dill flavor.
- Garlic Cloves: Fresh garlic smashed (not minced) releases flavor slowly without overpowering the pickles.
- Black Peppercorns: Adds a subtle peppery warmth—fresh whole peppercorns give the best taste.
- Red Pepper Flakes: Just a pinch for a little heat, but you can easily dial this up if you like spicy pickles.
- White or Cider Vinegar: Choose white vinegar for classic pickles or cider vinegar for a slightly fruity tang.
- Salt: Pickling or kosher salt is best to dissolve evenly and maintain the right brine balance.
- Water: Warm water helps dissolve the salt and vinegar mix quickly for the brine.
Variations
I love that this recipe is so forgiving and easy to customize. Over time, I’ve played around with different additions and learned you can tweak the flavor to fit your mood or what’s in your pantry.
- Garlicky Boost: I once accidentally doubled the garlic and my family went crazy for the extra punch—garlic lovers, this one’s for you.
- Spicy Kick: Adding more red pepper flakes and peppercorns brings a deeper heat that’s perfect if you like a little fire with your crunch.
- Mini Cucumbers: Perfect for a snack-sized pickle, I sometimes swap in Persian cucumbers and keep them whole for easy grab-and-go jars.
- Herbal Twists: Sometimes I throw in a few mustard seeds or a bay leaf for a subtle depth, but dill is still the star.
How to Make Refrigerator Dill Pickles (Super Easy!) Recipe
Step 1: Prepare Your Jars and Flavor Base
Start by grabbing clean pint-sized jars for your pickles. In each jar, drop in a smashed garlic clove, a teaspoon of black peppercorns, a pinch of red pepper flakes, and 2 fronds of fresh dill. This flavor base is what gives these pickles that wonderful herby, spicy bite. Pro tip: don’t crush the garlic too finely here—the gentle smash releases just enough flavor without getting overpowering.
Step 2: Slice and Pack Your Cucumbers
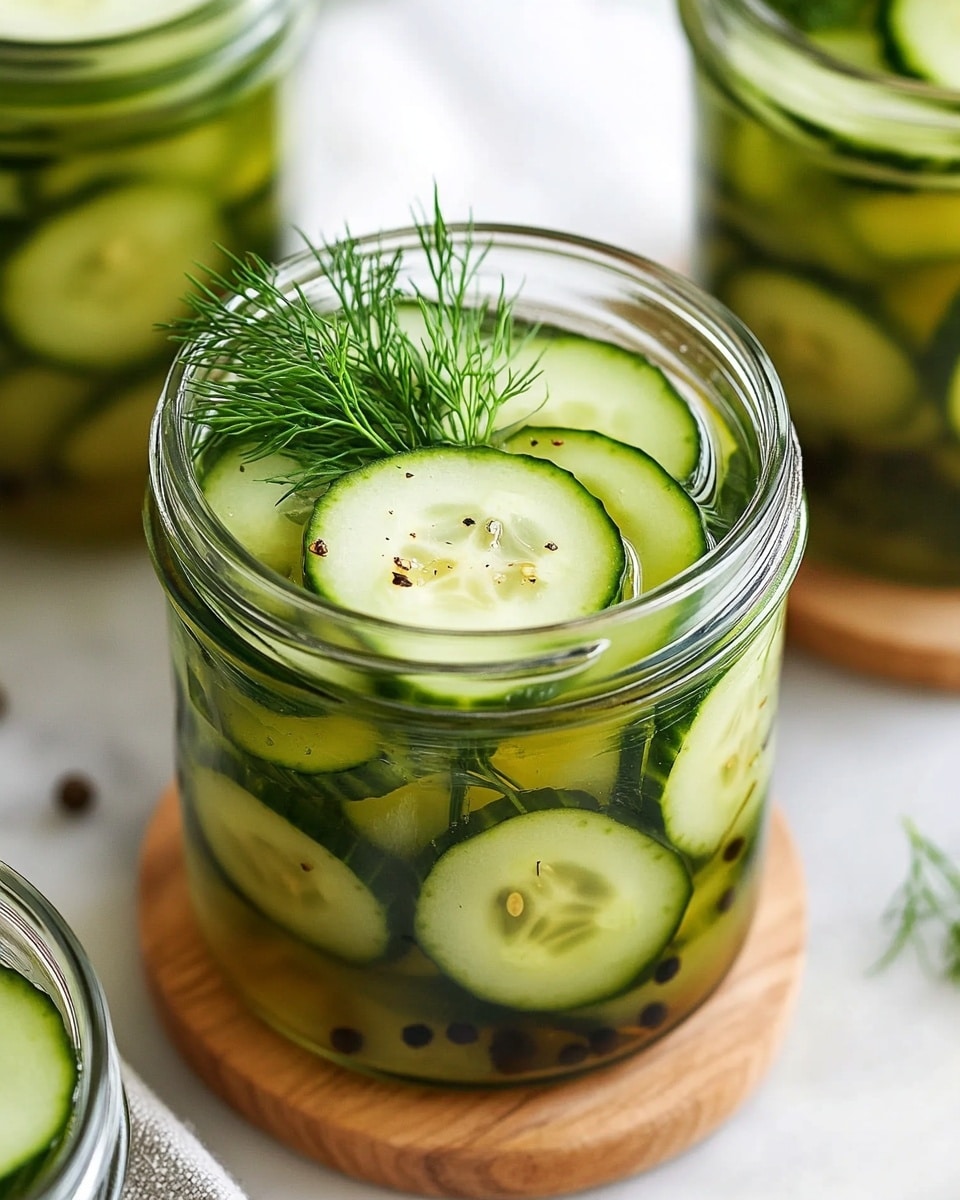
Next, slice your cucumbers however you like—spears are classic for sandwiches, chips are great for snacking, or you can leave mini cucumbers whole for quick bites. Pack them snugly into the jars, but avoid cramming them so tight that the brine can’t circulate. I like to tuck one more dill frond on top for an extra punch of flavor right before the brine goes in.
Step 3: Make and Add the Brine
Stir together warm water, vinegar, and salt until the salt dissolves fully. Pour the brine carefully into each jar, filling until the cucumbers are completely submerged. This ensures even pickling and helps keep your pickles crisp. Be sure to leave a little headspace at the top to avoid overflow when you seal the jars.
Step 4: Seal and Refrigerate
Cap your jars tightly and pop them in the fridge. I like to give the pickles at least 24 hours before tasting, but they get even better after 48 hours as the flavors meld and deepen. These refrigerator pickles are best enjoyed within 3-4 weeks. Just remember, they’re not designed for shelf stability at room temp, so keep ’em chilled.
Pro Tips for Making Refrigerator Dill Pickles (Super Easy!) Recipe
- Choosing Cucumbers: I always pick firm cucumbers with no blemishes to keep my pickles extra crisp.
- Use Warm Water: It helps dissolve salt quicker and ensures an even brine without gritty bits.
- Pack Just Right: Don’t overfill jars; cucumbers need space for the brine to surround them fully.
- Refrigeration Time: Resist temptation—wait at least 24 hours for best texture and flavor development.
How to Serve Refrigerator Dill Pickles (Super Easy!) Recipe
Garnishes
I often finish sandwiches and burgers with a sprig of fresh dill picked right from the jar to echo those bright pickle flavors. A few extra cracked black peppercorns sprinkled on a charcuterie board alongside these pickles make a simple but lovely garnish, too.
Side Dishes
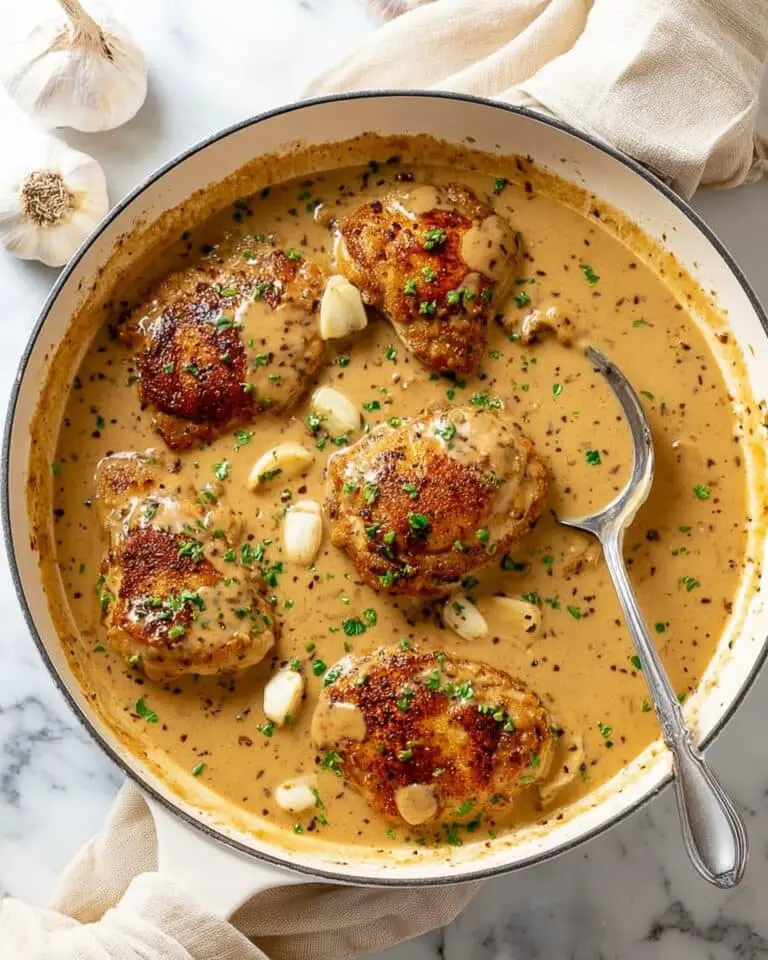
These Refrigerator Dill Pickles (Super Easy!) go perfectly with grilled cheeses, sloppy joes, or even classic potato salad. I like to serve them with BBQ dishes where the cool crunch contrasts smoky, rich flavors flawlessly.
Creative Ways to Present
For parties, I like to arrange pickle chips in a pretty glass jar surrounded by fresh dill sprigs and garlic cloves, which makes for a charming, rustic look that guests appreciate. You could also layer colorful veggies like carrots or cauliflower with the pickles in a large jar for a vibrant, fun mix.
Make Ahead and Storage
Storing Leftovers
Once made, your refrigerator pickles store beautifully for up to 4 weeks in the fridge. I keep mine in the original jars tightly sealed and always use a clean fork or tongs to avoid contamination. This keeps them deliciously fresh and crisp.
Freezing
I don’t recommend freezing these pickles—the texture suffers and they get soggy once thawed. It’s best to make fresh batches every few weeks if you want to keep a steady supply.
Reheating
Since these are cold refrigerator pickles, you don’t need to reheat them. They’re best served chilled and crisp straight from the fridge.
FAQs
-
How long do refrigerator dill pickles last?
Refrigerator dill pickles stay fresh for about 3 to 4 weeks when kept fully submerged in brine and stored in the refrigerator. Always use clean utensils to avoid introducing bacteria, and keep lids sealed tightly.
-
Can I use regular cucumbers instead of English cucumbers?
You can! Just choose smaller, firm cucumbers with fewer seeds to keep your pickles nice and crunchy. If using larger cucumbers, consider slicing them thinner or removing seeds to prevent sogginess.
-
Can I make this recipe without vinegar?
Vinegar is essential for safety and flavor in quick pickling, so it’s best not to skip it. If you prefer a milder tang, you can use apple cider vinegar or adjust the amount slightly—but don’t leave it out completely.
-
How do I make my refrigerator dill pickles spicier?
Simply increase the red pepper flakes and add extra black peppercorns. For even more heat, you could also toss in a sliced jalapeño or a few mustard seeds for a spicy twist.
-
Why are my refrigerator pickles not crunchy?
If your pickles turned out soft, it could be due to old or overripe cucumbers, too much water in the brine, or packing the jars too tightly. Using fresh, firm cucumbers and proper brine balance helps keep them crisp.
Final Thoughts
I still remember the first time I made this Refrigerator Dill Pickles (Super Easy!) Recipe—I was amazed at how easy it was and how fresh and vibrant the pickles tasted compared to anything I bought in a store. Now, I make it often, and it’s become a staple in my kitchen. Trust me, once you try these, you’ll never look at jarred pickles the same way again. So, grab some cucumbers and dill, and let’s get pickling—you’re going to love the crunchy, garlicky goodness waiting in your fridge!
Print
Refrigerator Dill Pickles (Super Easy!) Recipe
- Prep Time: 25 minutes
- Cook Time: 0 minutes
- Total Time: 2 days 25 minutes
- Yield: 4 pints (8 cups)
- Category: Condiment
- Method: No-Cook
- Cuisine: American
- Diet: Gluten Free
Description
These Refrigerator Dill Pickles are a SUPER easy, quick way to make fresh, tangy, and crunchy pickles right at home without canning. Using simple ingredients like cucumbers, fresh dill, garlic, and a vinegar-based brine, these pickles develop wonderful flavor after chilling in the fridge for 24-48 hours. Perfect for snacking, sandwiches, or burgers, this recipe yields crisp pickles that stay fresh for 3-4 weeks in the refrigerator.
Ingredients
For the Pickles:
- 2 long English cucumbers – or about 1.3 lbs. (600g) of mini or Persian cucumbers
- 8-12 fronds of fresh dill (about 0.75 oz container)
- 4 garlic cloves – smashed with the flat side of a knife or bottom of a glass
- 4 teaspoons black peppercorns
- 1/2 teaspoon red pepper flakes
For the Pickle Brine:
- 4 cups warm water
- 1/2 cup (8 Tbsp.) white vinegar or apple cider vinegar
- 1 Tablespoon salt
Instructions
- Combine Seasonings: Place 1 smashed garlic clove, 1 teaspoon black peppercorns, 1/8 teaspoon red pepper flakes, and 2 sprigs of fresh dill into each pint jar. These seasonings form the flavorful base of the pickles.
- Prepare Cucumbers: Slice cucumbers into your preferred shape; you can use whole mini cucumbers, pickle spears, chips, or crinkle cut chips depending on your texture preference.
- Fill Jars: Divide the prepared cucumbers evenly among the pint jars. Pack them closely but avoid overfilling to prevent bursting. Add one additional dill frond on top if available for extra fragrance.
- Make Brine: In a separate bowl or jug, stir together the warm water, vinegar, and salt until the salt fully dissolves, creating your pickle brine.
- Pour Brine: Carefully pour the brine mixture into each jar, filling to cover the cucumbers completely to ensure even pickling.
- Refrigerate: Secure lids tightly on the jars and refrigerate for at least 24-48 hours before eating. The flavor intensifies over time. These pickles will stay fresh for 3-4 weeks refrigerated but are not suitable for room temperature storage.
Notes
- Love Garlicky Pickles? Double up on the garlic cloves for a stronger flavor.
- Want Spicy Pickles? Increase the amount of black peppercorns and red pepper flakes to taste.
- Adjust Quantity: The recipe makes 4 pint jars (2 quarts). Halve or quarter the recipe as needed for fewer jars.
- Serving Ideas: These crisp pickles are delicious on burgers, sandwiches, wraps, sloppy joes, or as a tangy snack.
Nutrition
- Serving Size: 1/2 cup (approx. 120g)
- Calories: 10
- Sugar: 1g
- Sodium: 520mg
- Fat: 0g
- Saturated Fat: 0g
- Unsaturated Fat: 0g
- Trans Fat: 0g
- Carbohydrates: 2g
- Fiber: 1g
- Protein: 0.4g
- Cholesterol: 0mg

