
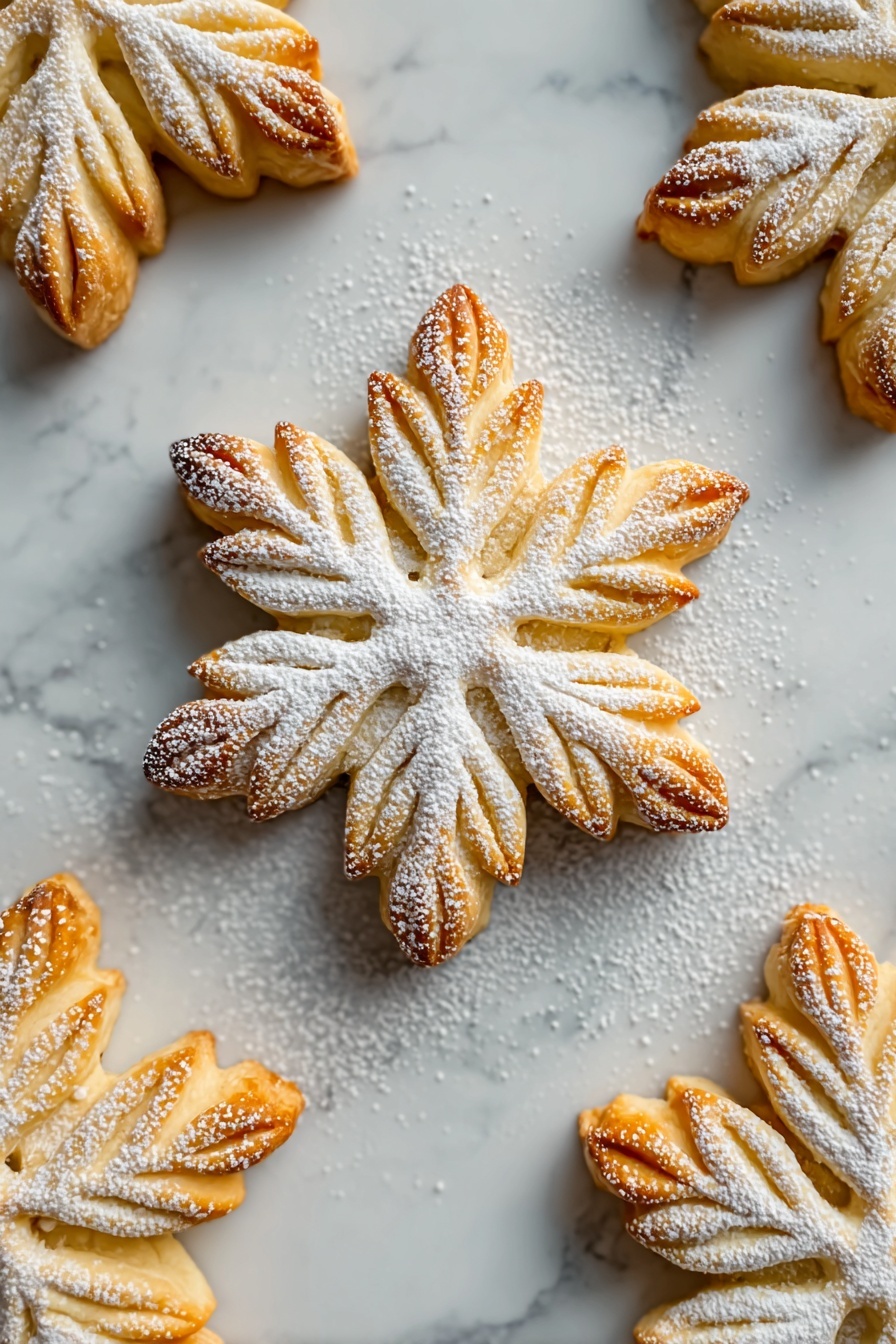
Winter holidays aren’t complete without a little sparkle, and that’s exactly why this Snowflake Cookies Recipe holds a special place in my kitchen. These delicate cookies, with their charming snowflake shapes and melt-in-your-mouth texture, are not only stunning but surprisingly easy to make. Whether you’re baking alongside your kids or prepping treats for a festive gathering, you’ll find that these cookies bring that cozy, magical vibe to any occasion. Stick around, and I’ll share everything you need to nail this recipe perfectly!
Why You’ll Love This Recipe
- Beautiful, Handcrafted Shapes: Each cookie looks like a delicate snowflake, adding a whimsical touch to your holiday spread.
- Simple Ingredients: You probably have everything in your pantry — no need for complicated or exotic items.
- Perfect Texture: Crisp edges combined with a tender, buttery center that makes these cookies irresistible.
- Great for Gifting and Parties: Dust them with powdered sugar for a snow-kissed look that everyone will rave about.

Ingredients You’ll Need
The magic of these snowflake cookies comes from simple pantry staples working together — a balance of just enough sweetness, butter, and flour to create that perfect dough to roll and shape without a fuss. I recommend using fresh butter and a good-quality vanilla extract to make those flavors pop.
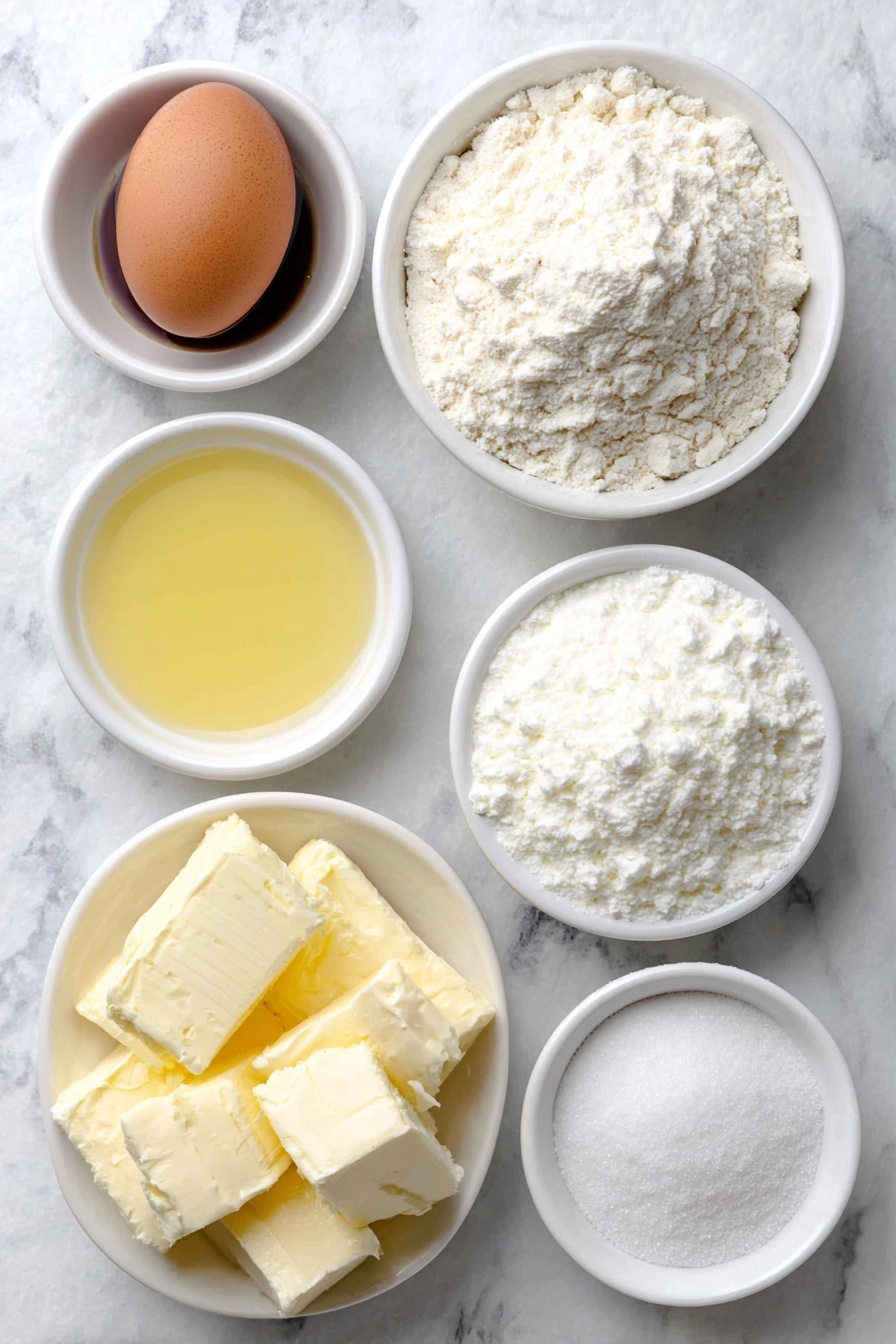
- All-purpose flour: Provides structure; make sure to spoon and level to avoid dense cookies.
- Powdered sugar: Adds subtle sweetness and a silky texture; plus, it’s great for dusting at the end.
- Granulated sugar: A little crunch and extra sweetness that complements the powdered sugar.
- Unsalted butter: Softened but not melted; it brings rich flavor and tender crumb.
- Vanilla extract: Classic flavor enhancer that brings warmth and depth.
- Almond extract (optional): A tiny dash adds a lovely nutty, aromatic twist if you want to experiment.
- Salt: Balances sweetness and intensifies all the other flavors.
- Egg: Helps bind the dough and adds moisture for softness.
Variations
I love getting creative with this Snowflake Cookies Recipe — it’s versatile enough for fun tweaks that suit your taste or make it allergy-friendly. Feel free to make it your own by swapping flavors or adjusting textures!
- Gluten-Free Version: I used a gluten-free all-purpose blend once, and the cookies still held their shape beautifully — just watch your baking time as it can vary slightly.
- Spiced Snowflakes: Adding a pinch of cinnamon or nutmeg to the dough gives a cozy warmth that my family adored last Christmas.
- Festive Icing: Once cooled, I sometimes decorate with royal icing and edible glitter to make these cookies even more magical for holiday parties.
- Seven-Point Snowflakes: For variety, try shaping seven-point snowflakes instead of six — it’s a neat way to switch up your cookie platter’s look.
How to Make Snowflake Cookies Recipe
Step 1: Cream the Butter and Sugars until Fluffy
Start by beating the softened butter, granulated sugar, and powdered sugar together using a hand or stand mixer on medium speed. I like to mix for about three minutes — you’ll see the mixture turn pale and fluffy, which is key for those light, tender cookies. Don’t rush this part; it really sets the tone for texture.
Step 2: Add the Egg and Extracts
Next, toss in the egg, vanilla extract, and almond extract if you’re using it. Beat these until everything looks smooth and fully combined. This step brings moisture and flavor, so make sure to scrape down the bowl a couple of times.
Step 3: Gradually Mix in Flour and Salt
In another bowl, whisk together the flour and salt. Slowly add this to your wet ingredients on low speed. I learned not to overmix here; once the dough looks smooth and comes together, stop mixing. Overworking dough can make cookies tough — we want tender and crumbly, not chewy.
Step 4: Chill the Dough Properly
Divide the dough into two equal discs, wrap them tightly in plastic wrap, and pop them in the fridge for at least an hour. This is crucial: chilled dough is easier to roll, holds its shape better, and prevents spreading in the oven. I usually prep this step in advance.
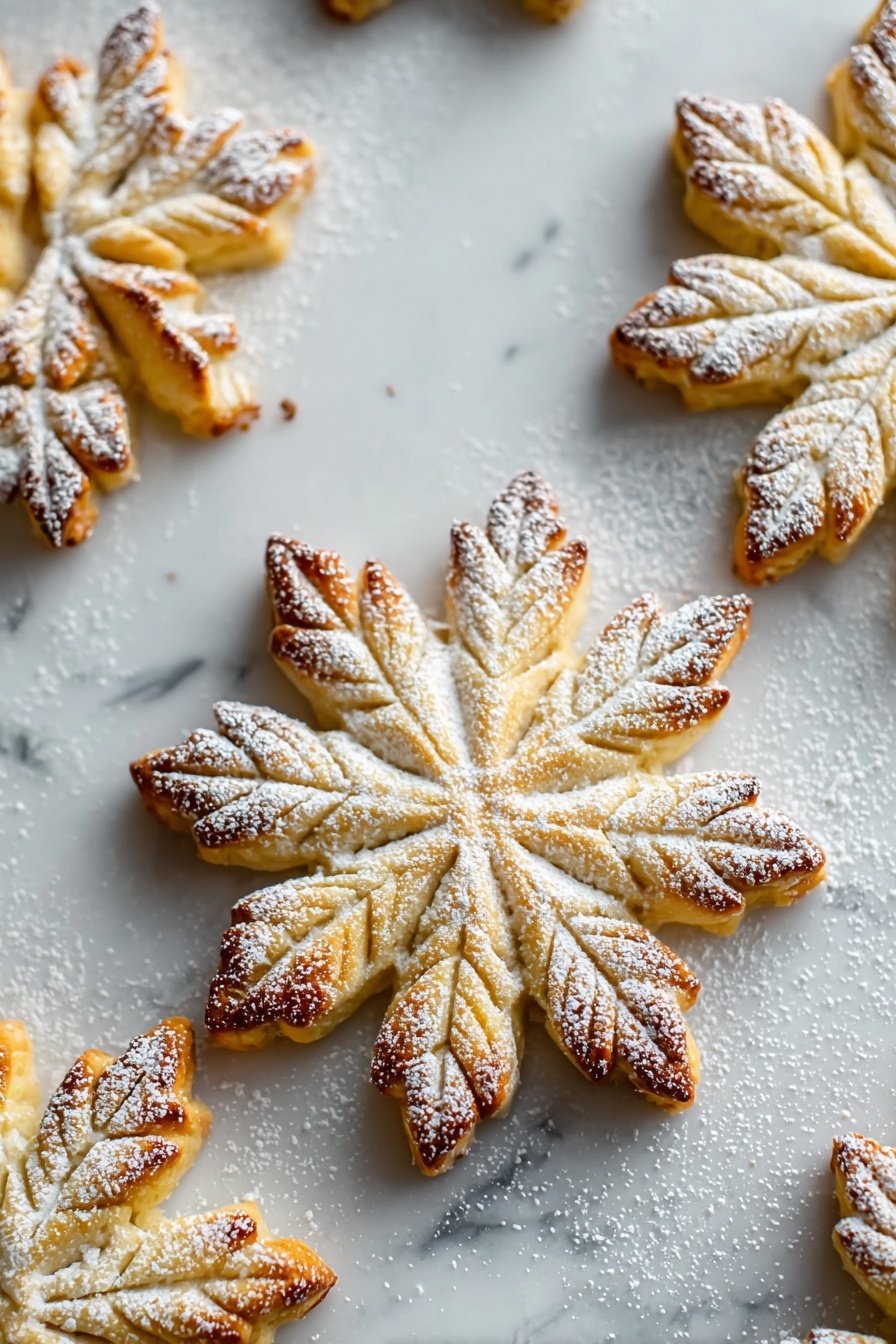
Step 5: Roll Out and Shape Your Snowflakes
On a lightly floured surface, roll one disc to about 1/4-inch thickness. Use a round cookie cutter to cut out circles, then carefully mark six (or seven for variation) evenly spaced points around the edge with a knife or toothpick. Gently pinch at each point to create those charming snowflake arms. I love this part — it’s surprisingly relaxing and gives the cookies their signature look.
Step 6: Bake Until Lightly Golden
Place your shaped cookies on parchment-lined baking sheets, spacing them about 2 inches apart. Bake in a preheated 350°F (175°C) oven for 10 to 12 minutes. Watch carefully — you want edges to turn just golden, not brown. Soft centers will set as they cool. This timing keeps the texture spot on.
Step 7: Cool Completely and Dust with Powdered Sugar
Let the cookies cool fully on wire racks. Once cooled, sift a light dusting of powdered sugar over the top to mimic freshly fallen snow. It’s a simple finishing touch that makes a big impression and tastes gorgeous.
Pro Tips for Making Snowflake Cookies Recipe
- Keep Dough Cold: I discovered that chilled dough is the secret weapon to preventing sticky mess and keeping snowflake shapes crisp and defined.
- Use a Light Touch When Pinching: Be gentle when forming points; pressing too hard can tear the dough or cause uneven baking.
- Rotate the Baking Sheets: Halfway through baking, rotate your pans for even cooking and consistent results.
- Avoid Overbaking: Cookies look slightly soft when taken out but firm up while cooling — that’s how you get that tender bite.
How to Serve Snowflake Cookies Recipe
Garnishes
Powdered sugar is my go-to snowflake dusting, but you can also add a sprinkle of edible pearl dust or a drizzle of white chocolate for a luxe touch. I’ve even used tiny silver dragées to mimic sparkling ice crystals — just for that wow factor at holiday parties.
Side Dishes
Pair these cookies with a cozy cup of hot cocoa or a spiced chai latte for the ultimate winter treat. They also pair beautifully with simple whipped cream or vanilla bean ice cream if you’re serving dessert plates.
Creative Ways to Present
For gatherings, I like to arrange them on a platter layered with fresh pine branches and cranberries — it feels festive and inviting. Wrapping a stack of cookies with a ribbon in a clear box makes for thoughtful, homemade gifts that always get compliments.
Make Ahead and Storage
Storing Leftovers
I usually keep leftover cookies in an airtight container at room temperature. They stay perfectly crisp and fresh for up to a week, but I admit they rarely last that long at my house! If you want to keep them extra fresh, layer parchment paper between stacks to avoid sticking.
Freezing
I’ve found that this dough freezes wonderfully. I wrap the discs tightly in plastic wrap and foil, then freeze. When I’m ready to bake, I thaw overnight in the fridge and proceed as usual. This is a lifesaver for busy holiday prep!
Reheating
If your cookies lose some crispness after storing, a quick 3-4 minute warm-up in a 300°F oven revives that fresh-baked texture. Just watch closely so they don’t brown further.
FAQs
-
Can I make these snowflake cookies without almond extract?
Absolutely! Almond extract is optional and simply adds a subtle nutty aroma. If you don’t have it or prefer to skip, just use vanilla extract alone and your cookies will still taste fantastic.
-
How do I prevent my snowflake cookies from spreading too much in the oven?
Keeping your dough chilled before baking is key to preventing spreading. Also, avoid using melted butter — always start with softened butter at room temperature. Lastly, don’t overmix the dough, which can develop gluten and cause spreading.
-
Can I make these cookies vegan or dairy-free?
You can swap the butter for a plant-based alternative and use a flax egg or chia egg in place of the chicken egg. Textures may vary slightly, so I recommend testing a small batch first and adjusting baking time as needed.
-
What’s the best way to shape the six-point snowflakes?
After cutting round cookies, mark six evenly spaced points around the edge with a toothpick or knife, then gently pinch the dough at each point to form the snowflake arms. Patience and a light touch help keep the shapes neat and pretty.
Final Thoughts
I absolutely love how this Snowflake Cookies Recipe brings a little winter magic into my kitchen every time I make it. It’s simple enough to whip up on a whim but special enough to impress friends and family. I used to struggle with rolling intricate shapes without the dough tearing, but chilling the dough and using gentle pinches changed the game for me — and I’m excited for you to experience that too. Grab this recipe, invite a loved one to bake alongside, and make some sweet memories wrapped in snowflake-shaped cookie delight!
Print
Snowflake Cookies Recipe
- Prep Time: 25 minutes
- Cook Time: 12 minutes
- Total Time: 1 hour 37 minutes
- Yield: 24 cookies
- Category: Dessert
- Method: Baking
- Cuisine: American
- Diet: Vegetarian
Description
Delight in these charming Snowflake Cookies, perfectly tender and subtly sweet, ideal for winter celebrations. These buttery cookies are adorned with delicate six- or seven-point snowflake shapes and dusted with powdered sugar for a festive snowy finish.
Ingredients
Cookie Dough
- 2 cups all-purpose flour
- 1/2 cup powdered sugar (plus extra for dusting)
- 1/4 cup granulated sugar
- 1 cup unsalted butter, softened
- 1 teaspoon vanilla extract
- 1/4 teaspoon almond extract (optional)
- 1/2 teaspoon salt
- 1 large egg
Instructions
- Prepare the Dough: Cream together the softened butter, granulated sugar, and powdered sugar in a large bowl using a hand mixer or stand mixer on medium speed until light and fluffy, about 3 minutes. Add the egg, vanilla extract, and almond extract (if using), and beat until fully combined.
- Add Dry Ingredients: In a separate bowl, whisk together the flour and salt. Gradually add the dry mixture to the wet ingredients, mixing on low speed just until a smooth dough forms. Do not overmix.
- Chill the Dough: Divide the dough into two equal portions. Flatten each into a disc, wrap tightly in plastic wrap, and refrigerate for at least 1 hour or until firm enough to roll out.
- Roll and Shape (Six-Point Snowflakes): On a lightly floured surface, roll one disc of dough to 1/4-inch thickness. Use a round cookie cutter to cut circles. Use a knife or toothpick to mark six evenly spaced points around the edge of each circle, then gently pinch the dough at each point to create snowflake arms.
- Roll and Shape (Seven-Point Snowflakes): For variation, mark the edges of the dough circles into seven segments instead of six, and pinch each segment to form a seven-point snowflake shape.
- Bake the Cookies: Preheat your oven to 350°F (175°C) and line baking sheets with parchment paper. Arrange the shaped cookies 2 inches apart. Bake for 10–12 minutes or until the edges are lightly golden. Do not overbake.
- Cool and Dust: Allow the cookies to cool completely on wire racks. Once cooled, lightly dust with powdered sugar for a snowy finish before serving or packaging.
Notes
- To prevent sticking, keep the dough cold and use a dusting of flour as needed when rolling and shaping.
- These cookies hold their shape well and can be stored in an airtight container at room temperature for up to 1 week.
Nutrition
- Serving Size: 1 cookie
- Calories: 110
- Sugar: 7g
- Sodium: 70mg
- Fat: 6g
- Saturated Fat: 3.5g
- Unsaturated Fat: 2.5g
- Trans Fat: 0g
- Carbohydrates: 14g
- Fiber: 0.3g
- Protein: 1.2g
- Cholesterol: 20mg

