
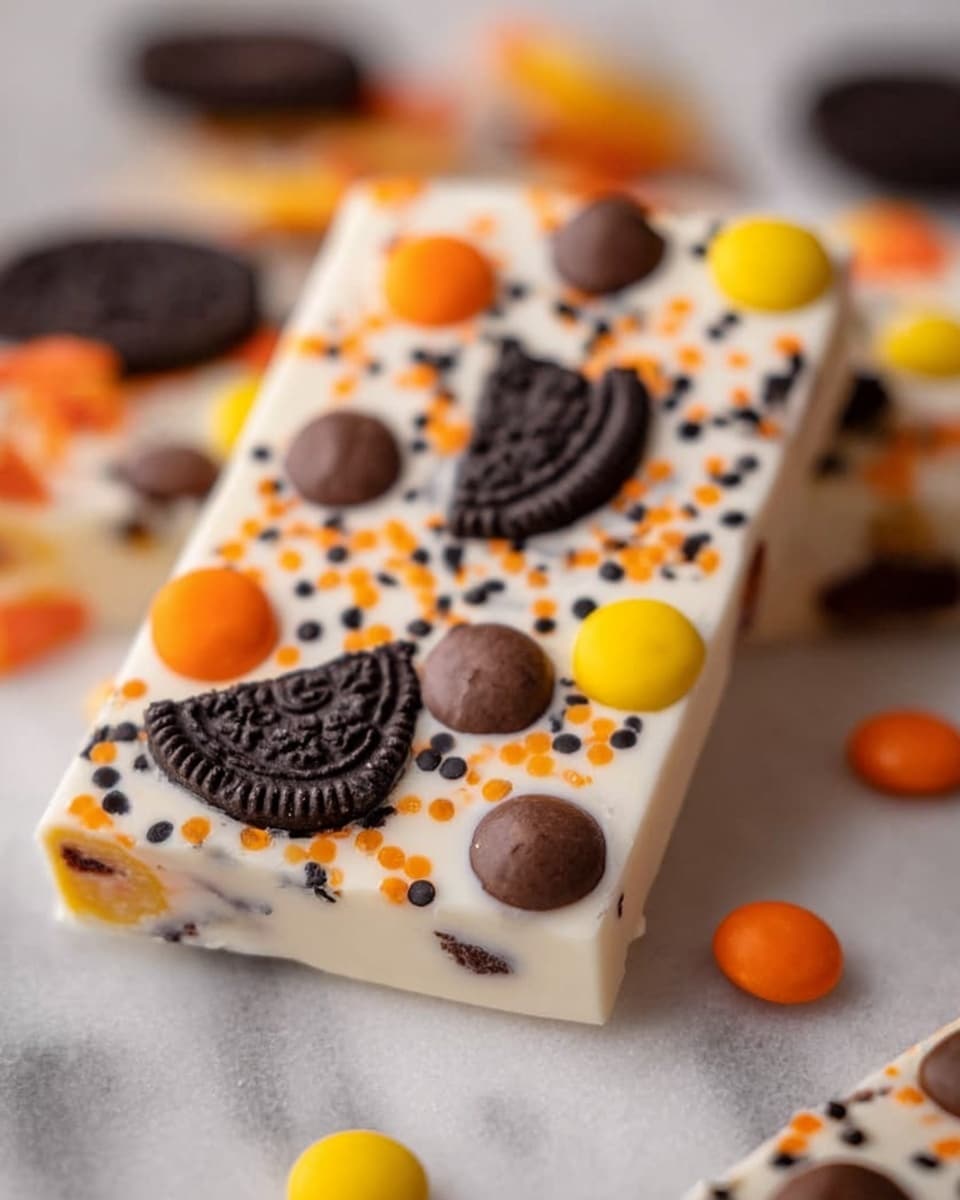
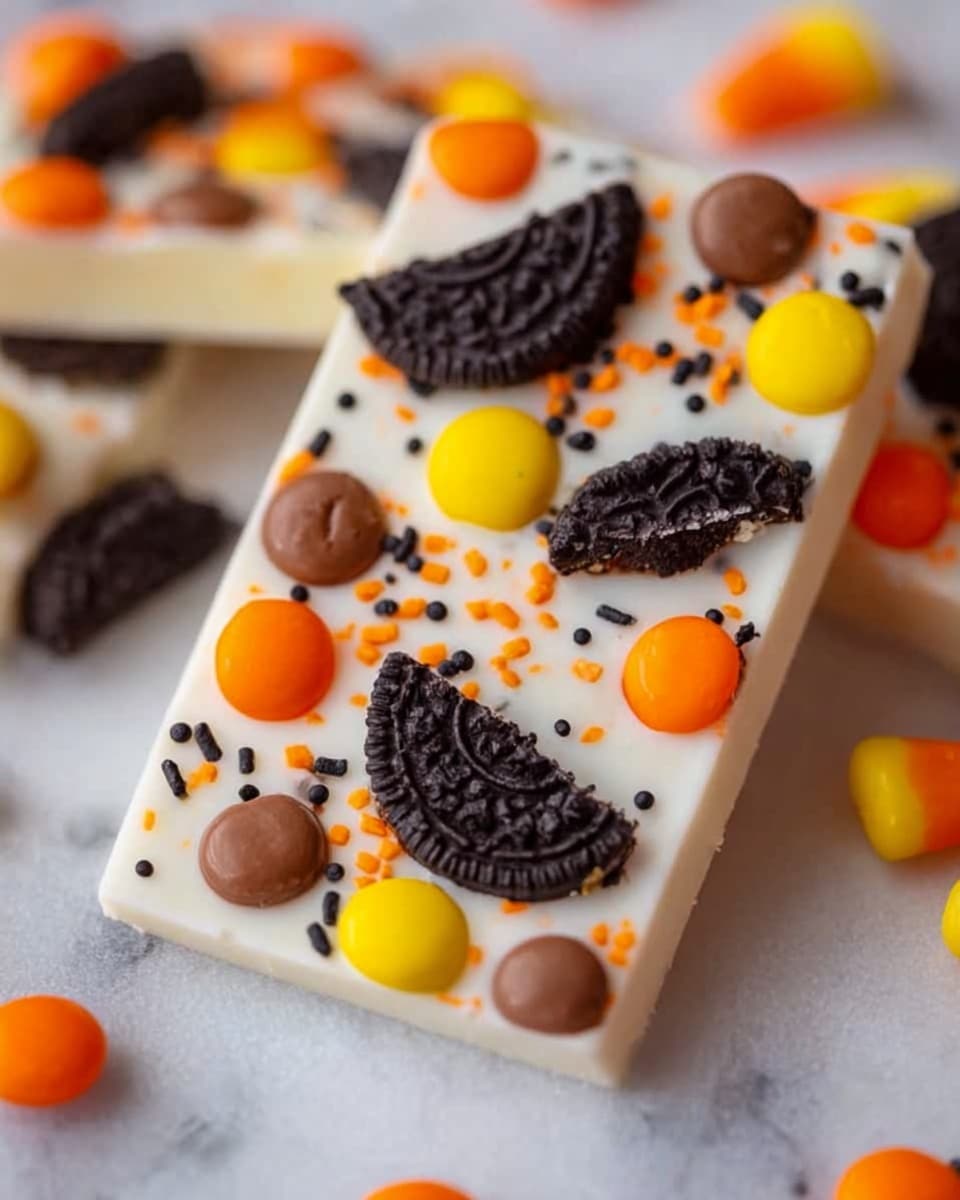
If you’re looking for a quick and fun treat to get you into the Halloween spirit, I absolutely love this Spooky Halloween Oreo Bark Recipe. It’s one of those recipes that’s ridiculously easy to whip up but impresses everyone who tries it. Seriously, you’ll find it’s the perfect mix of festive, sweet, and slightly spooky—ideal for sharing at parties, handing out to trick-or-treaters, or just sneaking a few pieces yourself when nobody’s looking.
Why You’ll Love This Recipe
- Super Simple: You only need a handful of ingredients and a few minutes to make it.
- Customizable: You can swap sprinkles and candies to match your own spooky vibe.
- Crowd-Pleaser: My family goes crazy for the crunchy Oreos combined with creamy white chocolate.
- No-Bake Fun: There’s no oven involved—just chilling in the fridge and you’re done.

Ingredients You’ll Need
The magic of this Spooky Halloween Oreo Bark Recipe really shines through with its simple but classic ingredients. Each component brings its own texture and flavor that meld wonderfully together. When you’re shopping, look for festive Halloween Oreos and colorful candies to really add that wow factor.
- White chocolate: I prefer good quality white chocolate chips or bars because they melt smoothly and have a creamy taste.
- Halloween Oreos: These are my favorite part; the spooky-themed cookies give you that iconic Oreo crunch plus vibrant Halloween colors.
- Reese’s pieces: Their peanut butter flavor is a perfect complement to sweet white chocolate.
- Halloween sprinkles: Adds color, texture, and that festive atmosphere you want to capture.
- Eyeball candies: These little candies always get giggles and make your bark look eerily perfect.
Variations
I love that you can easily make this Spooky Halloween Oreo Bark Recipe your own. Whether it’s swapping out candies or making it allergen-friendly, the possibilities keep this bark exciting every Halloween season.
- Nut-Free Version: Swap out Reese’s pieces for additional Halloween sprinkles or candy eyes if you have nut allergies in the family – it still looks and tastes fantastic.
- Dark Chocolate Twist: If you want a richer bark, try half white chocolate and half dark chocolate swirled together. My kids went wild for that combo.
- Extra Crunch: Add crushed pretzels or mini candy corn for a fun texture variation that keeps things interesting.
- Spiced Up: Sprinkle a hint of cinnamon or pumpkin spice in with the melted chocolate to add seasonal warmth.
How to Make Spooky Halloween Oreo Bark Recipe
Step 1: Gently Melt the White Chocolate
Start by placing your white chocolate in a microwave-safe bowl. I melt mine in 30-second bursts, stirring well in between. The trick I learned early on is patience—don’t rush by nuking in long intervals or the chocolate can seize up. Stirring after each burst helps you get that silky smooth texture perfect for spreading.
Step 2: Spread the Chocolate Base
Line a baking sheet with parchment paper—trust me, this will save you a sticky mess later. Pour the melted white chocolate on and spread it evenly. I usually cover about half the sheet because 12 ounces of white chocolate isn’t super thin but thick enough to hold all the toppings firmly.
Step 3: Add the Spooky Toppings
Now’s the fun part. Roughly chop the Halloween Oreos and sprinkle them all over the white chocolaty canvas. Follow up with Reese’s pieces, festive sprinkles, and those quirky eyeball candies that give this bark its signature spooky charm. Make sure you press down lightly so they stick!
Step 4: Chill and Set
Pop your creation into the fridge for about an hour. This is critical because the chocolate needs to harden fully before you break it into irregular pieces. Once chilled, just crack it up and you’re all set to enjoy or share.
Pro Tips for Making Spooky Halloween Oreo Bark Recipe
- Microwave in Short Bursts: Never heat chocolate longer than 30 seconds at a time to prevent burning.
- Even Spreading: Use an offset spatula to get a smooth, even layer that looks professional.
- Press Toppings Lightly: Light pressure helps everything stick better without sinking into the chocolate.
- Don’t Skip Parchment: It’s much easier to lift the bark out once set, and it cleans up quickly.
How to Serve Spooky Halloween Oreo Bark Recipe
Garnishes
I usually keep it simple with extra Halloween sprinkles dusted on top right before serving for an extra festive pop. Sometimes a few mini candy eyeballs on the serving plate add that cute creepy vibe that kids adore.
Side Dishes
This bark pairs beautifully with a cinnamon-spiced latte or a cold glass of milk. If it’s a party, I like setting it alongside pumpkin-shaped sugar cookies or a bowl of candy corn for variety and color contrast.
Creative Ways to Present
Last Halloween, I arranged pieces on black and orange plates with little plastic spiders tucked in between for a seriously spooky display. Wrapping individual bark pieces in clear cellophane tied with Halloween ribbon makes perfect take-home treats for guests.
Make Ahead and Storage
Storing Leftovers
I store leftover spooky bark in an airtight container at room temperature if it’s cool enough, or in the fridge if your kitchen’s warm. It keeps well for about a week, and I love having it on hand for an easy sweet fix.
Freezing
You can freeze this bark wrapped tightly in plastic wrap and stored in a freezer bag. When I’ve frozen it, I always thaw it slowly at room temp to avoid condensation spoiling the texture—works like a charm.
Reheating
No reheating needed here! Spooky Halloween Oreo Bark is best served cold or at room temperature. Just take it out of the fridge ahead of time so it’s not too hard to enjoy.
FAQs
-
Can I use regular Oreos instead of Halloween Oreos in the Spooky Halloween Oreo Bark Recipe?
Absolutely! Regular Oreos work just fine and you’ll still get that classic Oreo crunch and flavor. The Halloween Oreos just add a festive color boost and theme, but feel free to customize based on what you have.
-
What if my white chocolate seizes while melting?
This can happen if the chocolate overheats or gets moisture in it. Try stirring gently while microwaving, and only melt in short 30-second bursts. If it does seize, you might save it by adding a little bit of vegetable oil or cocoa butter and stirring thoroughly.
-
How long does the Spooky Halloween Oreo Bark stay fresh?
Stored properly in an airtight container, this bark stays fresh for up to a week at room temperature if it’s not too warm or up to two weeks in the fridge.
-
Can I make the Spooky Halloween Oreo Bark Recipe vegan?
To go vegan, look for dairy-free white chocolate alternatives and vegan-friendly candy options. You can substitute Oreos with any vegan cookies as well. Just keep an eye on ingredient labels to be safe.
Final Thoughts
This Spooky Halloween Oreo Bark Recipe has become one of my go-to no-fuss Halloween treats because it’s fast, festive, and fun to make with kids or friends. I love the crunchy-sweet combo and that it looks great with minimal effort. If you try it, I’m sure you’ll find it just as addictive and perfect for celebrating spooky season. Go ahead, whip up a batch and watch your friends’ faces light up at every bite!
Print
Spooky Halloween Oreo Bark Recipe
- Prep Time: 5 minutes
- Cook Time: 0 minutes
- Total Time: 1 hour 5 minutes
- Yield: 10 servings
- Category: Dessert
- Method: No-Cook
- Cuisine: American
Description
This Spooky Halloween Oreo Bark is a festive and fun treat perfect for Halloween celebrations. Creamy white chocolate is melted and spread out, then topped with chopped Halloween Oreos, colorful Reese’s Pieces, festive sprinkles, and creepy eyeball candies. After chilling, the bark is broken into pieces, creating a delightful mix of flavors and textures that kids and adults will love.
Ingredients
White Chocolate Base
- 12 oz white chocolate
Toppings
- 7 Halloween Oreos, chopped
- 1/4 cup Reese’s Pieces
- Halloween sprinkles, as desired
- Halloween eyeball candies, as needed
Instructions
- Melt the White Chocolate: Place the 12 oz of white chocolate in a microwave-safe bowl. Heat in 30-second increments, stirring thoroughly between each increment until the chocolate is completely melted and smooth.
- Spread the Chocolate: Line a baking sheet with parchment paper. Pour and spread the melted white chocolate evenly over half of the baking sheet to form a bark base of uniform thickness.
- Add Toppings: Immediately sprinkle the chopped Halloween Oreos, Reese’s Pieces, Halloween sprinkles, and eyeball candies evenly over the melted white chocolate to ensure they stick.
- Chill to Set: Place the baking sheet in the refrigerator and chill for one hour, allowing the bark to harden completely.
- Break and Serve: Once set, break the bark into irregular pieces and serve as a festive Halloween treat.
Notes
- Make sure to stir the chocolate well between microwave intervals to prevent burning and to ensure smooth melting.
- You can customize the toppings based on your preference or use other Halloween-themed candies.
- Store the bark in an airtight container in the refrigerator for up to one week to maintain freshness.
- Using parchment paper makes cleanup easier and helps prevent the bark from sticking.
Nutrition
- Serving Size: 1 piece (approx. 1/10 of recipe)
- Calories: 220
- Sugar: 20g
- Sodium: 60mg
- Fat: 13g
- Saturated Fat: 8g
- Unsaturated Fat: 4g
- Trans Fat: 0g
- Carbohydrates: 25g
- Fiber: 1g
- Protein: 2g
- Cholesterol: 10mg


