
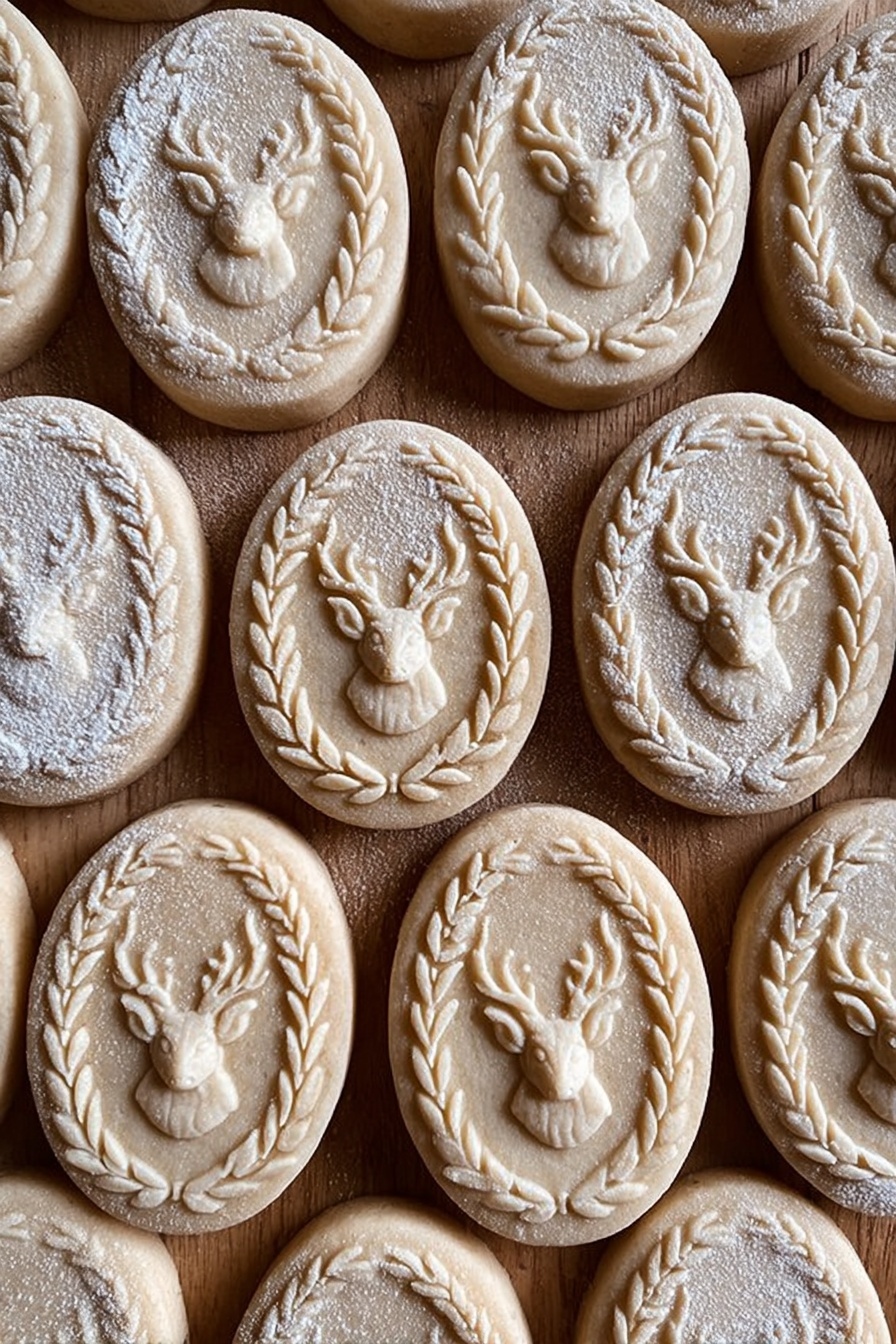
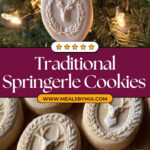
If you’re ready to try something truly unique and steeped in tradition, this Springerle Cookies Recipe is exactly what you’ve been looking for. I absolutely love how these charming embossed cookies turn out—delicately spiced, beautifully detailed, and perfect for sharing with family and friends. Stick with me, and I’ll guide you through every step so you can impress at home with these timeless treats.
Why You’ll Love This Recipe
- Beautifully Detailed Cookies: These springerle cookies boast intricate embossed designs that make them stand out at any gathering.
- Simple Ingredients, Magical Results: You only need a few pantry staples, but the end product is deceptively elegant.
- Make Ahead Friendly: The dough benefits from resting, and the cookies can be stored for weeks or even used as ornaments.
- Versatile Flavor Options: From anise to almond or vanilla, you can customize the cookies to suit every taste.

Ingredients You’ll Need
Getting your ingredients right is half the battle—and for this Springerle Cookies Recipe, it really pays to use good-quality flour and fresh eggs. The powdered sugar gives you that signature dreamy texture, and choosing the right flavoring lets you make the cookies truly your own.
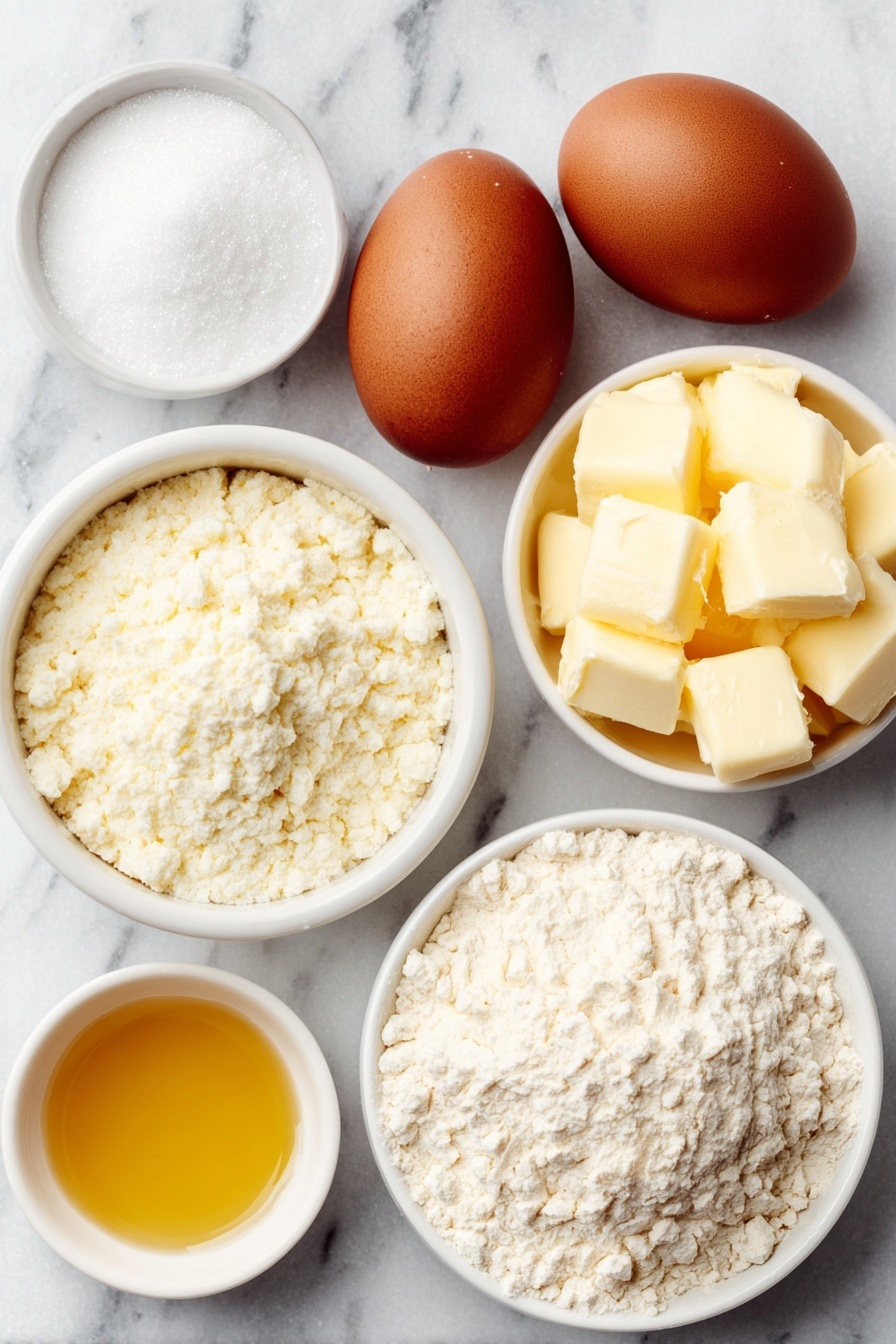
- Eggs: Make sure they’re at room temperature to whip up nice and foamy—this is key to the cookie’s airy texture.
- Powdered Sugar: Also called icing or confectioners’ sugar, it dissolves smoothly and helps create that silky batter.
- Baking Powder: Just a pinch adds the little lift that forms the classic ‘foot’ at the cookie’s base.
- Flavorings: Vanilla, almond extract, anise seed, or even something like pumpkin spice—pick your favorite or experiment!
- Cake Flour (T45 recommended): This soft flour gives the cookies their delicate crumb and is less dense than all-purpose flour.
Variations
I often like to switch up the flavorings depending on the season or mood—it’s a fun way to make the Springerle Cookies Recipe feel fresh and personal. Feel free to get creative with your extracts or even sprinkle a bit of your favorite spice over the dough before pressing the mold.
- Anise Flavor Variation: When I first tried anise in this recipe, it transported me to an old-world Christmas market—I love how authentic that taste feels.
- Almond Extract Twist: For a softer, nutty aroma, almond extract is my go-to; it also pairs beautifully with a dusting of powdered sugar post-baking.
- Seasonal Spices: Pumpkin spice or cinnamon add a cozy vibe perfect for autumn and winter holidays.
- Kirsch or Cherry Flavor: Adding a splash of kirsch gives the cookies a subtle fruitiness that surprised my family—in a good way!
How to Make Springerle Cookies Recipe
Step 1: Whip the Eggs and Sugar to Perfection
This step is critical: use an electric mixer with a whisk attachment to beat your room temperature eggs until they’re really foamy. Then slowly add in your powdered sugar—don’t rush this part—and whip on medium speed for 10-15 minutes. You’ll know you’re there when the mixture thickens to a texture resembling buttercream, glossy and dense. Around the last 5 minutes, add your pinch of baking powder and the flavoring of choice. I discovered this trick makes the cookies rise just enough to get their signature tiny foot.
Step 2: Incorporate the Flour Gently
Once your egg mixture is perfect, slowly add the cake flour while whipping on a low to medium speed. You want to combine just enough so that the dough comes together smoothly without overworking it. The texture should feel soft but not sticky. Wrap the dough tightly with plastic wrap, pressing the wrap right onto the surface to avoid drying out, then chill it for several hours or overnight. This resting time is my secret for easier rolling and keeping those beautiful mold impressions crisp.
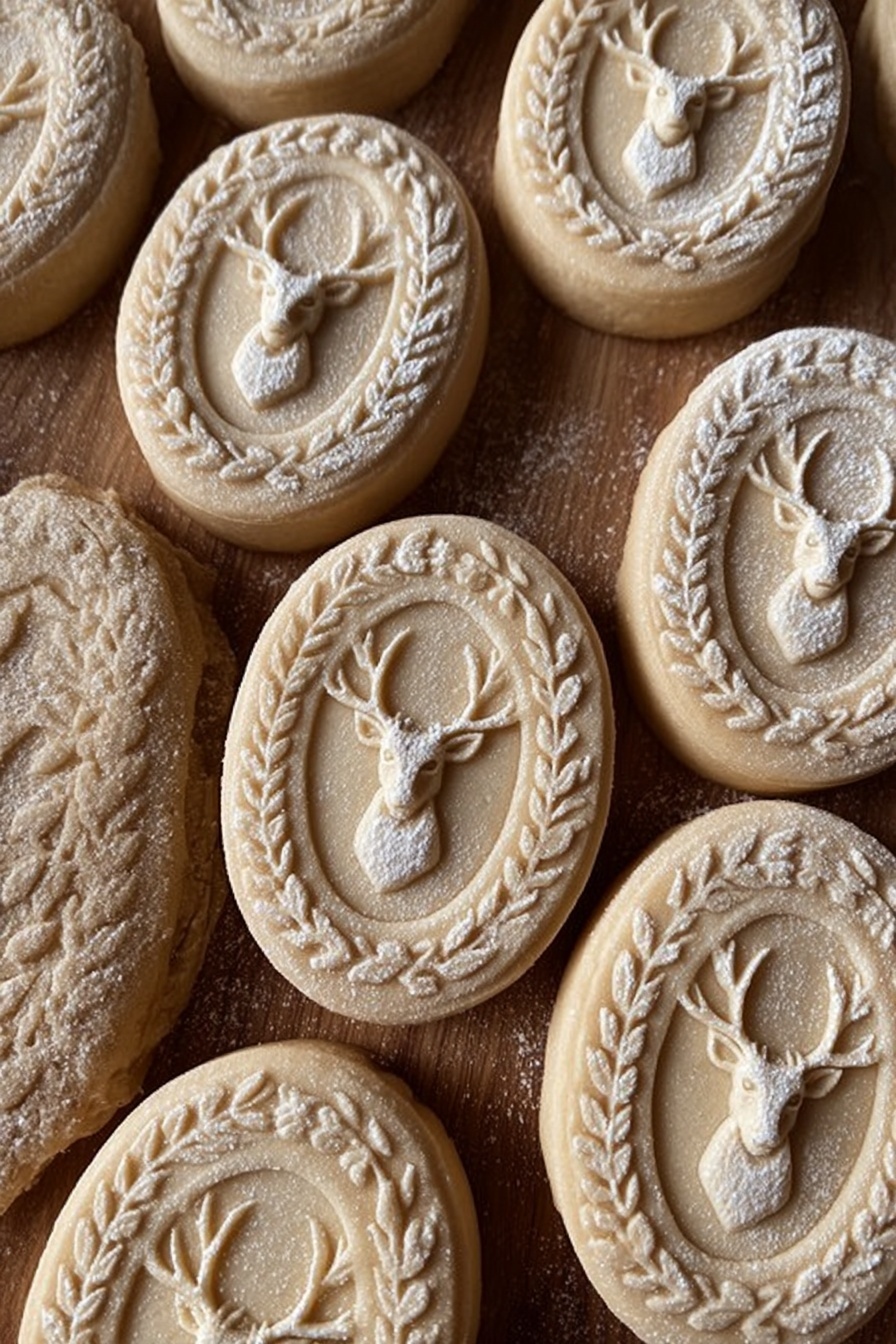
Step 3: Prepare and Mold the Cookies
Dust your workspace lightly with cornstarch—this is your best friend for preventing sticky dough here. Roll out small portions of dough at a time to about 1/4 inch (6mm) thickness, matching the depth of your cookie molds. Dust the top with cornstarch and press your mold firmly to get detailed impressions. Then, cut around the design with a sharp knife or cookie cutter. Lay your molded cookies on a cornstarch-dusted surface to rest for 12 to 24 hours in a place away from drafts or humidity. This dry resting period is what sets these cookies apart and helps the designs stay sharp during baking.
Step 4: Bake with Care for Perfect Springerle
Preheat your oven to a low 145°C (290°F). Just before baking, place each cookie on a damp paper towel for about 30 seconds—this moistens the bottom and helps them stick gently to your parchment paper without losing their shape. Transfer them to a parchment-lined tray, which you can sprinkle with a little extra seasoning if you like. Bake larger cookies for 18-20 minutes, smaller ones for 15-17 minutes. You’ll know they’re done when a little foot has risen beneath them and the cookie doesn’t wiggle when you gently shake it. If you’re baking on multiple trays, don’t forget to rotate and flip them halfway through for even coloring.
Pro Tips for Making Springerle Cookies Recipe
- Use Cake Flour: I tried all-purpose flour once and honestly, it just wasn’t the same—the soft texture cake flour creates really makes a difference.
- Patience with Drying: Don’t skip the 12-24 hour drying period; I learned the hard way, and the designs lost their crispness when I baked immediately.
- Moisten Before Baking: Pressing cookies on a damp towel might seem odd, but this little step keeps them from sticking and helps lift the patterns beautifully.
- Don’t Overfold Dough: If you mix in too much flour or work the dough too roughly, the cookies lose that light, airy texture we love—handle with care!
How to Serve Springerle Cookies Recipe
Garnishes
I usually skip heavy garnishes because the embossed designs and subtle flavors of the Springerle are the stars here. But sometimes, a light dusting of powdered sugar after baking adds a pretty finishing touch that deepens the charm without overpowering the delicate anise or almond notes.
Side Dishes
My favorite way to enjoy Springerle is alongside a cup of strong black coffee or spiced tea—the warmth and bitterness pair amazingly with the cookie’s sweetness. During holiday gatherings, a small plate of slices of sharp cheese (like a nice aged cheddar) surprisingly complements the flavors well too.
Creative Ways to Present
For special occasions, I’ve arranged these cookies in a beautiful wooden box tied with twine or packed into glass jars as gifts. Because their embossed designs stand out so well, I love displaying them on decorative plates or tiered trays where friends can admire the artistry before diving in.
Make Ahead and Storage
Storing Leftovers
Leftover Springerle cookies store best in an airtight container at room temperature. I’ve found they actually get more flavorful after a day or two as the spices meld, plus the texture remains crisp—and they keep well for several weeks if kept dry.
Freezing
I’ve frozen both dough and baked cookies. When freezing the dough, wrap tightly in plastic and freeze for up to a month—just thaw in the fridge overnight before rolling. For baked cookies, freeze them in a single layer inside a zip-top bag; they reheat beautifully without losing their crisp edges.
Reheating
To refresh your cookies, I pop them into a preheated 300°F (150°C) oven for 5 minutes. This warms them without drying them out and brings back that fresh-baked crispness I love.
FAQs
-
What makes Springerle cookies unique compared to other cookies?
Springerle cookies are unique because of their traditional embossed designs made by pressing special molds into the dough, their airy texture achieved by whipping eggs and sugar, and their characteristic “foot” that rises during baking. They also require a drying period before baking, which helps the cookies keep their detailed patterns.
-
Can I use all-purpose flour instead of cake flour in this recipe?
Yes, you can use all-purpose flour, but it’s best to reduce the amount to about 2 ¾ cups (340 g) instead of 3 ½ cups. The texture may be slightly denser, so you’ll want to watch the dough’s feel and adjust flour as needed to keep it soft but manageable.
-
Why do I need to rest the dough for 12-24 hours before baking?
The resting period allows the surface of the molded cookies to dry out, which helps preserve the intricate designs during baking and prevents the cookies from spreading or losing shape. Skipping this step can result in less defined patterns.
-
What’s the best way to store Springerle cookies?
Store them in an airtight container at room temperature in a cool, dry place. They keep their texture and flavor well for a few weeks and can even be used as edible ornaments!
-
Can I experiment with different flavors in the Springerle Cookies Recipe?
Absolutely! I encourage trying vanilla, almond, anise, or even seasonal spices like pumpkin pie mix. Just be mindful that strong liquid flavorings may require you to add a bit more flour to keep the dough’s consistency right.
Final Thoughts
This Springerle Cookies Recipe is one of my favorite baking adventures because it combines art and flavor in such a special way. I remember the first time I made them—nervous about the molds and the timing—but the moment the cookies emerged with their delicate feet and crisp designs, I was hooked. If you want to create something that feels both historic and homey, give this recipe a try—you’ll enjoy every step, from mixing to resting to that very first bite.
Print
Springerle Cookies Recipe
- Prep Time: 30 minutes
- Cook Time: 20 minutes
- Total Time: 24 hours 50 minutes
- Yield: Approximately 30 medium-sized cookies (depending on mold size)
- Category: Dessert
- Method: Baking
- Cuisine: German
- Diet: Vegetarian
Description
Classic Springerle cookies are anise-flavored, intricately molded German biscuits that combine a light, airy texture with delicate designs pressed into the dough. This traditional recipe uses simple ingredients like eggs, powdered sugar, and cake flour, enhanced with your choice of flavorings such as vanilla, almond, or anise. The unique resting step before baking allows the cookies to develop their characteristic raised patterns, making them perfect for festive occasions or as charming edible ornaments.
Ingredients
Basic Ingredients
- 4 eggs, room temperature
- 500 g (4 cups) powdered sugar (icing/confectioners sugar)
- 1/8 tsp baking powder
- 420-440 g (3 1/2 cups) cake flour (non-rising, T45 preferred)
Flavoring Options
- 2 tsp vanilla extract or
- 1 tsp almond extract or
- Anise seed or
- 1 tsp pumpkin spice seasoning or
- Kirsch (cherry brandy) or
- Other flavorings as desired (get creative!)
Additional for Rolling and Baking
- Cornstarch for dusting surface and molds
- Parchment paper for baking trays
- Damp paper towel to moisten cookie bottoms before baking
Instructions
- Whip Eggs and Sugar: Using an electric mixer fitted with a whisk attachment, beat the room temperature eggs until foamy. Gradually add the powdered sugar while mixing at medium speed. Continue whipping for 10-15 minutes until the mixture thickens and resembles a buttercream texture. In the last 5 minutes, add the baking powder and your chosen flavoring, blending thoroughly.
- Add Flour: Slowly incorporate the cake flour by mixing on low to medium speed until a smooth, pliable dough forms. Avoid overmixing to keep the dough light.
- Chill Dough: Wrap the dough tightly in plastic wrap, ensuring the wrap touches the surface to prevent drying out. Refrigerate for several hours or overnight to firm up the dough.
- Roll and Mold: On a surface dusted generously with cornstarch, roll out small portions of dough to approximately 1/4 inch (6mm) thickness, matching the thickness of your Springerle mold. Dust the top of the dough with cornstarch, press the mould firmly into the dough to imprint the design, and cut around the shapes. Transfer shaped cookies to another cornstarch-dusted surface and let rest at room temperature for 12-24 hours in a draft-free, low humidity environment to dry and develop the raised details.
- Prepare for Baking: Preheat the oven to 145°C (290°F). Before baking, place each cookie on a damp paper towel for about 30 seconds to moisten the bottom, which helps the cookies rise properly and prevents sticking. Then transfer them carefully onto parchment-lined baking trays, optionally sprinkled with seasoning for flavor.
- Bake: Bake the cookies for 18-20 minutes if they are large (4-5 inches) or 15-17 minutes for medium or smaller sizes. The Springerle are done when they develop a slight raised ridge—a little foot—and do not move when gently nudged on top. If baking two trays simultaneously, flip and rotate them halfway through baking to ensure even heating.
- Cool and Store: Allow cookies to cool completely. Store them in an airtight container at room temperature to maintain their texture, or use them as dry decorative ornaments.
Notes
- Use fine flour such as cake or pastry flour (French T45) for best results; all-purpose flour can be substituted but reduce to 340 g (2 ¾ cups) and adjust texture accordingly.
- If using strong flavorings that add liquid (more than 1 tablespoon), you might need to add an extra 1/4 to 1/2 cup of flour to maintain the dough consistency.
- Resting the molded dough for 12-24 hours is critical to allow the designs to set and rise properly during baking.
- Handling the dough gently and moistening the bottoms before baking ensure spring and prevent cracking or spreading.
- Storing in airtight containers keeps the cookies fresh and crunchy for weeks.
Nutrition
- Serving Size: 1 cookie (approx. 20 g)
- Calories: 90
- Sugar: 12 g
- Sodium: 10 mg
- Fat: 0.2 g
- Saturated Fat: 0.1 g
- Unsaturated Fat: 0.1 g
- Trans Fat: 0 g
- Carbohydrates: 22 g
- Fiber: 0.2 g
- Protein: 1.5 g
- Cholesterol: 30 mg