

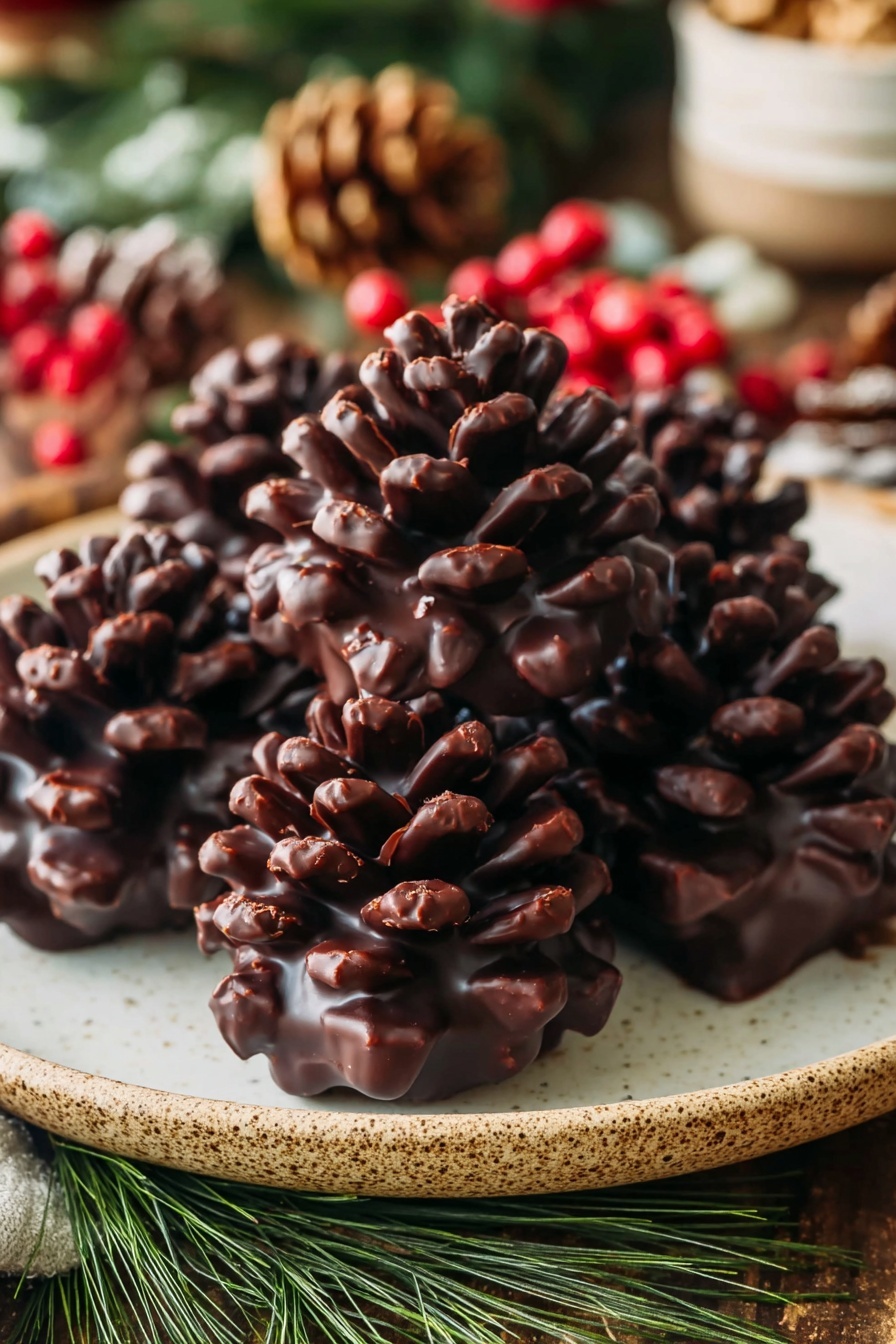
If you’re anything like me and love a dessert that’s not just delicious but also *totally* Instagram-worthy, then you’re going to adore this Viral Pine Cone Brownie Bites Recipe. I’ve seen this fun little treat popping up all over social, and once I tried it, I was hooked! These adorable, bite-sized brownies that look like pine cones are not only a feast for your eyes but also packed with rich, chocolatey goodness that’ll make your taste buds dance. Trust me, whether you’re making these for holiday gatherings, a cozy night in, or just to impress your friends, this recipe is fan-freaking-tastic and surprisingly easy to pull off. Let me walk you through how to make them perfectly!
Why You’ll Love This Recipe
- Eye-Catching & Fun: You’ll get compliments on these unique pine cone shapes before anyone even tastes them.
- Decadently Gooey: The brownies stay slightly gooey inside, which gives a perfect contrast to the crunchy almond “scales.”
- Customizable Ingredients: You can easily swap almonds for cereal flakes or tweak the chocolate coating to your liking.
- Perfect for All Skill Levels: Even if you don’t bake often, you’ll find these surprisingly approachable and fun to make.

Ingredients You’ll Need
The magic of the Viral Pine Cone Brownie Bites Recipe is in its simple, wholesome ingredients that come together to create something extraordinary. I love using a grain-free brownie mix like Simple Mills because it bakes beautifully and tastes fantastic, but don’t be shy about experimenting with your favorite mix as well. The sliced almonds are crucial for that authentic pine cone texture, but if you’re looking for a twist or a budget-friendly option, cereal flakes work surprisingly well too!
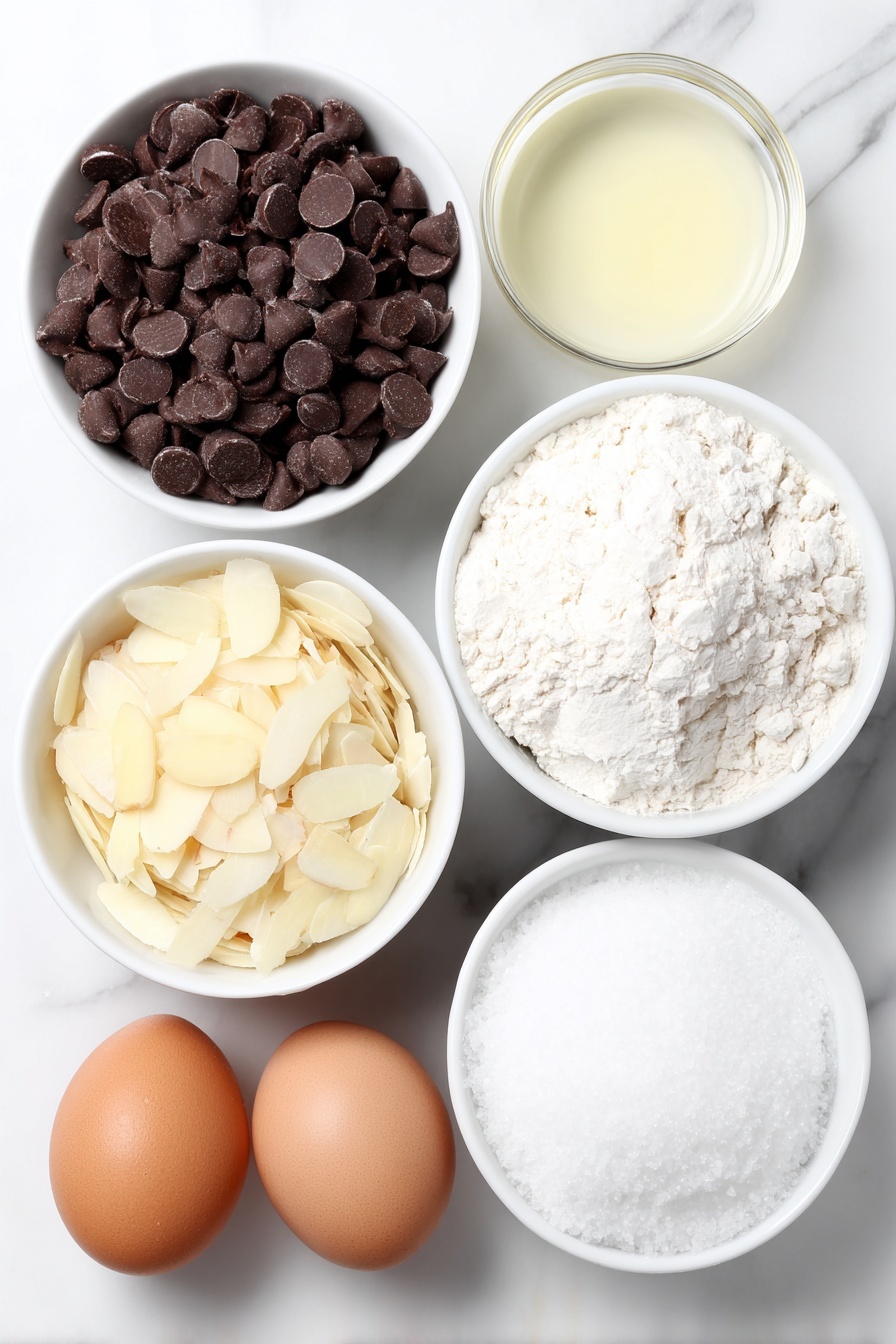
- Gluten-free / Grain-free boxed brownie mix: I prefer Simple Mills for a moist, flavorful base that also works well for those avoiding grains.
- Sliced almonds: These give the pine cone “scales” their signature look and crunch; cereal flakes are a fun substitute if you’re in a pinch.
- Chocolate chips: Semi-sweet or dark chocolate melts best for coating and adds rich flavor.
- Coconut oil: Adding this to your melted chocolate thins it out to the perfect consistency for drizzling.
- Powdered sugar or powdered monk fruit: This sprinkle on top mimics a light dusting of snow and amps up the festive vibes.
Variations
One of the reasons I keep coming back to this Viral Pine Cone Brownie Bites Recipe is how flexible it is. You can really make it your own depending on the occasion, your taste preferences, or dietary needs. For example, I’ve swapped almonds for gluten-free cereal flakes and loved the texture change. Feel free to tweak the chocolate type or try adding a hint of cinnamon or espresso powder to the batter for a flavor twist — the possibilities are endless!
- Cereal flakes instead of almonds: I used this variant when I ran out of almonds, and honestly, it gave a slightly crunchier, lighter pine cone texture that surprised me.
- Chocolate type swap: Dark chocolate adds a sophisticated edge, whereas milk chocolate lends more creamy sweetness; I often go with semi-sweet for balance.
- Binding with frosting: If your brownie mix turns out too crumbly, mixing in a bit of cream cheese or chocolate frosting helps the bites hold their shape better — a neat trick I picked up to avoid waste.
How to Make Viral Pine Cone Brownie Bites Recipe
Step 1: Bake your brownie base just right
Start by preparing your brownie mix exactly as directed on the box — but here’s the key: don’t overbake! You want the brownies to be slightly gooey in the middle so they’re pliable enough to shape. When I first made these, I left them in too long and the brownies became too firm to shape easily. Bake as usual, then let the brownies cool for about 10 minutes — warm, but not hard. This is when you start to work your magic.
Step 2: Shape your pine cones gently but firmly
Now comes the fun part: shaping. Take the warm brownie mixture and form about a dozen cone-shaped bites — think mini versions of cake pops. Don’t rush here; be gentle so they don’t crack, but make sure you press enough to hold their shape. This step got me feeling like a kid playing with edible modeling clay, and it’s oddly satisfying!
Step 3: Add the “scales” with almond slices or cereal flakes
Carefully press almond slices (or cereal flakes if you’re choosing that route) all around the cones to mimic pine cone scales. This is a delicate step because the cones are still soft, so take your time placing the slices to make the pine cones look full and natural. I found using tweezers or clean fingers helps with precision here. Once done, place these on a parchment-lined sheet pan.
Step 4: Chill for easy chocolate coating
Pop the tray into your freezer for about 30 minutes. This quick chill firms up the cones so they’re easier to dip or coat without falling apart. I learned this trick after my first attempt when warm brownies made a melty mess — chilling really ups your chances of success.
Step 5: Melt chocolate with coconut oil for a smooth coat
While your pine cones chill, melt the chocolate chips together with the coconut oil in 30-second increments in the microwave or over a double boiler. The coconut oil thins the chocolate so it drips nicely and sets glossy. If your chocolate seems too thick, just add a tiny bit more coconut oil — this small tip saved my first batch from looking like a lumpy mess.
Step 6: Coat and frost for the finishing touch
Take the pine cones out of the freezer and use a spoon or fork to drizzle the melted chocolate all over each one, making sure they get coated well. Place them back on the parchment paper to let the chocolate set — about 15 to 20 minutes at room temperature does the trick. If you’re feeling extra festive, sprinkle a little powdered sugar or powdered monk fruit on top to create that enchanting frosted look.
Pro Tips for Making Viral Pine Cone Brownie Bites Recipe
- Don’t Overbake: Slightly underbaking keeps the brownies pliable, which is essential for shaping your pine cones without cracking.
- Chill Before Coating: Freezing the shaped cones firms them up, so your chocolate coating sets smoothly without breaking the shape.
- Adjust Chocolate Consistency: Adding coconut oil helps thin the chocolate, making for an even and glossy coat that’s easier to work with.
- Be Gentle with Almond Placement: Use tweezers or clean fingers to place almond slices carefully, or you might lose the delicate shape you worked so hard on.
How to Serve Viral Pine Cone Brownie Bites Recipe
Garnishes
I usually dust mine with powdered sugar to replicate snowy pine cones — it’s simple but adds a charming wintery vibe that makes these treats truly special. Sometimes I mix in a tiny pinch of edible glitter on top for a subtle sparkle that lights up the dessert table. Fresh mint or rosemary sprigs on the serving plate perfectly complement the pine cone theme and add a lovely earthy scent.
Side Dishes
These brownie bites pair wonderfully with a cup of rich hot cocoa or a scoop of vanilla ice cream for an extra indulgence. For adult gatherings, a glass of port or dessert wine balances the chocolate’s richness incredibly well. I’ve also served them alongside fresh berries to cut through the decadence with a pop of freshness.
Creative Ways to Present
For holiday parties, I’ve placed these pine cones on a bed of crushed pecans and edible moss for a rustic forest vibe that sparks conversation. I once arranged them on a tiered serving stand resembling a pine tree, which was a huge hit with both kids and adults. Wrapping each bite in clear cellophane with a little ribbon also makes them adorable gifts or party favors.
Make Ahead and Storage
Storing Leftovers
I keep leftovers in an airtight container at room temperature, layered with parchment paper so they don’t stick together. They stay fresh for about 3 days, which is just long enough for you and your family to enjoy them all (if you don’t eat them faster!).
Freezing
Freezing these pine cone brownie bites works surprisingly well. I snap-freeze them on a tray first, then transfer to a freezer bag to prevent crushing. When you’re ready, let them thaw at room temperature for 30 minutes. I’ve found this helps keep the layered almond “scales” from getting soggy, so your pine cones look fresh and beautiful when served later.
Reheating
Since these bites are served at room temperature or slightly chilled, there’s no need to reheat. But if you want that fresh-baked warm gooeyness, a 10-second zap in the microwave can soften them up nicely without melting the chocolate coating completely.
FAQs
-
Can I make Viral Pine Cone Brownie Bites Recipe dairy-free?
Yes! Look for a dairy-free brownie mix and use dairy-free chocolate chips to melt. I love using coconut oil, which fits right into a dairy-free diet, so the coating stays luscious and smooth.
-
What if my brownie mix is too crumbly to shape?
If your batter or baked brownies crumble a lot, try adding a small amount of cream cheese or chocolate frosting to the mix to help bind everything together. This trick helped me save a crumbly batch once, turning it into perfectly mouldable pine cone bites!
-
How long do these brownie bites keep fresh?
Stored in an airtight container at room temperature, they stay fresh for about 3 days. Beyond that, freezing is your best bet to maintain their delicious texture and look.
-
Can I use other nuts instead of almonds?
Almonds work best because of their shape and texture, but you could experiment with thinly sliced pecans or walnuts. Keep in mind that visual effect might change, and the bite might not hold as well.
Final Thoughts
I absolutely love how this Viral Pine Cone Brownie Bites Recipe combines creativity with simple ingredients to create something truly special. When I first tried these, it was like baking and crafting rolled into one joyful experience — and sharing them became an instant crowd-pleaser with my family and friends. If you’re in the mood to wow your guests or just want a fun, delicious project in the kitchen, give this recipe a shot. Seriously, you’ll love how impressive and tasty these little pine cones turn out. Happy baking!
Print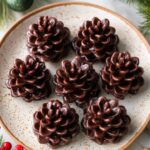
Viral Pine Cone Brownie Bites Recipe
- Prep Time: 1 hour 15 minutes
- Cook Time: 20 minutes
- Total Time: 3 hours
- Yield: 12 pine cone brownies
- Category: Dessert
- Method: Baking
- Cuisine: American
- Diet: Gluten Free
Description
These Viral Pine Cone Brownies are a fun and creative twist on classic brownies, shaped like pine cones with almond slices mimicking pine cone scales. Made with a gluten-free or grain-free boxed brownie mix, topped with melted chocolate and powdered sugar for a festive, frosted look. Perfect for holiday gatherings or as a unique dessert treat.
Ingredients
Brownie Base
- 1 box gluten-free/grain-free brownie mix (such as Simple Mills) and ingredients required by the mix
Toppings and Coating
- 1 cup sliced almonds (or cereal flakes as a substitute)
- 9 oz chocolate chips
- 1 tsp coconut oil
- Powdered sugar or powdered monk fruit for dusting
Instructions
- Prepare the Brownie Mix: Follow the instructions on your gluten-free or grain-free boxed brownie mix to make the batter. Be careful to not overbake the brownies; they should remain gooey in the center for easier shaping.
- Bake and Cool: Bake the brownies as directed, then let them cool for about 10 minutes. Do not allow them to cool completely or harden.
- Shape the Brownies: Using your hands, form the warm brownie mixture into about 12 cone shapes, similar to cake pops.
- Add the Pine Cone ‘Scales’: Gently press sliced almonds or cereal flakes into and around the brownie cones to resemble the scales of a pine cone. Handle carefully as the cones will be fragile.
- Chill the Pine Cones: Place the shaped pine cones on a parchment-lined sheet pan and freeze for 30 minutes to harden.
- Melt the Chocolate: Combine the chocolate chips and coconut oil in a microwave-safe bowl. Heat in 30-second increments, stirring in between, until smooth and melted. Alternatively, use a double boiler method.
- Coat the Pine Cones: Remove the pine cones from the freezer and carefully dip or drizzle them with the melted chocolate to coat fully. Return the coated pine cones to the parchment paper to set.
- Add the Frosted Finish: Sprinkle powdered sugar or powdered monk fruit on top to give a frosted, snowy appearance. Allow the chocolate to fully set before serving.
Notes
- Every brownie mix behaves differently; results may vary depending on the brand used.
- If the melted chocolate is too thick, add a little more coconut oil to thin it out for easier coating.
- Semi-sweet or dark chocolate chips work best for coating; milk chocolate may not set as well.
- If the brownie mixture is crumbly, try binding it with a small amount of chocolate or cream cheese frosting before shaping.
Nutrition
- Serving Size: 1 pine cone brownie (approx. 65g)
- Calories: 220
- Sugar: 18g
- Sodium: 110mg
- Fat: 12g
- Saturated Fat: 7g
- Unsaturated Fat: 4g
- Trans Fat: 0g
- Carbohydrates: 26g
- Fiber: 2g
- Protein: 3g
- Cholesterol: 0mg


